utquidem
Version:
The meta-framework suite designed from scratch for frontend-focused modern web development.
692 lines (514 loc) • 18.9 kB
Markdown
---
sidebar_position: 10
---
# 开发 UI 组件
本章将介绍如何使用 Modern.js 进行 UI 组件项目的开发。本章对应的代码仓库地址:[独立项目场景](https://github.com/modern-js-dev/modern-js-examples/tree/main/quick-start/components-project) 、[Monorepo 场景](https://github.com/modern-js-dev/modern-js-examples/tree/main/quick-start/monorepo-component)。
:::info 注
在 Modern.js 中,UI 组件项目是指基于 React 开发组件类型可复用模块的项目。
:::
通过本章你可以了解到:
- 如何创建一个 UI 组件项目。
- 如何在 UI 组件项目中进行测试。
- 如何为 UI 组件项目开启 Storybook 功能并使用它进行调试。
- 如何开发 UI 组件样式。
- 如何在 UI 组件项目中使用[运行时 API](/docs/apis/runtime/overview)。
- 如何发布 UI 组件项目。
- 在 Monorepo 中,UI 组件项目与应用项目如何联调。
## 环境准备
import EnvPrepare from '@site/docs/components/env-prepare.md';
<EnvPrepare />
## 创建项目
使用 `@modern-js/create` 创建新项目,运行命令如下:
```bash
npx @modern-js/create components-project
```
:::info 注
components-project 为创建项目的目录名称。
:::
按照如下选择,生成项目:
```bash
? 请选择你想创建的工程类型 模块
? 请填写项目名称 components
? 请选择开发语言 TS
? 请选择包管理工具 pnpm
? 是否需要调整默认配置? 否
```
:::info 注
项目名称为 `package.json` 中的 `"name"` 字段值。
:::
### 修改默认文件和代码
1. 将 `src/index.ts` 文件重命名为 `src/index.tsx`,以支持 JSX 语法。
2. 将文件代码替换为:
``` tsx
export default function () {
return <div>This is a UI Component</div>;
}
```
### 修改默认测试文件和代码
1. 将 `tests/index.test.ts` 文件重命名为 `tests/index.test.tsx`,以支持 JSX 语法。
2. 将测试代码替换为:
``` tsx
import { render, screen } from '@modern-js/runtime/testing';
import Component from '@/index';
describe('默认值 cases', () => {
test('Rendered', () => {
render(<Component />);
expect(screen.getByText('This is a UI Component')).toBeInTheDocument();
});
});
```
### 新增 `styles/` 目录
在项目根目录创建 `styles/` 目录,该目录用于存放[独立样式](#开发独立样式)文件。
到此为止,一个组件项目创建成功。
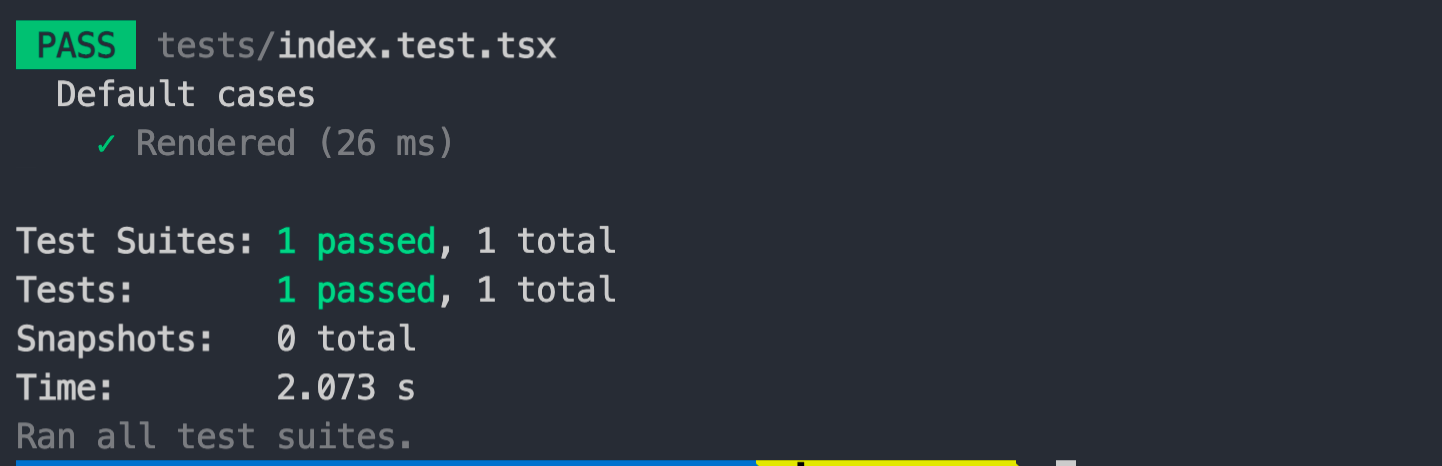
## 测试
项目创建成功之后,我们可以使用 Modern.js 提供的 `test` 命令对替换的组件代码进行测试,命令如下:
```bash
pnpm run test
```
## IDE
import DevIDE from '@site/docs/components/dev-ide.md'
<DevIDE/>
## 添加组件代码
接下来添加真正的组件代码。这里以一个 `TableList` 组件举例。
### 准备工作
:::info 注
这里基于 [Ant Design](https://ant.design/) 组件库进行 UI 组件的开发。你也可以使用其他组件库,或不使用任何组件库。
:::
1. 安装 [Ant Design](https://ant.design/) 依赖:`pnpm add antd`。
2. 由于需要使用 [Antd](https://ant.design/index-cn) 的 Less 样式,需要先开启 Modern.js 对 Less 的支持:
```
? 请选择你想要的操作: 启用可选功能
? 启用可选功能: 启用 Less 支持
```
### 新增 `TableList` 组件
修改 `src/index.tsx` 文件,增加以下代码:
``` tsx
import type React from 'react';
import { Table } from 'antd';
export const TableList: React.FC = () => {
const columns = [
{
title: 'Name',
dataIndex: 'name',
key: 'name',
},
{
title: 'Age',
dataIndex: 'age',
key: 'age',
},
{
title: 'Country',
dataIndex: 'country',
key: 'country',
},
];
const data = [
{
key: '1',
name: 'John Brown',
age: 32,
country: 'America',
},
{
key: '2',
name: 'Jim Green',
age: 42,
country: 'England',
},
{
key: '3',
name: 'Ming Li',
age: 30,
country: 'China',
},
];
return (
<div className="table-list table-theme">
<Table columns={columns} dataSource={data} />
</div>
);
};
```
### 新增 `TableList` 组件样式
创建 `src/tableList.less` 文件,并增加以下内容:
``` less
.table-list {
border: 1px solid #ccc;
padding: 5px;
}
```
> 这里为表格的父容器增加了内边距以及边框
然后更新 `src/tableList.tsx` 文件。将 `tableList.less` 样式文件导入到 `src/tableList.tsx` 文件中:
``` tsx {4}
import type React from 'react';
import { Table } from 'antd';
import './tableList.less';
// ...
```
### 新增 `styles/tableTheme.less` 文件
创建 `styles/tableTheme.less` 样式文件,并增加以下内容:
``` less
.table-theme {
background: beige;
}
```
## 启用 Storybook 调试
在添加完组件代码后,可以使用 Modern.js 提供的 Storybook 功能,查看效果并进行调试。
在项目根目录下,执行 `pnpm run new`,可以开启 Storybook 功能:
```bash
? 请选择你想要的操作 启用可选功能
? 启用可选功能 启用「Storybook」
```
启用成功后,会自动创建 `stories/` 目录。
然后更改默认的 Story 代码:
``` tsx
import { TableList } from '@/index';
import '@styles/tableTheme.less';
export const YourStory = () => <TableList />;
export default {
title: 'Your Stories',
};
```
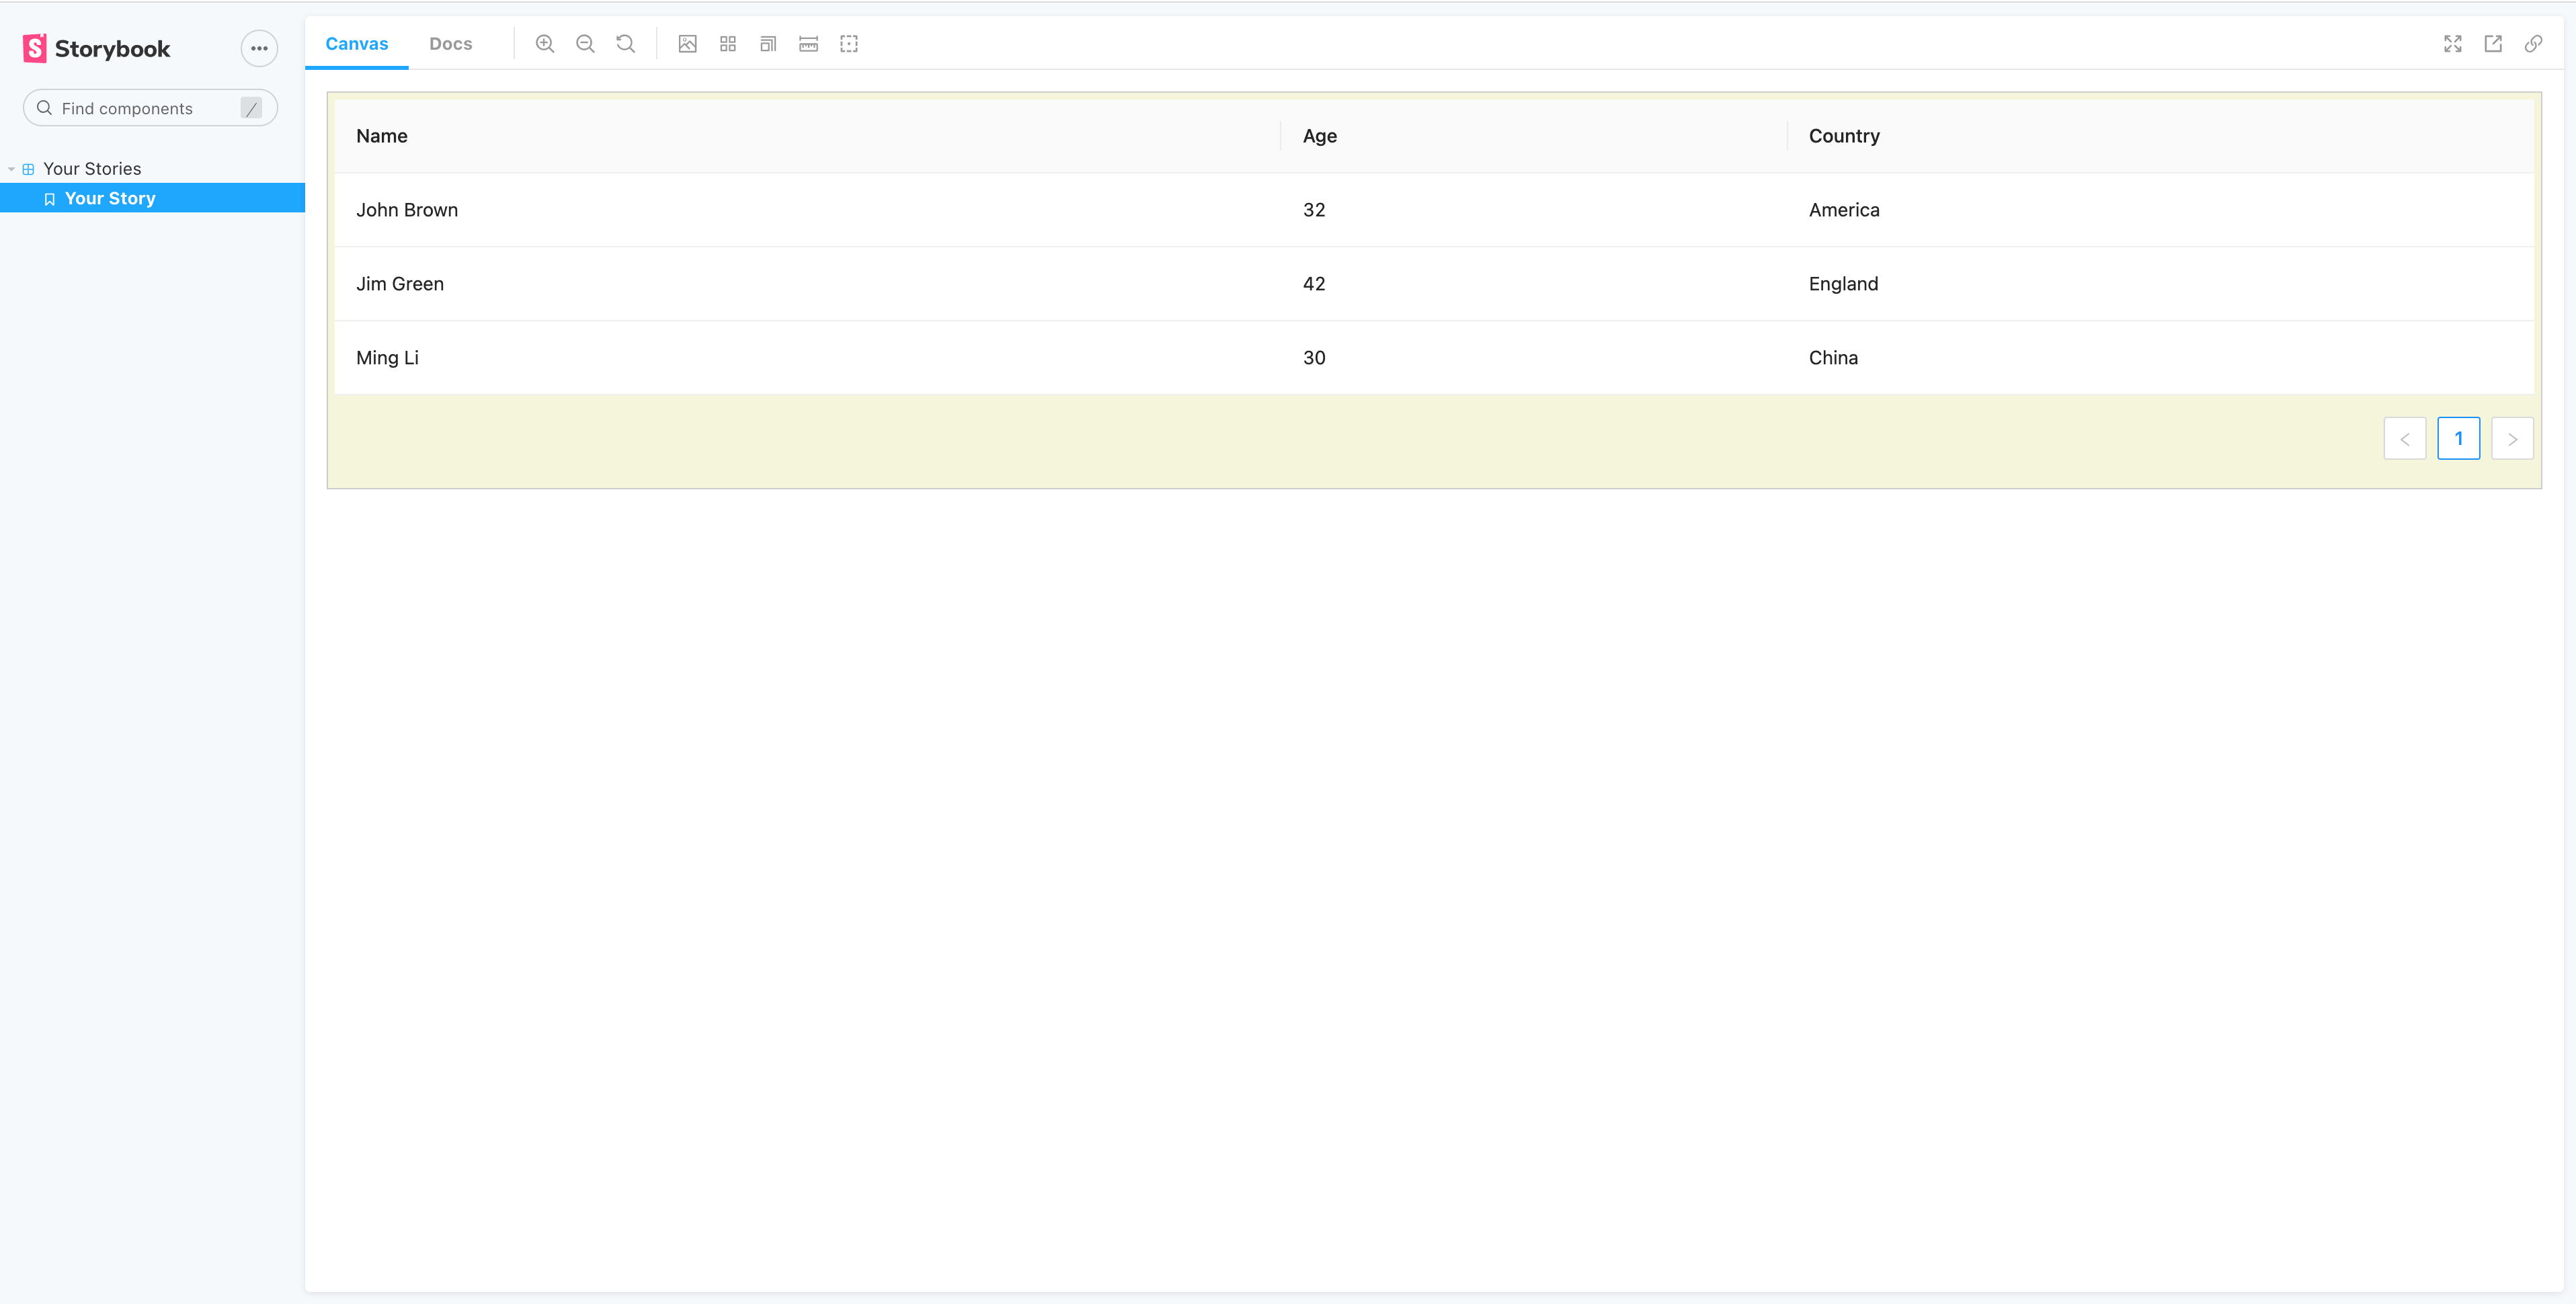
执行 `pnpm run dev` 查看运行结果:
## 开发组件样式
在开发 `TableList` 组件的过程中,通过三种方式为组件添加样式。接下来介绍这三种方式。
### 使用组件库样式
在开发 `TableList` 组件过程中,使用 [Ant Design](https://ant.design/index-cn) 组件库中的 `Table` 组件,基于 `Table` 组件提供基础的样式进行二次开发。像这类第三方 UI 组件库中包含一些可复用的样式,使用这类组件库提供的组件在开发中可以节省很多时间。
### 开发内置样式
在 Modern.js 中,位于 `src` 目录下的样式称为组件的内置样式。
:::info 注
关于更多内置样式的内容,请参考【[什么是内置样式](/docs/guides/features/modules/code-style#什么是内置样式)】章节。
:::
在实现 `TableList` 组件的过程中,`src/tableList.less` 样式文件就是 `TableList` 组件的内置样式。在 Modern.js 中推荐内置样式在组件代码中引用,例如 `tableList.tsx` 文件中有如下一段代码:
``` tsx
import './tableList.less';
```
:::info 注
Modern.js 对于在组件代码中引用内置样式文件的情况,在构建组件代码的过程中会进行一些特殊的处理,更多内容请参考【[内置样式与独立样式的构建产物](/docs/guides/features/modules/code-style#内置样式与独立样式的构建产物)】。
:::
### 开发独立样式
在 Modern.js 中,位于 `styles` 目录下的样式称为组件的独立样式。
:::info 注
关于更多独立样式的内容,请参考【[什么是独立样式](/docs/guides/features/modules/code-style#什么是独立样式)】章节。
:::
在实现 `TableList` 组件的过程中,`styles/tableTheme.less` 样式文件就是 `TableList` 组件的独立样式。独立样式的使用方式类似 Ant Design 组件库中组件样式的使用方式,分为:
- 通过 [babel-plugin-import](https://github.com/ant-design/babel-plugin-import) **按需加载**组件的独立样式文件产物。
- 手动导入组件的独立样式文件产物。
:::info 注
关于 Ant Design 的按需加载,可以参考 Ant Design 官网【[按需加载](https://ant.design/docs/react/getting-started-cn#%E6%8C%89%E9%9C%80%E5%8A%A0%E8%BD%BD)】章节内容。
:::
## 转换为组件库
目前项目只包含一个组件。如果要创建组件库项目,只需要重新组织项目的目录结构,增加更多的组件即可。例如将当前 `src` 目录结构更改为:
```md
.
├── src/
│ └── index.tsx
| └── tableList
| ├── tableList.less
| └── index.tsx
| └── avatar
| └── index.tsx
| ...
```
其中 `src/tableList/index.tsx` 包含了 `TableList` 组件的代码。
新建 `src/avatar/index.tsx` 文件,并添加组件代码:
``` tsx
import { Avatar } from 'antd';
export default ({ name }: {name: string}) => {
return <Avatar>{name}</Avatar>
}
```
修改 `src/index.tsx` 文件,将所有组件导出:
``` tsx
export { TableList } from './tableList';
export { default as Avatar } from './avatar'
```
此时组件项目就变成了组件库项目。
## 使用 Runtime API
Modern.js 通过 `@modern-js/runtime` 模块提供运行时 API。下面通过创建状态管理层,即 Model 层,演示如何在 UI 组件项目中使用 Modern.js Runtime API。接下来将新建一个 Model 对象,调用网络 API 动态获取数据,并提供给 `TableList` 组件使用。
首先,在 `TableList` 组件同一层级的目录下面创建 `./tableListModel.tsx` 文件,定义 Model 对象,代码如下:
``` tsx
import { model } from '@modern-js/runtime/model';
type State = {
data: {
key: string;
name: string;
age: number;
country: string;
}[];
};
export default model<State>('tableList').define({
state: {
data: [],
},
actions: {
load: {
fulfilled(state, payload) {
return { data: payload };
},
}
},
effects: {
async load() {
const data = await (await fetch('https://lf3-static.bytednsdoc.com/obj/eden-cn/beeh7uvzhq/users.json')).json();
return data;
},
},
});
```
然后,在 `TableList` 组件文件中导入 `tableListModel.tsx` 文件,并使用导入的 `tableListModel` 对象:
``` tsx
import type React from 'react';
import { useEffect } from 'react';
import { Table } from 'antd';
import { useModel } from '@modern-js/runtime/model';
import tableListModel from './tableListModel';
import './tableList.less';
export const TableList: React.FC = () => {
const columns = [
{
title: 'Name',
dataIndex: 'name',
key: 'name',
},
{
title: 'Age',
dataIndex: 'age',
key: 'age',
},
{
title: 'Country',
dataIndex: 'country',
key: 'country',
},
];
const [{data}, {load}] = useModel(tableListModel);
useEffect(() => {
load();
}, [])
return (
<div className='table-list table-theme'>
<Table columns={columns} dataSource={data} />
</div>
);
};
```
:::info 补充信息
关于 Model 的详细介绍,请参考【[添加业务模型](/docs/guides/tutorials/c10-model/10.1-application-architecture)】。
:::
接着新增 `modern.config.js` 文件并添加配置 [`runtime.state`](/docs/apis/config/runtime/state) 开启支持 Model 功能:
``` javascript title=modern.config.js
export default defineConfig({
runtime: {
state: true,
},
};
```
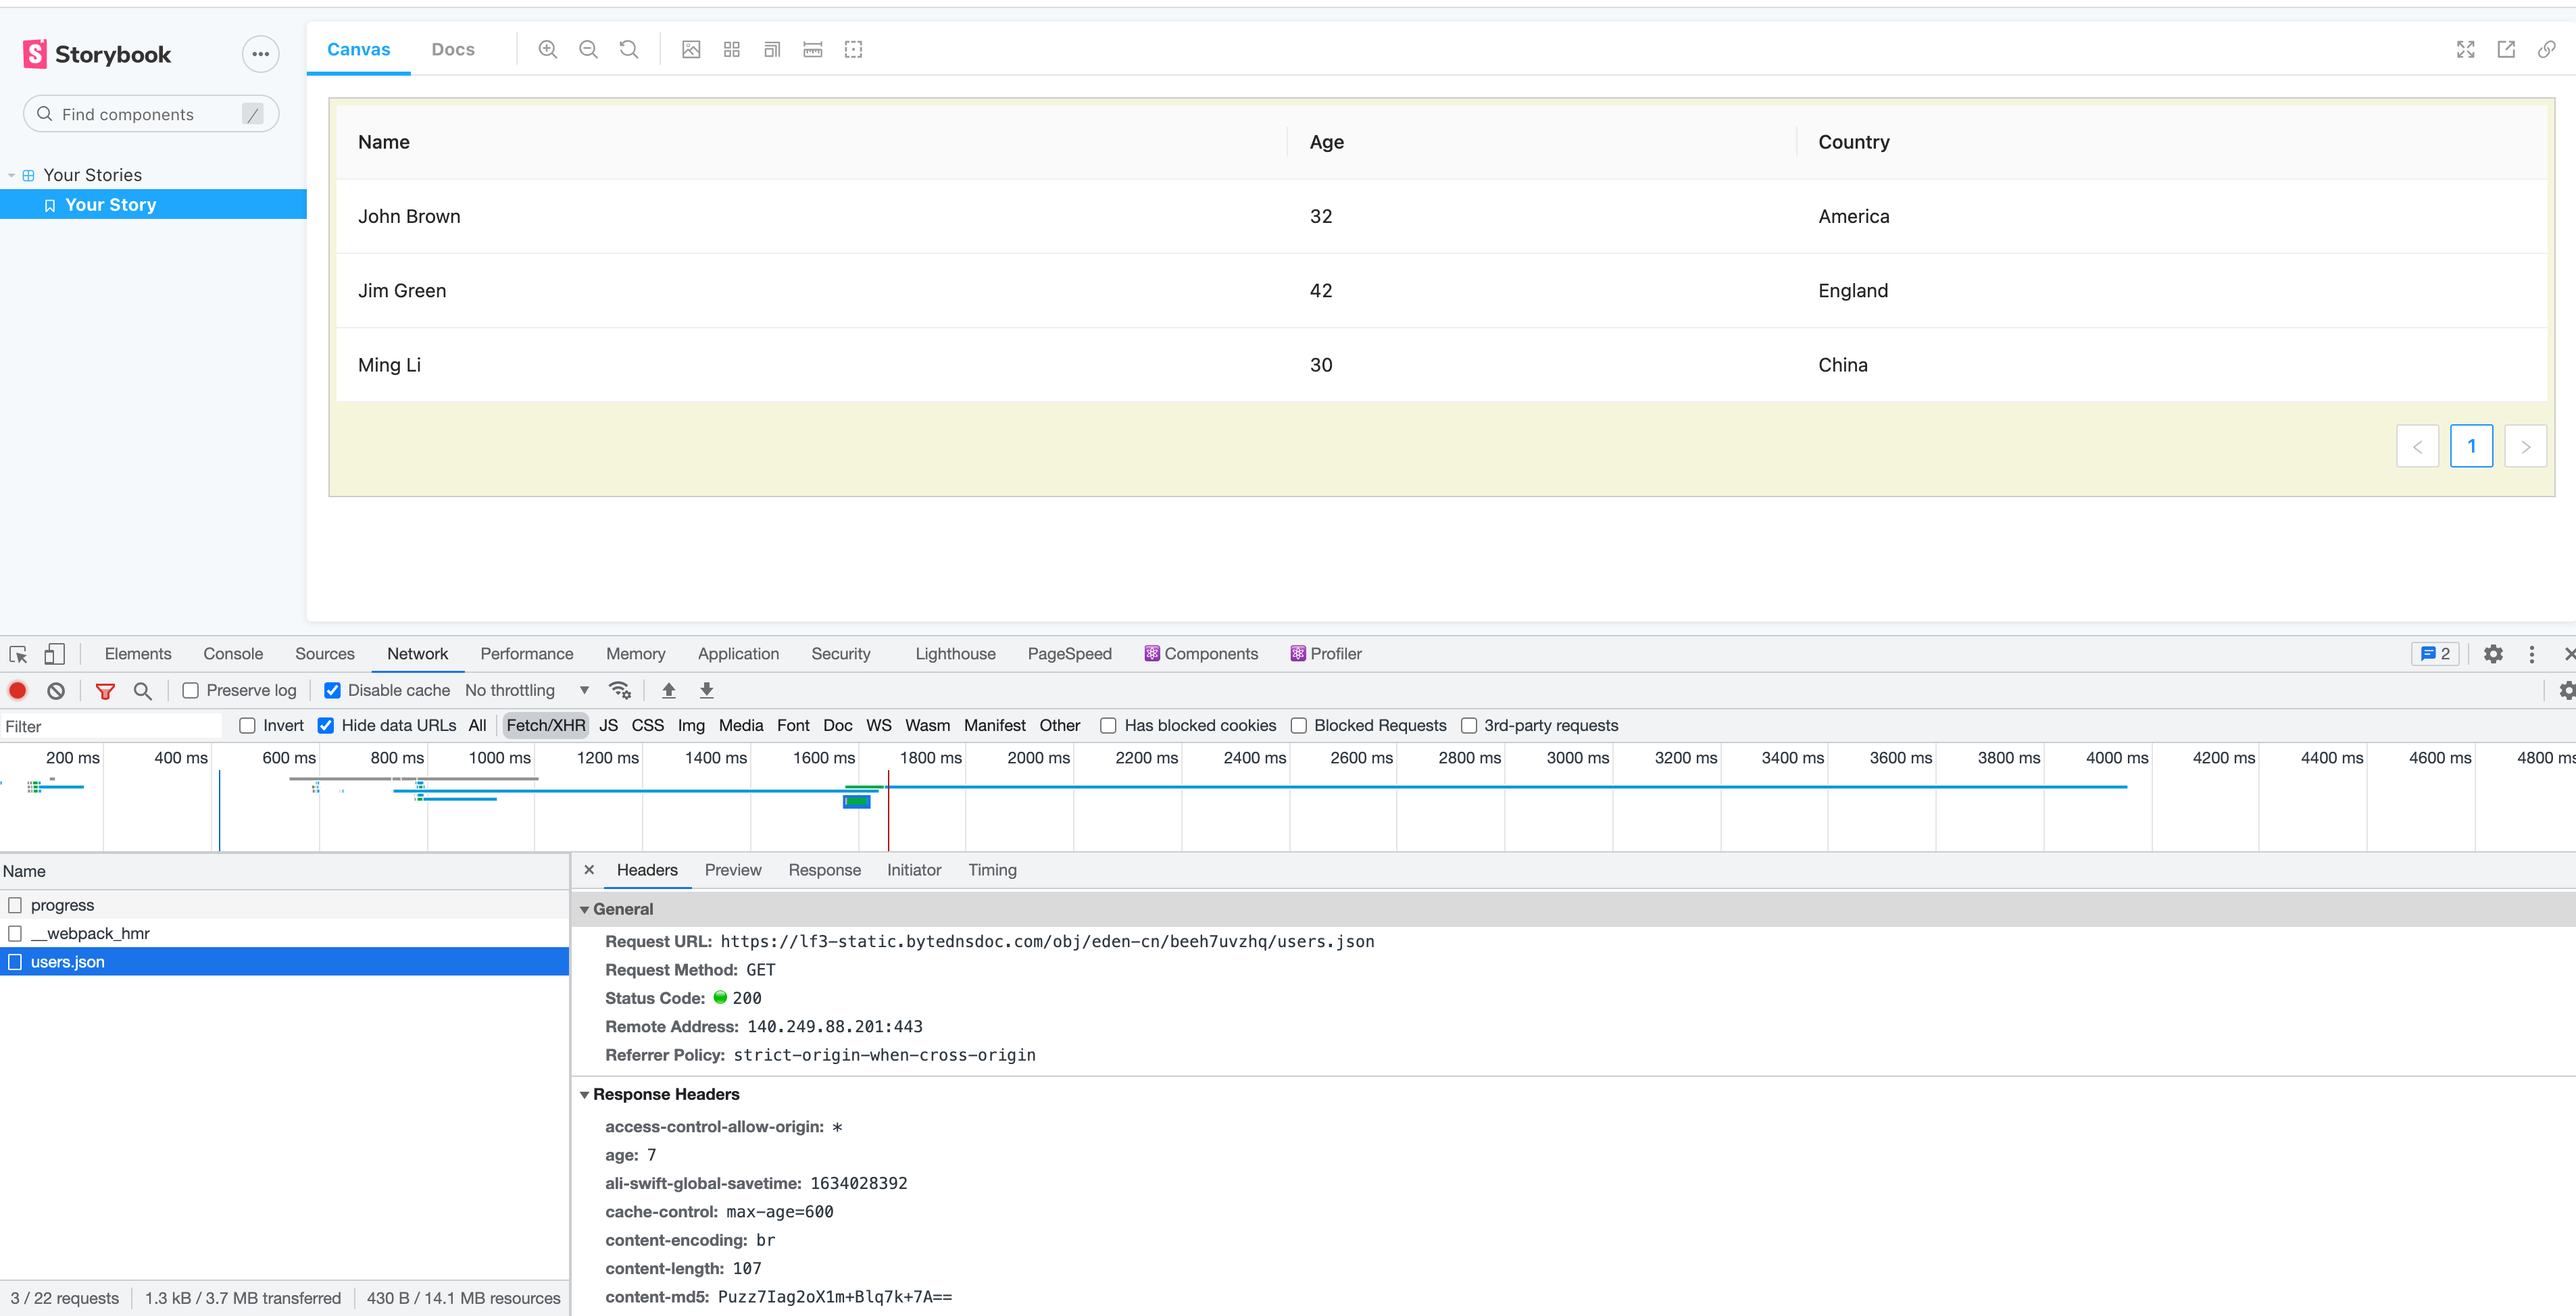
最后重新启动 Storybook 调试程序观察效果,可以看到 `TableList` 组件上展示的数据内容是从接口返回的动态数据:
## 发布
组件功能开发完成后,可对 UI 组件项目进行发布。
发布分以下四个步骤:
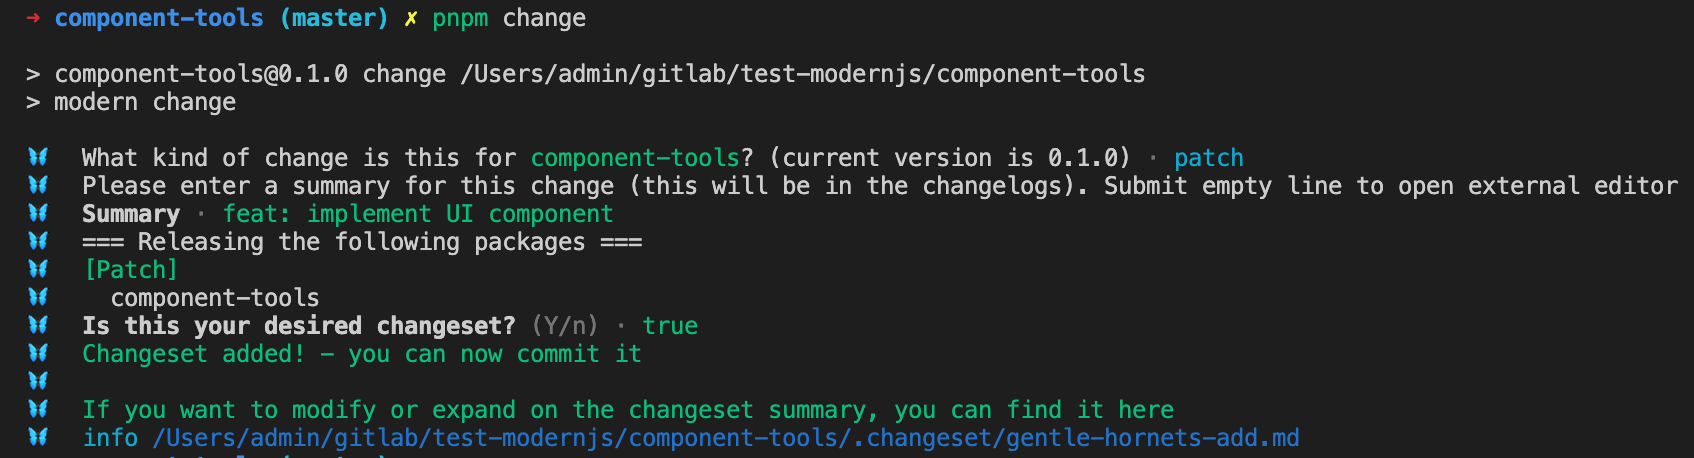
1. 添加 changeset
执行 `pnpm run change`,根据提示选择升级的版本,并填写变更信息。
2. 升级对应版本号,并生成 changelog
执行 `pnpm run bump`,该命令会根据上述生成的 changeset 自动更新版本号和 CHANGELOG 信息,检查信息无误后提交。
3. 发布
执行 `pnpm run release`, 发布该 UI 组件包。
4. 推送 tags
发布完成之后执行 `git push --follow-tags`,推送当前发布对应生成的 git tag。
## 迁移到 Monorepo
在团队协作开发中,也会存在使用 Monorepo 进行项目开发的情况。接下来讲一下如何将组件项目在 monorepo 中的一些使用方式。
### 创建 Monorepo
使用 `@modern-js/create` 创建 Monorepo 项目,运行命令如下:
```bash
npx @modern-js/create monorepo
```
:::info 注
monorepo 即为创建的 Monorepo 目录名称,又是项目的名称。
:::
按照如下选择,生成项目:
```bash
? 请选择你想创建的工程类型 Monorepo
? 请选择包管理工具 pnpm
```
生成的项目目录结构如下:
```bash
.
├── .changeset
│ └── config.json
├── .editorconfig
├── .gitignore
├── .npmrc
├── .nvmrc
├── .pnpmfile.cjs
├── .vscode
│ ├── extensions.json
│ └── settings.json
├── README.md
├── apps
│ └── .gitkeep
├── features
│ └── .gitkeep
├── monorepo.code-workspace
├── package.json
├── packages
│ └── .gitkeep
├── pnpm-lock.yaml
├── pnpm-workspace.yaml
└── tsconfig.json
```
### 迁移组件项目
这里只需要将之前创建的组件项目复制到 `packages` 目录下面,并删除 `.change/`、`.vscode/`、`.git/` 目录及 `.editorconfig`、`.gitignore`、`.nvmrc`、`.npmrc` 文件。
```md
.
├── packages/
│ └── components/
│ ├── README.md
│ ├── modern.config.js
│ ├── package.json
│ ├── src
│ │ ├── avatar
│ │ │ └── index.tsx
│ │ ├── index.ts
│ │ ├── modern-app-env.d.ts
│ │ └── tableList
│ │ ├── index.tsx
│ │ ├── tableListModel.tsx
│ │ └── tableList.less
│ ├── stories
│ │ ├── index.stories.tsx
│ │ └── tsconfig.json
│ ├── styles
│ │ └── tableTheme.less
│ ├── tests
│ │ ├── index.test.tsx
│ │ ├── modern-app-env.d.ts
│ │ └── tsconfig.json
│ └── tsconfig.json
│ ...
```
### 创建子项目
Modern.js 支持 Monorepo 工程方案的管理,可以在 Monorepo 项目下通过 `new` 命令创建不同类型的子项目。例如在刚刚创建的 Monorepo 项目根目录下执行:
```
pnpm run new
```
在刚刚创建的 Monorepo 项目根目录下执行 `pnpm run new`,然后分别选择创建 「应用」,「模块(内部)」项目:
```bash
? 请选择你想创建的工程类型 应用
? 请填写子项目名称 app
? 请填写子项目目录名称 app
? 请选择开发语言 TS
? 是否需要支持以下类型应用 不需要
? 是否需要调整默认配置? 否
```
```bash
? 请选择你想创建的工程类型 模块(内部)
? 请填写子项目名称 internal-lib
? 请填写子项目目录名称 internal-lib
? 请选择开发语言 TS
? 是否需要调整默认配置? 否
```
### 在应用项目中使用组件以及内部模块
接下来在 `app` 项目中通过以下方式把组件项目加到依赖中:
```bash
cd ./apps/app
pnpm add components
```
此时可以观察到 app 项目的 `package.json` 内容更新如下:
``` json {4}
{
"dependencies": {
"@modern-js/runtime": "^1",
"components": "workspace:^0.1.0",
"react": "^17.0.1",
"react-dom": "^17.0.1"
}
}
```
接下来导入内部模块 `internal-lib`,由于内部模块并不需要进行发布,因此通过如下方式添加到项目中:
> 内部模块是指不需要发布到 npm 上的项目,它们只提供源码给应用项目使用,应用项目会将它们打包到构建产物中。
```bash
cd ./apps/app
pnpm add internal-lib -D
```
此时可以观察到 app 项目的 `package.json` 内容更新如下:
``` json {9}
{
"devDependencies": {
"@modern-js/app-tools": "^1",
"@modern-js/plugin-jarvis": "^1",
"@types/jest": "^26.0.9",
"@types/node": "^14",
"@types/react": "^17",
"@types/react-dom": "^17",
"internal-lib": "workspace:^0.1.0",
"typescript": "^4"
},
}
```
此时在 `app` 项目下的 `src/App.tsx` 文件引用 `components` 的 `TableList` 组件以及 `internal-lib` 模块,并使用它们:
``` tsx
import { Switch, Route } from '@modern-js/runtime/router';
import { TableList } from 'components';
import sayHelloWorld from 'internal-lib';
import './App.css';
const App = () => (
<Switch>
<Route exact={true} path="/">
<div className="container">
<main>
{/* //... */}
</main>
<TableList />
{sayHelloWorld()}
<footer className="footer">
<a href="#" target="_blank" rel="noopener noreferrer">
Powered by Modern.JS
</a>
</footer>
</div>
</Route>
<Route path="*">
<div>404</div>
</Route>
</Switch>
);
export default App;
```
然后我们在 `apps/app` 目录下执行 `dev` 命令,可以看到组件被正确渲染出来:

### 批量发布
我们可以在 Monorepo 中再创建一个 UI 组件项目(以创建 Button 组件为例):
在 Monorepo 项目根目录下执行:
```bash
pnpm run new
```
```bash
? 请选择你想创建的工程类型 模块
? 请填写子项目名称 component2
? 请填写子项目目录名称 compomemt2
? 请选择开发语言 TS
? 是否需要调整默认配置? 否
```
删除 `packages/component2/src/index.ts` 文件,新建 `packages/component2/src/index.tsx` 文件,增加 Button 组件:
```ts
import Button from 'antd/es/button';
export default function () {
return <Button />;
}
```
开发完成后可以在 Monorepo 的场景下对所有 UI 组件库做批量发布:
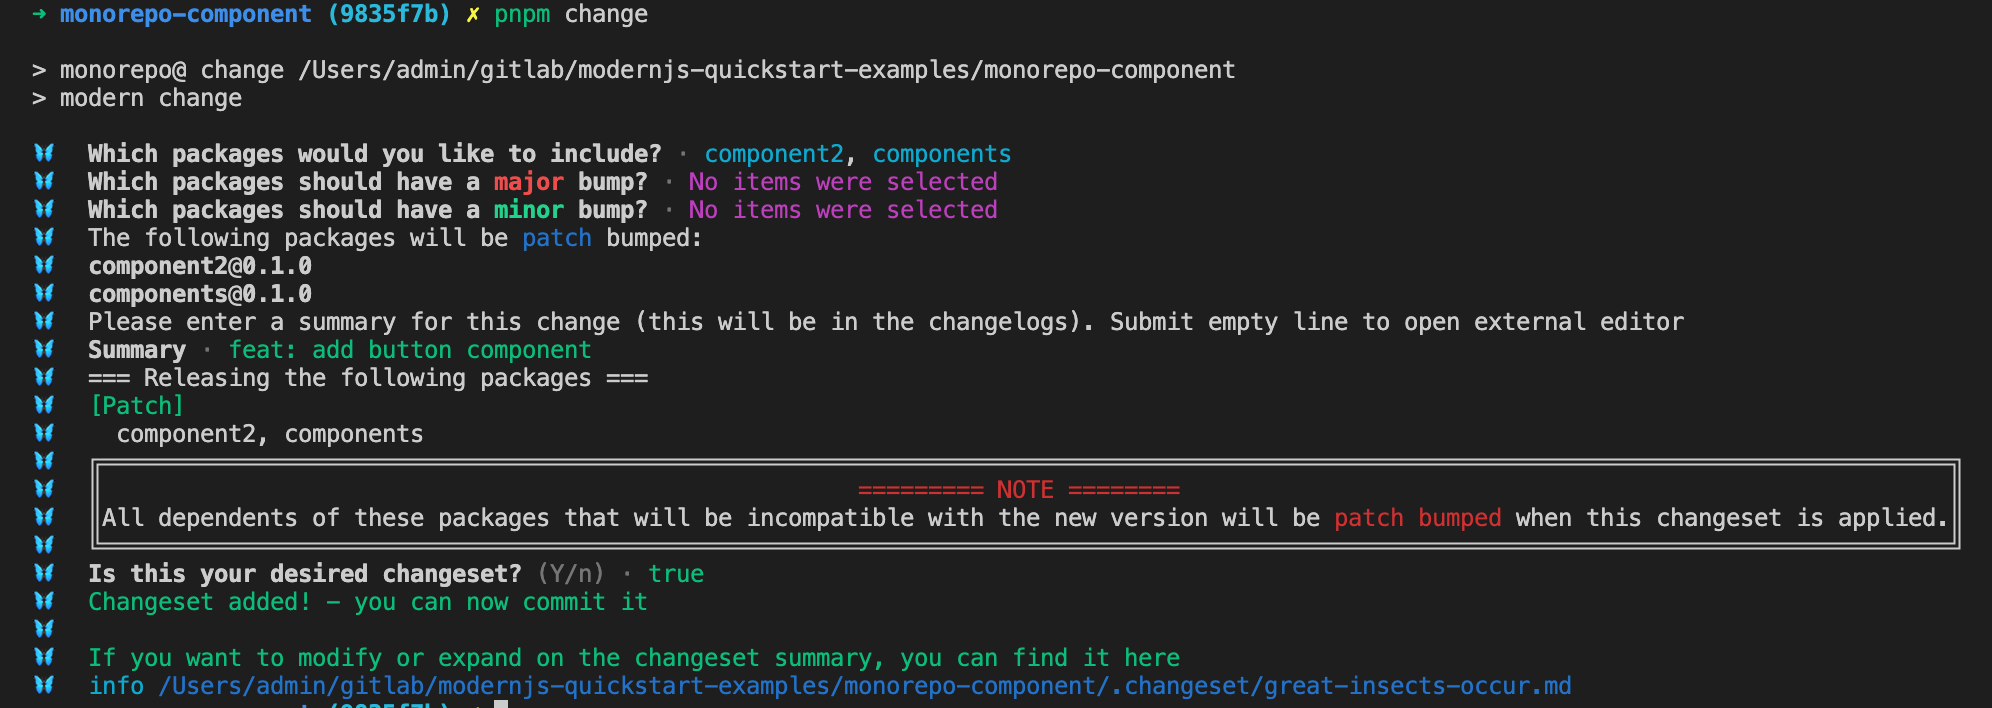
#### 添加 changeset
在 Monorepo 根目录执行 `pnpm run change`,根据提示选择发布的包(注意这里只选择 UI 组件包名)和升级的版本,并填写变更信息。
#### 升级发布包对应版本号,并生成 changelog
执行 `pnpm run bump`,该命令会根据上述生成的 changeset 自动更新版本号和 CHANGELOG 信息,检查信息无误后提交。
#### 发布
执行 `pnpm run release`, 发布对应的多个 UI 组件包。
#### 推送 tags
发布完成之后执行 `git push --follow-tags`,推送当前发布对应生成的 [Git Tag](https://git-scm.com/book/en/v2/Git-Basics-Tagging)。