three-orientation-gizmo
Version:
Creates an orientation gizmo (aka view cube) showing the rotation of the camera for Three JS.
90 lines (66 loc) • 3.41 kB
Markdown
# three-orientation-gizmo
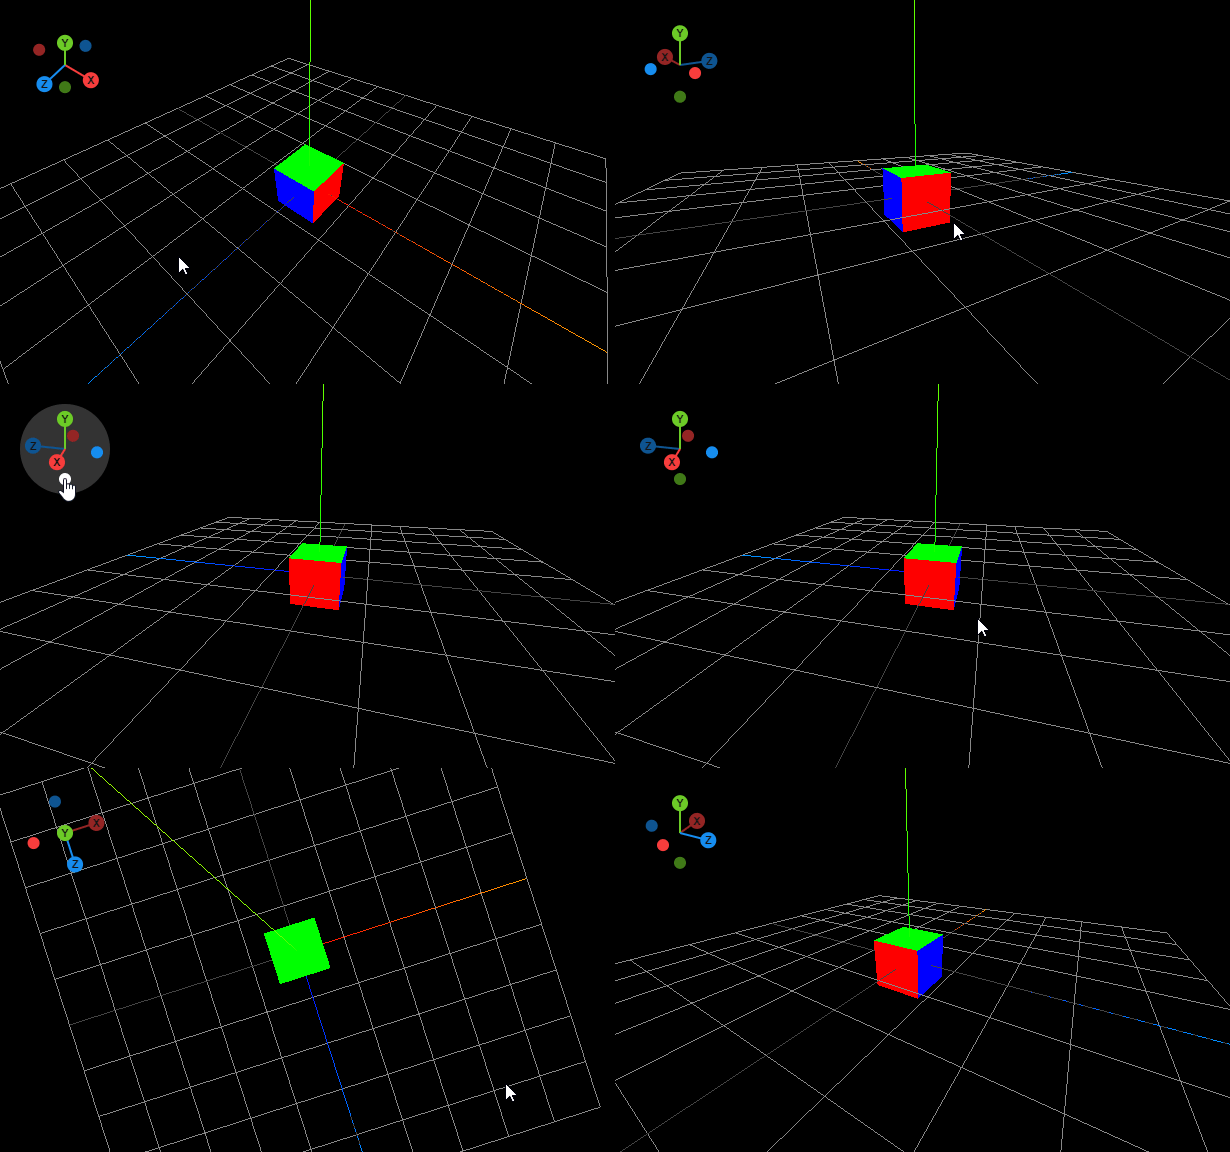
This library creates a orientation gizmo for showing the user how the camera is rotated in space using just an HTML 5 canvas. I love Blender 2.8's new orientation cube and this replicates that for Three.js.
The gizmo has several configurable properties for changing colors, sizing and what axes are visible.
**Dependancies**
- Three.js (https://www.npmjs.com/package/three)
**Usage**
Include the OrientationGizmo class:
- Web Browser:
```html
<script src="../dist/OrientationGizmo.js"></script>
```
- Node.js
```js
const OrientationGizmo = require("OrientationGizmo");
```
Then just create a new Orientation Gizmo, passing in the Three JS Camera to use for the rotation and any options to style it how you want:
```js
var orientationGizmo = new OrientationGizmo(camera, { size: 100, padding: 8 });
document.body.appendChild(orientationGizmo);
```
This library will not rotate your camera for you, but it will give you the direction clicked:
```js
orientationGizmo.onAxisSelected = function(axis) {
console.log(axis); // { axis: "x", direction: THREE.Vector3(1,0,0) }
}
```
And lastly, you need to call the update() function in your render loop.
```
requestAnimationFrame(() => {
orientationGizmo.update();
});
```
In the future I might support rotating the camera and changing between ortho and perspective camera but this can vary widely between applications.
**Options**
Here are all the options and their defaults:
```js
{
size: 90, // Size of the canvas
padding: 8, // Adds padding around the gizmo (makes it look nicer when using a circular background)
bubbleSizePrimary: 8, // Size of the circle for the positive axes (X,Y,Z)
bubbleSizeSeconday: 6, // Size of the circle for the negative axes (-x,-Y,-Z)
showSecondary: true, // Show the negative axes bubbles
lineWidth: 2, // Size of the stroke to use for connecting the bubble to the center point
fontSize: "11px", // Size of the label for the axis in the bubble
fontFamily: "arial", // Font for the label for the axis in the bubble
fontWeight: "bold", // Weight of the label for the axis in the bubble
fontColor: "#151515", // Color of the label for the axis in the bubble
colors: { // Array of colors to use for the axes (
x: ["#f73c3c", "#942424"], // X-Axis colors [foreground, background]
y: ["#6ccb26", "#417a17"], // Y-Axis colors [foreground, background]
z: ["#178cf0", "#0e5490"], // Z-Axis colors [foreground, background]
}
}
```
**Notes**
Blender on hover changes the background to be a light transparent gray circle. To achieve this affect you can do that with just css!
```css
orientation-gizmo:hover {
background: rgba(255, 255, 255, .2);
border-radius: 100%;
cursor: pointer;
}
```
**Contributors**
Shoutout to [Rabbid76](https://stackoverflow.com/users/5577765/rabbid76) on Stackoverflow for helping me get the camera matrix rotation working.