puer-mock
Version:
Puer + Mock.js = A configurable mock server with configurable mock(random) data.
248 lines (222 loc) • 12.2 kB
Markdown
# _mockserver.json 配置手册
`_mockserver.json` 遵循 [JSON Schema](http://json-schema.org/) 规范, 对应的 schema 文件是 [_mockserver-schema.json](https://github.com/ufologist/puer-mock/blob/master/_mockserver-schema.json)
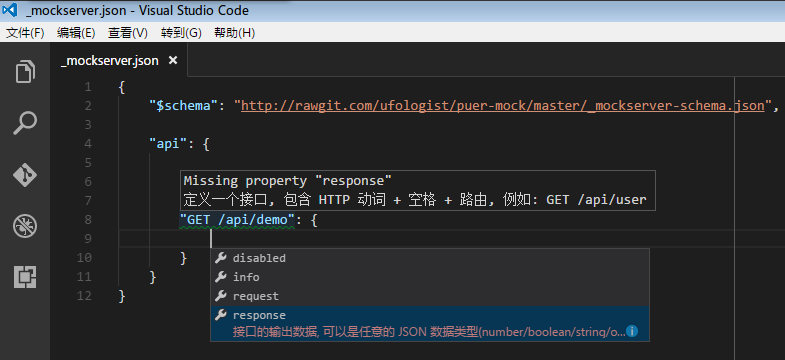
推荐使用支持 [JSON Schema](http://json-schema.org/) 的编辑器来协助编写配置, 例如 [Visual Stuido Code](https://code.visualstudio.com/Docs/languages/json), 可以帮助你校验 `_mockserver.json` 的格式是否正确, 还能给予一些提示信息.
## 配置项
[example/_mockserver.json](https://github.com/ufologist/puer-mock/blob/master/example/_mockserver.json) 中提供了很多配置示例可供参考, 并配套有对应的[单元测试](https://github.com/ufologist/puer-mock/tree/master/test).
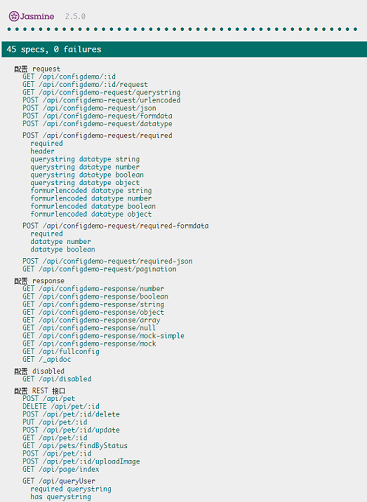
PS: 运行单元测试需要先开启 puer-mock(使用默认的 `example/_mockserver.json`), 并在支持跨域(例如设置 chrome 启动参数为 `--disable-web-security`)的浏览器中运行 `test/index.html` 即可, 执行结果如下图所示:
### 配置项简介
```javascript
{
"$schema": "http://rawgit.com/ufologist/puer-mock/master/_mockserver-schema.json",
// 项目的介绍信息(非必要属性)
// "info": {
// "summary": "",
// "description": ""
// },
// 接口列表
"api": {
// 定义一个接口
"GET /api/user": {
// 是否禁用该接口(非必要属性)
// "disabled": false,
// 是否代理接口(非必要属性)
// "proxy": "http://localhost:8001",
// 接口的介绍信息(非必要属性)
// "info": {
// "summary": "",
// "module": "",
// "description": "",
// "author": ""
// },
// 接口的输入参数(非必要属性)
// "request": {
// "querystring": {},
// "header": {},
// "body": {}
// },
// 接口的输出数据
"response": {}
},
// 定义另一个接口
"GET /api/friend": {
"response": {}
}
}
}
```
### 各个配置项的完整说明
```javascript
{
// 指定 _mockserver.json 的 JSON Schema
"$schema": "http://rawgit.com/ufologist/puer-mock/master/_mockserver-schema.json",
// 项目的介绍信息
"info": {
"summary": "xxx 项目接口文档",
"description": "如此高大上的接口文档 Powered by puer-mock"
},
// 接口列表
"api": {
// 定义一个接口, 包含 HTTP 动词 + 空格 + 路由
"GET /api/user": {
// 是否禁用该接口, 一般和 puer 的 proxy 方式一起使用
// ----------
// 例如我们可以通过 puer 代理的方式来代理后端的真实接口
// puer -a _mockserver.js -t http://localhost:8001
//
// 这样当后端接口开发完成以后, 就可以立马切换到后端的真实接口, 前端完全不用动
// "disabled": true,
// 是否代理接口
// ----------
// 设置这个就会直接代理远程的接口, 方便在开发的过程中切换到后端的真实接口
// 例如下面的配置
// 我们请求 http://localhost:8000/api/fullconfig
// 实际上会由代理去请求 http://localhost:8001/api/fullconfig 返回数据
// "proxy": "http://localhost:8001",
//
// 另外 proxy 支持直接配置为一个接口 URL, 或者使用 object 类型来控制更多的代理配置项
// 当直接配置为一个接口 URL 时, 等同于 {"target": "URL"}
// 完成的配置项请参考 https://github.com/nodejitsu/node-http-proxy#options
// 例如:
// "proxy": {
// "target": "http://localhost:8001/path",
// "ignorePath": true
// },
// 接口的介绍信息
"info": {
"summary": "接口介绍",
"module": "接口分组", // 用于对 API 进行分组
"description": "接口详情",
"author": "接口作者"
},
// 用于说明请求接口时需要传入什么参数
// 如果配置了必传参数, 则会校验前端调用时的输入参数是否与接口匹配.
// 如果参数匹配则返回接口的输出数据, 否则返回 400 错误, 告知验证不通过, 返回的错误信息如下所示
// {
// "status": 400,
// "statusInfo": [{
// "required": true,
// "type": "number",
// "factValue": "a",
// "querystring": "querystring1" // header/body
// }]
// }
// ----------
// 前端给后端接口传递参数的方式一般有三种
// 1. querystring 即在 URL 中添加参数
// 2. body 即在 HTTP REQUEST BODY 中添加参数
// 3. header 即在 HTTP REQUEST HEADER 中添加参数
//
// 这几种方式基本上都在传递 key-value 型的参数数据
// 如果要传递复杂的 raw 型数据(例如整个 JSON), 则需要通过设置 Content-Type HEADER 来说明,
// 再将整个数据体放置在 body 中即可
//
// 可以在参数数据中指定数据类型,
// 目前支持的数据类型有: string, number, boolean, object
// 复杂数据类型 object, 一般用于复杂的 key-value 型数据,
// 例如: GET /shoes?shoe[color]=blue&shoe[type]=converse
// 取出来就是(以 Express 为例) request.query.shoe.color
// 或者用于在 body 中传递 JSON 数据时使用
"request": {
// 通过 URL querystring 定义 key-value 型的参数数据
// ----------
// 例如下面定义的参数, 调用接口时应该是这样的
// GET /api/user?querystring1=1&querystring2=1&querystring3=true&querystring4%5Bp%5D=1
"querystring": {
// 在参数名前面添加一个星号(*)标识出该参数为必传参数
// 这种形式的灵感来自前端表单的必填项
"*querystring1": "1", // string
"querystring2": 1, // number, 整数或者小数
"querystring3": true, // boolean
"querystring4": {"p": 1} // object
},
// 可以使用 header 来传递参数, 或者通过 Content-Type 定义 body 的数据类型
"header": {
// 一般的 Content-Type 有表单编码, HTML form POST 请求时默认是这个类型
// "Content-Type": "application/x-www-form-urlencoded"
// 或者直接使用 body 来传递 raw 数据, 例如 JSON 数据, 或者 XML 之类, 要指明数据类型
// "Content-Type": "application/json"
// 或者比较少用的还有整个表单数据, 则设置为
// "Content-Type": "multipart/form-data"
// 或者使用自定义 header 来传递数据
"X-Custom-Header": "header-value"
},
// 可以在 body 中放置参数数据, 当为 GET 请求时, 不可以设置 body
// ----------
// 当 header 中设置 "Content-Type": "application/x-www-form-urlencoded" 时
// 例如下面定义的参数, 调用接口时应该是这样的
// POST /api/user
// Content-Type: application/x-www-form-urlencoded
//
// formurlencoded1=1&formurlencoded2=1&formurlencoded3=true&formurlencoded4%5Bp%5D=1
"body": {
// 当为 POST 请求时, 将表单编码的 key-value 参数数据放在 body 中
"formurlencoded1": "1",
"formurlencoded2": 1,
"formurlencoded3": true,
"formurlencoded4": {"p": 1}
}
// 如果要在 body 中放置 raw 数据, 例如 JSON 数据,
// 需要先在 header 中定义 Content-Type 定义为 application/json,
// 再将整个数据设置在 body 中即可, 此时前端请求的 body 中必须有对应的数据,
// 否则会通不过请求输入参数的验证
// ----------
// 例如下面定义的参数, 调用接口时应该是这样的
// POST /api/user
// Content-Type: application/json
//
// {"name":{"n1":"1"},"list":[{"p1":1,"p2":2}]}
// "body": { // object 数据类型
// "name": {
// "n1": "1"
// },
// "list": [{
// "p1": 1,
// "p2": 2
// }]
// }
},
// 接口的输出数据, 可以是任意的 JSON 数据类型(number/boolean/string/object/array/null),
// 但推荐返回固定结构的 object 类型的数据
"response": {
// 接口返回的固定结构可以参考 - 前后端接口规范
// https://github.com/f2e-journey/treasure/blob/master/api.md
"status": 0,
"statusInfo": {
"message": "ok"
},
"data": {
// 通过 mockjs 来定义 response 的 mock 数据, 更多配置项请参考 mockjs 示例
// http://mockjs.com/examples.html
"foo|10-30": [{
"text": "固定值", // 可以夹杂其他固定值
"id": "@id",
"guid": "@guid",
"index": "@increment",
"name": "@cname",
// 占位符是可以组合使用的, 因此可以更灵活的使用
// XXX 必须使用 province1 这样的属性名, 不要直接叫做 province,
// 否则会造成冲突, 出现 Maximum call stack size exceeded 异常
// 以此类推, 只要使用了组合的占位符, 然后再设置属性名与其中的某个占位符的名字相同, 就会出现这个问题
// PS: 使用单个占位符的时候不会出现这种问题
// https://github.com/nuysoft/Mock/issues/137
"address": "@province@city@county",
"email": "@email",
"desc": "@cparagraph",
"avatar": "@image('200x100', '#50B347', '#FFF', 'Mock.js')",
"age": "@integer(10, 50)",
"money": "@float(0, 100, 2, 2)", // 返回带2位小数位的小数
"isVip": "@boolean",
"now": "@now('yyyy-MM-dd HH:mm:ss')",
"datetime": "@datetime('yyyy-MM-dd HH:mm:ss')",
"url": "@url('http')",
"gender": "@pick(['male', 'female'])", // 随机取一个
"timestamp": "@integer(1471491895528, 1481491895528)" // 通过整型数字来伪造时间戳
}]
}
}
}
}
}
```