lassiecoder
Version:
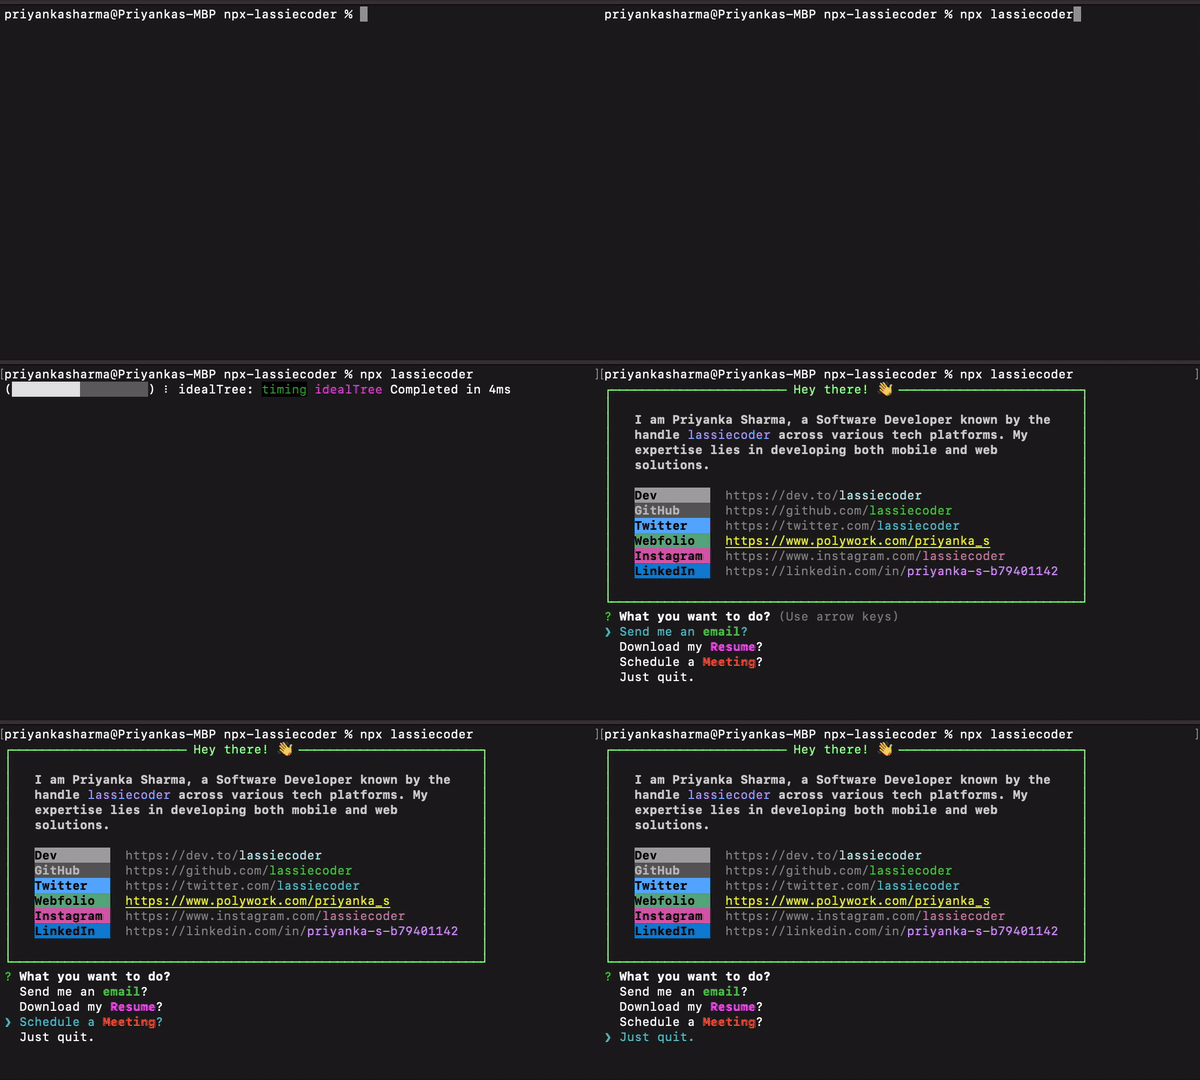
Priyanka's introduction on terminal.
91 lines (57 loc) • 1.84 kB
Markdown
# `npx lassiecoder` in your terminal?
## Preview

## Create your personalized NPX introduction card
### Step 1: Select a Unique Package Name
Choose a distinctive name for your package, as it will be the identifier for invoking your introduction command using `npx`.
### Step 2: Establish a New Directory
Create a fresh directory for your package, naming it after the chosen package name.
```bash
mkdir npx-username
cd npx-username
```
### Step 3: Initialize Your Package
Initialize your project as a Node.js package using the command:
```bash
npm init -y
```
### Step 4: Develop an Executable Script
Within your project directory, create a JavaScript file named `index.js` and store it in a folder named `bin`. This file will function as the executable script for your npx command.
Ensure to specify the `bin` field in `package.json`:
```json
"bin": {
"username": "./bin/index.js"
}
```
**Ensuring Script Execution Capability:**
To enable script execution, follow these steps:
For Mac/Linux:
```bash
chmod +x bin/index.js
```
For Windows:
```bash
git update-index --chmod=+x bin/index.js
```
### Step 5: Add your script to execute and display in terminal
Execute your script with the following command:
```bash
node bin/index.js
```
### Step 6: Publish the package
Once your script runs successfully, publish the package:
**1. Log in to npm:**
```bash
npm adduser
```
**2. After logging in, return to the terminal and run:**
```bash
npm publish
```
### Step 7: Execute Your NPX Command
Once the package is published, run your npx command:
```bash
npx username
```
Follow these steps to create your personalized NPX introduction command and share it with others!
***Happy coding! 🚀***