ionic4-tooltips
Version:
Tooltips module for Ionic 2+ and Angular 8+ apps
185 lines (121 loc) • 6.28 kB
Markdown
# ionic4-tooltips
[](https://www.npmjs.com/package/ionic4-tooltips/)
[](https://www.npmjs.com/package/ionic4-tooltips)
[](https://www.npmjs.com/package/ionic4-tooltips)
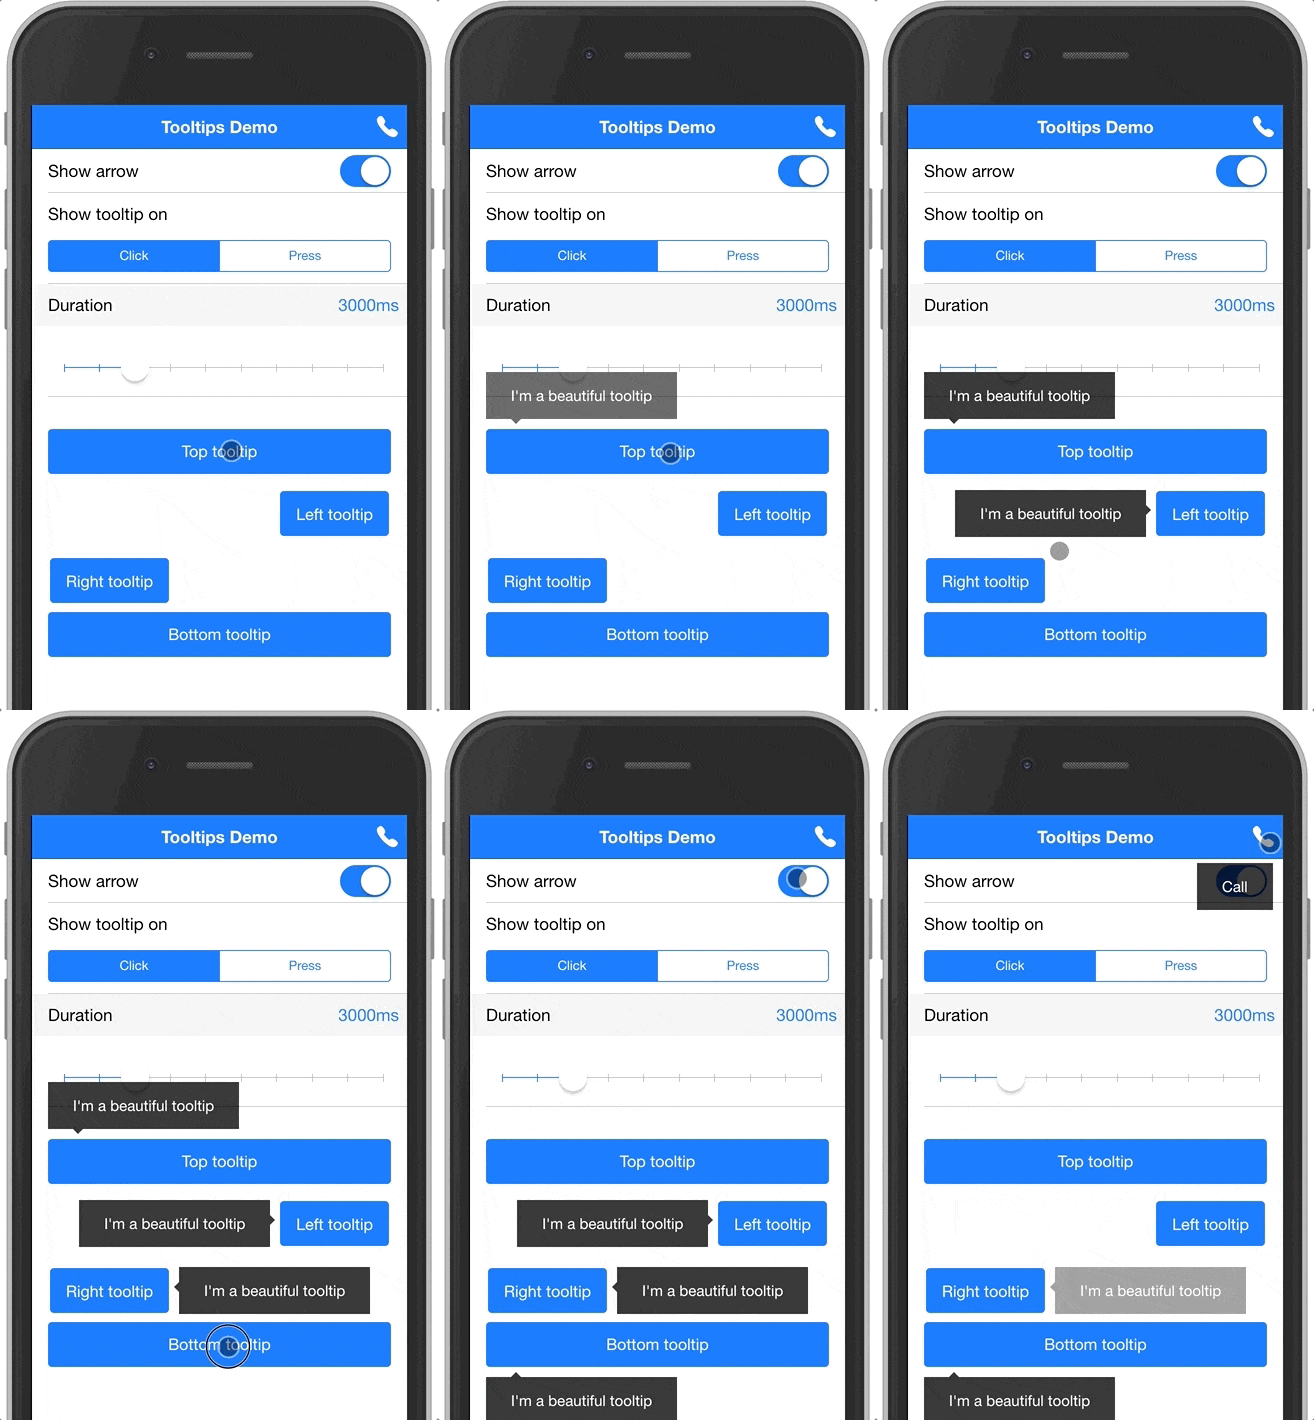
## Index ##
* [About](#about)
* [Demo](#demo)
* [Setup](#setup)
* [Documentation](#documentation)
* [Issues](#issues)
* [Contributing](#contributing)
* [Deploy](#deploy)
* [Future Plans](#future-plans)
* [FAQ](#faq)
## About
Tooltips module for AngularJS/Angular2+ and Ionic 2+.
* Try out the [demo](https://ionic4-tooltips.jrquick.com) to see it in action!
* Checkout [my other Ionic/Angular project](https://github.com/jrquick17/ionic4-auto-complete) for autocomplete!
* Visit [my website](https://jrquick.com) for other cool projects!
## Documentation
The module can be used to display tooltips for any element in your app. It also provides a special treatment for buttons in the header navigation (inspired by Google's apps).
Here's a quick example to show a tooltip below a button:
```html
<!-- positionV specifies where the tooltip should be displayed vertically, can be either top or bottom -->
<!-- arrow tells the tooltip directive to show an arrow above the tooltip box -->
<button ion-button tooltip="I'm a tooltip below a button" positionV="bottom" arrow>
Press me to see a tooltip
</button>
```
And here's another example to show a tooltip below a nav button:
```html
<ion-header>
<ion-navbar>
<ion-title>Page title</ion-title>
<ion-buttons end>
<!-- navTooltip tells the tooltip directive that this is a nav button -->
<ion-button icon-only tooltip="Call" navTooltip>
<ion-icon name="call"></ion-icon>
</ion-button>
</ion-buttons>
</ion-navbar>
</ion-header>
```
### Installation
1. Install this module by running the following command:
```shell
npm install ionic4-tooltips --save
```
* For AngularJS + Ionic 3 ([v0.0.1](https://github.com/jrquick17/ionic4-tooltips/releases/tag/v0.0.1)): `npm install ionic4-tooltips@0.0.1 --save`
* For Angular 2-7 + Ionic 3 ([v1.0.0](https://github.com/jrquick17/ionic4-tooltips/releases/tag/v1.0.0)): `npm install ionic4-tooltips@1.0.0 --save`
2. Import `TooltipsModule` in your `@NgModule`. If you are using lazy module loading, then you need to import it in the modules where it's used.
```ts
import { TooltipsModule } from 'ionic-tooltips';
@NgModule({
...
imports: [
...
TooltipsModule.forRoot()
]
})
export class MyModule { ... }
```
3. Import `BrowserAnimationsModule` in your app's main `@NgModule`.
```ts
import { BrowserAnimationsModule } from '@angular/platform-browser/animations';
@NgModule({
...
imports: [
...
BrowserAnimationsModule
]
})
```
Now you're ready to use this module. See information below for usage.
### Usage
The `tooltip` directive takes a string, which will be used as the tooltip text. To use HTML in your tooltip, you need to pass the content through the `[tooltipHtml]` directive documented below. When using the `tooltip` directive, you can also use the following inputs:
#### `tooltipHtml`
(string) specifies HTML to use inside the tooltip. This will override any value you passed with the `[tooltip]` directive (if any was provided).
#### `navTooltip`
(boolean) add this attribute or set it's value to true to specify that the tooltip belongs to a nav button. Defaults to `false`.
#### `positionV`
(string) specifies the vertical position of the tooltip. Can be either `'top'` or `'bottom'`.
#### `positionH`
(string) specifies the horizontal position of the tooltip. Can be either `'right'` or `'left'`.
#### `event`
(string) the event to show the tooltip on. Can be either `'hover'`, `'click'` or `'press'`. Defaults to `'hover'` on desktop, `'press'` on mobile.
Note: `'hover'` only works on desktop.
#### `desktopEvent`
(string) the event to show the tooltip on when displayed on a desktop . Can be either `'hover'`, `'click'` or `'press'`. Defaults to `'hover'`.
Note: This only works when the `event` attribute is omitted.
#### `mobileEvent`
(string) the event to show the tooltip on when displayed on a mobile. Can be either `'click'` or `'press'`. Defaults to `'press'`.
Note: This only works when the `event` attribute is omitted.
#### `arrow`
(boolean) add this attribute or set it's value to true to show an arrow attached to the tooltip. Defaults to `false`.
#### `duration`
(number) number of milliseconds to show the tooltip for. Defaults to `3000`.
#### `active`
(boolean) add this attribute or set it's value to true to display the tooltip. Defaults to `false`.
#### `topOffset`
(number) add this attribute to offset the vertical position of the tooltip. Defaults to `0`.
#### `leftOffset`
(number) add this attribute to offset the horizontal position of the tooltip. Defaults to `0`.
#### `hideOthers`
(boolean) add this attribute to set weather to hide other visible tooltips. Defaults to `false`.
## Contributing ##
To contribute, clone the repo. Then, run `npm install` to get the packages needed for the library to work. Running `npm install start` will build and run the demo.
### Versioning
We use [SemVer](https://semver.org/) for versioning. For the versions available, see the [tags on this repository](https://github.com/jrquick17/ionic4-tooltips).
## Issues ##
If you find any issues feel free to open a request in [the Issues tab](https://github.com/jrquick17/ionic4-auto-complete/issues). If I have the time I will try to solve any issues but cannot make any guarantees. Feel free to contribute yourself.
### Demo ###
Run `npm install` to get packages required for the demo and then run `ionic serve` to run locally.
### Thanks ###
* [bushybuffalo](https://github.com/bushybuffalo)
* [jrquick17](https://github.com/jrquick17)
* [kadoshms](https://github.com/kadoshms)
* [gnowland](https://github.com/gnowland)
## License
This project is licensed under the MIT License - see the [LICENSE.md](LICENSE.md) file for details