conectric-usb-gateway-beta
Version:
Conectric USB IoT Gateway Library
1,266 lines (942 loc) • 63.7 kB
Markdown

# Conectric USB Gateway Module for Node.js (beta)
## Introduction
This module is Conectric's Node.js SDK that allows you to communicate with our wireless mesh network sensors. We aim to get you up and running quickly, so that you can rapidly build applications or visualizations that use near real time temperature, humidity, motion detection, pulse and switch state data. You can also use this module to communicate with devices that use the [RS-485 protocol](https://en.wikipedia.org/wiki/RS-485).
Our introductory video provides a quick overview of the product.
[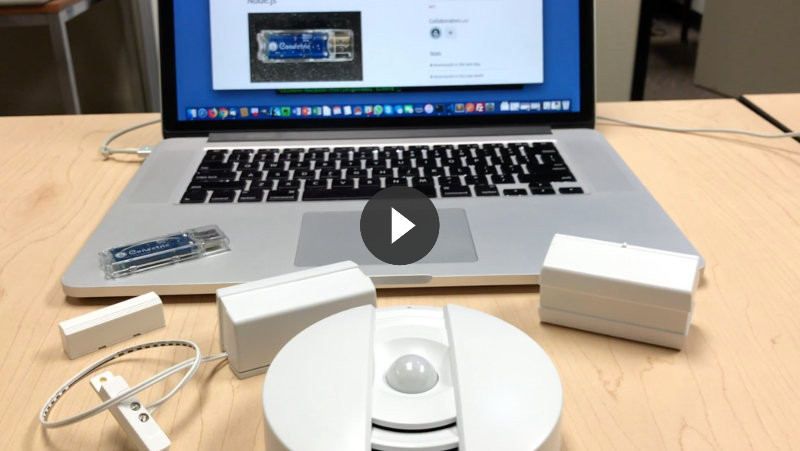](https://www.youtube.com/watch?v=aPfZNUkFKBM)
We also published an [overview on Medium](https://medium.com/conectric-networks/announcing-conectrics-usb-iot-gateway-sensor-product-86087af7ae57).
## Hardware Requirements
In order to use this module, you will require:
* A computer which has a spare USB 2.0 port.
* The ability to install Node.js 8.9.4 or higher. We recommend use of the long term stable releases.
* A USB router from Conectric.
* One or more wireless sensors from Conectric.
### USB Router
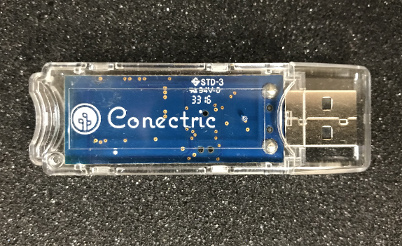
The USB router (Echo) is a USB 2.0 stick that can be purchased from Conectric. It acts as the interface between the mesh network that the sensors are connected to, and this Node module.
### Sensors
In order to receive data via the USB router through this module, you will need at least one Conectric wireless sensor.
The following sensor types are supported at this time:
* Motion (PIR) sensor.
* Pulse sensor.
* Switch (door switch) sensor.
* Combined temperature / humidity sensor.
* Combined temperature / humidity / light sensor.
* Combined temperature / humidity / moisture sensor.
* Combined temperature / humidity / analog input sensor.
* Wireless RS-485 module.
## Linux Dependencies
If you are running Linux (e.g. Ubuntu) you will need to install the following before installing this module:
```
sudo apt install libusb-dev libusb libudev-dev libudev build-essential
```
You may need to use `apt-get` in place of `apt`, depending on your setup. You may also need to request specific versions for some e.g. on Raspbian Stretch for Raspberry Pi:
```
sudo apt-get install libusb-dev libusb-1.0-0-dev libudev-dev build-essential
```
## Node.js Version
We recommend that you use [Node.js](https://nodejs.org) 8.9.4, or any subsequent long term stable (LTS) release.
You should also make sure `node-gyp` is installed:
```
sudo npm install -g node-gyp
```
## Quick Start
To get going and receive your first sensor data quickly, use one of our bundled examples:
```shell
mkdir iotgateway
cd iotgateway
npm init
```
Accept all the defaults, except "entry point", use `server.js` for that. Then:
```shell
npm install --save conectric-usb-gateway-beta
cp node_modules/conectric-usb-gateway-beta/examples/logmessages/server.js .
npm start
```
Then insert batteries into your Conectric sensors, plug your Conectric USB router into a USB port on your computer and watch sensor data appear in your `console.log` output.
**Example expected output (when a temperature / humidity sensor is present):**
```shell
$ npm start
> conectric-gateway-example-logmessages@1.0.0 start /Users/conectric/projects/myiotgateway
> node server.js
Found router device at /dev/tty.usbserial-DB00VL3E.
Gateway opened.
Switched gateway to dump payload mode.
USB router mac address is 00124b000513da40.
USB router Contiki version: 3.x
USB router Conectric version: 1.0.2
{ type: 'tempHumidity',
payload:
{ battery: 3,
temperature: 23.05,
temperatureUnit: 'C',
humidity: 41.65 },
timestamp: 1518761945243,
sensorId: 'a946',
sequenceNumber: 37 }
```
`server.js` contains:
```javascript
const gateway = require('conectric-usb-gateway-beta');
gateway.runGateway({
onSensorMessage: (sensorMessage) => {
console.log(sensorMessage);
}
});
```
## Incoming Message Types
This module works by decoding sensor broadcast messages from the mesh network, then translating them into JSON objects which are then supplied to your callback function where your business logic happens.
Depending on how you configure this module (see [Configuration Options](#configuration-options) for details), and on which sensors you have available, you can expect to see the following types of message delivered to your callback.
Each message has a set of common keys. Others only appear when certain gateway configuration values are set in your code's call to `runGateway`:
* `numHops`: (present if `sendHopData` option is set to `true`). Value will be a number indicating the number of network hops that the message took.
* `maxHops`: (present if `sendHopData` option is set to `true`). Value will be a number indicating the maximum number of allowed network hops (`0` = unlimited).
* `payload`: (present unless `sendDecodedPayload` option is set to `false`). Value will be an object whose schema varies depending on the value of `type`, see the next few sections for examples of each type of payload.
* `timestamp`: (always present) UNIX timestamp for when the gateway received the message from the mesh network. This is in seconds by default, but millisecond resolution can be enabled via configuration options.
* `rawData`: (present if `sendRawData` option is set to `true`). Value will be the raw hex data for the message as received from the mesh network. This is mostly useful for debugging this module, end users should use values from `payload`.
* `sensorId`: (always present) The last 4 characters of the mesh network MAC address of the sensor that send the message.
* `sequenceNumber`: (always present) The message sequence number -- do not rely on these to arrive in order, or be unique, as the sequence number will reset over time or if the sensor's battery is removed and replaced. You should **not** use a combination of `sequenceNumber` and `sensorId` as a unique message key.
* `type`: (always present) indicates which type of message was received, values are:
* `boot`
* `echoStatus`
* `moisture`
* `moistureStatus`
* `motion`
* `motionStatus`
* `pulse`
* `pulseStatus`
* `rs485Config`
* `rs485ChunkEnvelopeResponse`
* `rs485ChunkRequest`
* `rs485ChunkResponse`
* `rs485Request`
* `rs485Response`
* `rs485Status`
* `switch`
* `switchStatus`
* `tempHumidity`
* `tempHumidityAdc`
* `tempHumidityLight`
* `text`
### boot
This message is sent when a sensor initially boots up (battery is inserted), or is reset for some reason. The message JSON looks like:
```json
{
"type": "boot",
"payload": {
"battery": 2.9,
"resetCause": "powerOn"
},
"timestamp": 1518746384048,
"sensorId": "a946",
"sequenceNumber": 0
}
```
The `payload` for the `boot` message consists of the following keys:
* `battery`: The sensor's battery level in volts.
* `resetCause`: Indicates the reason that the sensor booted, possible values are:
* `powerOn`: The battery was inserted into the sensor.
* `externalReset`: The sensor's reset button was pressed.
* `watchdogReset`: The sensor's firmware detected a need to reboot the sensor.
* `unknown`: Catch all value, which should never appear.
If your application does not need to see these messages, they can be suppressed using the `sendBootMessages` configuration option. See the [Configuration Options](#configuration-options) section for details.
### echoStatus
Periodic status message sent by Echo routers if configured to do so.
```json
{
"type": "echoStatus",
"payload": {
"battery": 3.2,
},
"sensorId": "2e06",
"sequenceNumber": 34,
"timestamp": 1567533467
}
```
The `payload` for the `echoStatus` message consists of the following keys:
* `battery`: The router's battery level in volts (routers are usually mains powered to this will usually be the highest possible value).
These messages are off by default, and can be enabled using the `sendStatusMessages` configuration option. See the [Configuration Options](#configuration-options) section for details.
Information about the number of events that the router has processed can be added to this message by turning on the `sendEventCount` configuration option. See the [Configuration Options](#configuration-options) section for details.
### moisture
This message is sent when a moisture sensor detects a change in the presence of moisture. It is an event driven message. If you want the moisture sensor to periodically report its status, regardless of whether a moisture event has occurred, see the `moistureStatus` message. The message JSON looks like this:
```json
{
"type": "moisture",
"payload": {
"battery": 2.8,
"moisture": true
},
"sensorId": "3b8e",
"sequenceNumber": 141,
"timestamp": 1561096119
}
```
The `payload` for the `moisture` message consists of the following keys:
* `battery`: The sensor's battery level in volts.
* `moisture`: `true` if the sensor is wet, `false` if it is dry.
### moistureStatus
This message is sent periodically by a moisture sensor, regardless of whether or
not it has detected moisture. The sensor sends data aboout whether or not moisture has been detected, as well as temperature and humidity information. The message JSON looks like this:
```json
{
"type": "moistureStatus",
"payload": {
"battery": 2.8,
"moisture": false,
"temperature": 25.68,
"temperatureUnit": "C",
"humidity": 55.3
},
"sensorId": "3b8e",
"sequenceNumber": 142,
"timestamp": 1561096180
}
```
The `payload` for the `moistureStatus` message consists of the following keys:
* `battery`: The sensor's battery level in volts.
* `moisture`: `true` if the sensor detects moisture, otherwise `false`.
* `temperature`: The temperature reading, to a maximum of two decimal places.
* `temperatureUnit`: Will be set to `"C"` if the value of `temperature` is in degrees Celcius (default), or `"F"` if the value of `temperature` is in degrees Fahrenheit.
* `humidity`: The percentage relative humidity reading, to a maximum of two decimal places.
By default, values for `temperature` will be in degrees Celcius. To receive values in degrees Fahrenheit, set the configuration option `useFahrenheightTemps` to `true` (see [Configuration Options](#configuration-options) section).
These messages are off by default, and can be enabled using the `sendStatusMessages` configuration option. See the [Configuration Options](#configuration-options) section for details.
### motion
This message is sent when a motion detector / PIR sensor detects motion. The message JSON looks like this:
```json
{
"type": "motion",
"payload": {
"battery": 2.8,
"motion": true
},
"timestamp": 1518757698977,
"sensorId": "02A2",
"sequenceNumber": 12
}
```
The `payload` for the `motion` message consists of the following keys:
* `battery`: The sensor's battery level in volts.
* `motion`: Will always be `true` as the sensor only fires when motion is detected.
Information about the number of motion events that the sensor has seen can be added to this message by turning on the `sendEventCount` configuration option. See the [Configuration Options](#configuration-options) section for details.
### motionStatus
This message is sent periodically by a motion detector when there have been no actual motion events, to let you know that the sensor is OK and can include information about the number of events that the sensor has seen. The message JSON looks like:
```json
{
"type": "motionStatus",
"payload": {
"battery": 3.2
},
"timestamp": 1551034925,
"sensorId": "12c0",
"sequenceNumber": 23
}
```
These messages are off by default, and can be enabled using the `sendStatusMessages` configuration option. See the [Configuration Options](#configuration-options) section for details.
Information about the number of motion events that the sensor has seen can be added to this message by turning on the `sendEventCount` configuration option. See the [Configuration Options](#configuration-options) section for details.
### pulse
This message is sent when a pulse sensor detects a pulse. The message JSON looks like this:
```json
{
"type": "pulse",
"payload": {
"battery": 2.8,
"pulse": true
},
"timestamp": 1518757698977,
"sensorId": "02A2",
"sequenceNumber": 12
}
```
The `payload` for the `pulse` message consists of the following keys:
* `battery`: The sensor's battery level in volts.
* `pulse`: Will always be `true` as the sensor only fires when a pulse is detected.
Information about the number of pulse events that the sensor has seen can be added to this message by turning on the `sendEventCount` configuration option. See the [Configuration Options](#configuration-options) section for details.
### pulseStatus
This message is sent periodically by a pulse sensor when there have been no actual pulse events, to let you know that the sensor is OK, and can include information about the number of events that the sensor has detected. The message JSON looks like:
```json
{
"type": "pulseStatus",
"payload": {
"battery": 3.2
},
"timestamp": 1551034925,
"sensorId": "12c0",
"sequenceNumber": 23
}
```
These messages are off by default, and can be enabled using the `sendStatusMessages` configuration option. See the [Configuration Options](#configuration-options) section for details.
Information about the number of pulse events that the sensor has seen can be added to this message by turning on the `sendEventCount` configuration option. See the [Configuration Options](#configuration-options) section for details.
### rs485ChunkEnvelopeResponse
This message is sent in response to an `rs485Request` message, in the case where the data being return is > 64 bytes and has been split up for tranport on the mesh network.
This message contains information on the number and size of chunks that the data was brokwn down into.
The message JSON looks like:
```json
{
"type": "rs485ChunkEnvelopeResponse",
"payload": {
"battery": 3.1,
"numChunks": 4,
"chunkSize": 64
},
"timestamp": 1536903474,
"sensorId": "e17b",
"sequenceNumber": 39
}
```
The `payload` for the `rs485ChunkEnvelopeResponse` message consists of the following keys:
* `battery`: The sensor's battery level in volts.
* `numChunks`: The number of chunks that the complete response payload has been broken up into.
* `chunkSize`: The size in bytes of each chunk.
* `trackingId`: If `useTrackingId` is enabled (see [Configuration Options](#configuration-options) section).
Information from the payload would then be used to send `rs485ChunkRequest` messages to ask the remote device to send each chunk across the network until all are received and can be re-assembled into the original message.
### rs485ChunkResponse
This message is sent in response to an `rs485ChunkRequest` message, and contains a single chunk of a larger complete response that was broken down for transport over the mesh network.
The message JSON looks like:
```json
{
"type": "rs485ChunkResponse",
"payload": {
"battery": 3.1,
"data": "021022173..."
},
"timestamp": 1536903735,
"sensorId": "e17b",
"sequenceNumber": 45
}
```
The `payload` for the `rs485ChunkResponse` message consists of the following keys:
* `battery`: The sensor's battery level in volts.
* `data`: Raw data from the device sending the message.
* `trackingId`: If `useTrackingId` is enabled (see [Configuration Options](#configuration-options) section).
### rs485Response
This message is sent from a wireless RS-485 module in reponse to a request sent from the USB router to the RS-485 module. See RS-485 Messaging section of this document for details of how to send a request.
The message JSON looks like:
```json
{
"type": "rs485Response",
"payload": {
"battery": 3.1,
"rs485": "0110000062b9fe"
},
"timestamp": 1527654307,
"sensorId": "dfbc",
"sequenceNumber": 1
}
```
The `payload` for the `rs485Response` message consists of the following keys:
* `battery`: The sensor's battery level in volts.
* `rs485`: Data coming back from the RS-485 device in response to data sent in an `rs485Request` message (See RS-485 Messaging section of this document). The format and encoding of this data will depend on your RS-485 device.
### rs485Status
Periodic status message sent by RS485 modules if configured to do so.
The message JSON looks like:
```json
{
"type": "rs485Status",
"payload": {
"battery": 3.2
},
"sensorId": "dfbc",
"sequenceNumber": 223,
"timestamp": 1567503012
}
```
The `payload` for the `rs485Status` message consists of the following keys:
* `battery`: The module's battery level in volts (modules are usually mains powered to this will usually be the highest possible value).
These messages are off by default, and can be enabled using the `sendStatusMessages` configuration option. See the [Configuration Options](#configuration-options) section for details.
Information about the number of events that the module has processed can be added to this message by turning on the `sendEventCount` configuration option. See the [Configuration Options](#configuration-options) section for details.
### switch
This messsage is sent when a switch / door switch sensor changes state (switch / door opens or closes). The message JSON looks like:
```json
{
"type": "switch",
"payload": {
"battery": 3,
"switch": false
},
"timestamp": 1518757698977,
"sensorId": "0219",
"sequenceNumber": 0
}
```
The `payload` for the `switch` message consists of the following keys:
* `battery`: The sensor's battery level in volts.
* `switch`: By default, the value will be `false` when the two switch magnets are close to each other or `true` when the two switch magnets are far apart from each other.
The optional configuration key `switchOpenValue` can be used in your call to `runGateway`. It can be set to change the value of `switch`, so that it becomes `false` when the magnets are far apart from each other and `true` when they are close together. To do this, set `switchOpenValue` to `false` in your call to `runGateway`:
```javascript
gateway.runGateway({
onSensorData: (sensorData) => {
console.log(sensorData);
},
switchOpenValue: false // switch messages report true when magnets close to each other
})
```
### switchStatus
This message is sent when a switch sensor has not generated a real switch event for a period of time (e.g. because the door hasn't opened or closed in that time). The message tells you the current state of the switch (see the `switch` message type above for details). Receiving this message does not indicate a state transition event - it is a periodic status reminder. Whenever the door opens or closes, a `switch` message will be sent instead.
```json
{
"type": "switchStatus",
"payload": {
"battery": 3.1,
"switch": false
},
"timestamp": 1551033663,
"sensorId": "1078",
"sequenceNumber": 19
}
```
Information about the number of switch events that the sensor has seen can be added to this message by turning on the `sendEventCount` configuration option. See the [Configuration Options](#configuration-options) section for details.
These messages are off by default, and can be enabled using the `sendStatusMessages` configuration option. See the [Configuration Options](#configuration-options) section for details.
### tempHumidity
This message is sent when a temperature and humidity sensor broadcasts the temperature and humidity values that it has observed. The message JSON looks like:
```json
{
"type": "tempHumidity",
"payload": {
"battery": 3,
"temperature": 73.33,
"temperatureUnit": "F",
"humidity": 60.65
},
"timestamp": 1518746385455,
"sensorId": "a946",
"sequenceNumber": 1
}
```
The `payload` for the `tempHumidity` message consists of the following keys:
* `battery`: The sensor's battery level in volts.
* `temperature`: The temperature reading, to a maximum of two decimal places.
* `temperatureUnit`: Will be set to `"C"` if the value of `temperature` is in degrees Celcius (default), or `"F"` if the value of `temperature` is in degrees Fahrenheit.
* `humidity`: The percentage relative humidity reading, to a maximum of two decimal places.
By default, values for `temperature` will be in degrees Celcius. To receive values in degrees Fahrenheit, set the configuration option `useFahrenheightTemps` to `true` (see [Configuration Options](#configuration-options) section).
### tempHumidityAdc
This message is sent when a combined temperature, humidity and analog input sensor broadcasts the temperature, humidity and analog values that it has observed. The message JSON looks like:
```json
{
"type": "tempHumidityAdc",
"payload": {
"battery": 2.8,
"temperature": 25.68,
"temperatureUnit": "C",
"humidity": 51.35,
"adcIn": "0090",
"adcMax": "07ff"
},
"sensorId": "12b9",
"sequenceNumber": 179,
"timestamp": 1561238170
}
```
The `payload` for the `tempHumidityAdc` message consists of the following keys:
* `battery`: The sensor's battery level in volts.
* `temperature`: The temperature reading, to a maximum of two decimal places.
* `temperatureUnit`: Will be set to `"C"` if the value of `temperature` is in degrees Celcius (default), or `"F"` if the value of `temperature` is in degrees Fahrenheit.
* `humidity`: The percentage relative humidity reading, to a maximum of two decimal places.
* `adcIn`: Reading from the analog device, will vary depending on device.
* `adcMax`: Reading from the analog device, will vary depending on device.
### tempHumidityLight
This message is sent when a combined temperature, humidity and light sensor broadcasts the temperature, humidity and light values that it has observed. The message JSON looks like:
```json
{
"type": "tempHumidityLight",
"payload": {
"battery": 2.7,
"temperature": 25.71,
"temperatureUnit": "C",
"humidity": 50.25,
"bucketedLux": 0
},
"sensorId": "0f02",
"sequenceNumber": 150,
"timestamp": 1561238167
}
```
The `payload` for the `tempHumidityLight` message consists of the following keys:
* `battery`: The sensor's battery level in volts.
* `temperature`: The temperature reading, to a maximum of two decimal places.
* `temperatureUnit`: Will be set to `"C"` if the value of `temperature` is in degrees Celcius (default), or `"F"` if the value of `temperature` is in degrees Fahrenheit.
* `humidity`: The percentage relative humidity reading, to a maximum of two decimal places.
* `bucketedLux`: This value gives an idea of the amount of light detected by the sensor. A value of 0 means that the lux reading from the sensor was 0-100, 1 means 101-200 etc. The maximum value is 15, any readings 1500 lux or higher will all return 15.
Additionally, the raw lux value from the light sensor can be enabled in the payload. When enabled, it appears as `lux` and will be a floating point number. To turn this on, set the configuration option `sendRawLux` to `true` (see [Configuration Options](#configuration-options) section).
### text
This message is received from another USB router or other network device. The message JSON looks like:
```json
{
"type": "text",
"payload": {
"battery": 3.2,
"text": "Hello World this is a test."
},
"timestamp": 1524198664,
"sensorId": "da40",
"sequenceNumber": 10
}
```
The `payload` for the `text` message consists of the following keys:
* `battery`: The sensor's battery level in volts.
* `text`: The free text message string that was sent (up to 250 characters).
By default, `text` will be decoded from the hex representation used on the network. To receive raw hex data instead, set the configuration option `decodeTextMessages` to `false` (see [Configuration Options](#configuration-options) section).
## Callback Functions
This module deals with decoding the sensor broadcast messages from the mesh network, and handles all of the heavy lifting associated with that for you. When you start the gateway module by invoking its `runGateway` method, you must pass it a configuration object containing a callback function that will be called every time a message is received from the mesh network. A second callback function can also be supplied, and is called when the gateway is ready to send text messages to the network.
You can disable some messages (for example sensor boot messages) using the configuration settings (see [Configuration Options](#configuration-options) section) in the case where your business logic doesn't need to see them.
### onSensorData
The object passed to the `runGateway` method must contain a key `onSensorData` whose value must be a function that takes a single parameter. Values passed to that parameter will be JSON objects corresponding to the schemas described in [Message Types](#message-types).
Here's an example implementation that can process several types of incoming message and display relevant data:
```javascript
const gateway = require('conectric-usb-gateway-beta');
gateway.runGateway({
onSensorMessage: (sensorMessage) => {
const sensorId = sensorMessage.sensorId;
const payload = sensorMessage.payload;
switch (sensorMessage.type) {
case 'boot':
console.log(`Sensor ${sensorId} booted, reason ${payload.resetCause}`);
break;
case 'motion':
console.log(`Sensor ${sensorId} detected motion.`);
break;
case 'tempHumidity':
console.log(`Sensor ${sensorId} reports temp ${payload.temperature}${payload.temperatureUnit} / humidity ${payload.humidity}%.`);
break;
case 'switch':
console.log(`Sensor ${sensorId}, switch state is ${payload.switch}.`);
break;
default:
console.log('Unknown message type received!');
}
}
});
```
### onGatewayReady
This is an optional callback that should be provided if you want to know when the USB router has been inserted and the gateway has established communications with it and is ready to send messages. Use this if you wish to use the text message sending, RS-485 or sensor configuration messaging functionality.
```javascript
const gateway = require('conectric-usb-gateway-beta');
gateway.runGateway({
onSensorMessage: (sensorMessage) => {
console.log(sensorMessage);
},
onGatewayReady: () => {
console.log('Gateway is ready.');
const res = gateway.sendTextMessage({
message: 'Hello World this is a test.',
destination: 'da40'
});
console.log(`${res === true ? 'Message sent.' : 'Error sending message.'}`);
}
});
```
If you want to broadcast the text message to any listening routers, use `gateway.BROADCAST_ALL_ADDRESS` as the destination value. To broadcast to those a single network hop away, use `gateway.BROADCAST_LOCAL_ADDRESS`.
## Configuration Options
The object that is passed as the only parameter to the `runGateway` method can also contain any mixture of the following additional configuration keys. Adding additional keys that are not documented here will result in an error message from `runGateway`.
Example with some configuration options set, those which are omitted will use their default values:
```javascript
const gateway = require('conectric-usb-gateway-beta');
gateway.runGateway({
onSensorMessage: (sensorMessage) => {
console.log(sensorMessage);
},
sendBootMessages: false, // Suppress sensor boot/reboot messages
useFahrenheitTemps: true // Report temperature in F not C
});
```
### debugMode
Controls whether or not additional low level debugging is sent to `console.log` (informational) and `console.error` (error) from within the gateway module.
* Possible values: `true | false`
* Optional: yes
* Default: `false`
### decodeTextMessages
Controls whether or not text message payloads are decoded from hex.
* Possible values: `true | false`
* Optional: yes
* Default: `true`
### deDuplicateBursts
Some sensors broadcast messages in a burst, where the same message ID is sent more than once to ensure that it reaches its indended recipient. This parameter controls whether the gateway module should pass all messages having the same messsage ID to the `onSensorData` callback or only one of them. Applies to all message types.
* Possible values: `true | false`
* Optional: yes
* Default: `true`
### sendAdcWithLux
If set to `true`, will add two keys to `tempHumidityLight` messages: `adcIn` and `adcMax`. These will both be strings containing hex values from the analog lux sensor. These values are used by this SDK to calculate the `lux` and `bucketedLux` values for `tempHumidityLight` messages, and it is not normally necessary to work with them directly.
* Possible values: `true | false`
* Optional: yes
* Default: `false`
### sendBootMessages
Sensors broadcast boot messages when a battery is inserted or other power reset event occurs. This parameter controls whether or not these messages are passed to the `onSensorData` callback.
* Possible values: `true | false`
* Optional: yes
* Default: `true`
### sendDecodedPayload
If `true`, messages supplied to the `onSensorData` callback will contain a `payload` key containing a JSON object that holds the decoded message payload. The form of this object will depend on which type of message was received (see [Message Types](#message-types)).
* Possible values: `true | false`
* Optional: yes
* Default: `true`
### sendEventCount
If `true`, messages supplied to the `onSensorData` callback will contain an `eventCount` key containing the number of events that the sensor has detected. This is useful in combination with the `sendStatusMessages` configuration parameter: the number of events that have occurred in the time between two status messages from the same sensor can then be calculated.
The following message types will contain this if turned on:
* `echoStatus`
* `moisture`
* `moistureStatus`
* `motion`
* `motionStatus`
* `pulse`
* `pulseStatus`
* `switch`
* `switchStatus`
* `tempHumidity`
* `tempHumidityAdc`
* `tempHumidityLight`
* Possible values: `true | false`
* Optional: yes
* Default: `false`
### sendHopData
If `true`, messages supplied to the `onSensorData` callback will contain two extra keys:
* `numHops`: The number of wireless hops that the message took across the network
* `maxHops`: The maximum number of hops that the network allows (0 = unlimited)
* Possible values: `true | false`
* Optional: yes
* Default: `false`
### sendRawData
If `true`, messages supplied to the `onSensorData` callback will contain a `rawData` key containing the unencoded hex message received from the mesh network. Mostly useful for debugging the gateway module.
* Possible values: `true | false`
* Optional: yes
* Default: `false`
### sendRawLux
If `true`, `tempHumidityLight` messages will contain an additional `lux` key containing the actual lux value from the light sensor. Normally, this data is normalized into the `bucketedLux` value, which will still be sent when `sendRawLux` is `true`.
* Possible values: `true | false`
* Optional: yes
* Default: `false`
### sendStatusMessages
If `true`, periodic status messages generated by sensors will be passed to the `onSensorData` callback. In this version, the following sensors / components generate such messages:
* Echo
* Switch
* Moisture
* Motion
* Pulse
Configuration:
* Possible values: `true | false`
* Optional: yes
* Default: `false`
### switchOpenValue
Determines whether the library reports the switch sensor having an open circuit as `true` or `false`. Set according to your application's needs.
* Possible values: `true | false`
* Optional: yes
* Default: `false`
### useFahrenheitTemps
If `true`, messages of type `tempHumidity` will contain temperature in Fahrenheit. If `false`, messages of type `tempHumidity` will contain temperature in Celcius.
* Possible values: `true | false`
* Optional: yes
* Default: `false`
### useMillisecondTimestamps
If `true`, all message timestamps will use millisecond accuracy. If `false`, all message timestamps will use second accuracy.
* Possible values: `true | false`
* Optional: yes
* Detauls: `false`
### useTrackingId
If `true`, then any four character hex string supplied to the `rs485ChunkRequest` or `rs485ChunkEnvelopeRequest` will be returned in the corresponding response message, so that a response can be associated with a given request.
Example:
```
gateway.sendRS485ChunkRequest({
chunkNumber: 0,
chunkSize: 64,
destination: '1fcd',
trackingId: 'FFFF'
});
```
You can then expect the response from the RS485 hub to contain `trackingId: 'FFFF'`. Valid values for `trackingId` are `0000` to `FFFF` inclusive.
## Getting the Gateway's MAC Address
Should you need to access the mesh network MAC address for the USB router that the gateway module is using, you can do so in your callback function as follows:
```javascript
const gateway = require('conectric-usb-gateway-beta');
gateway.runGateway({
onSensorMessage: (sensorMessage) => {
console.log(gateway.macAddress); // '00124b0005141c71'
console.log(sensorMessage);
}
});
```
The MAC address is returned as a string. This could for example be useful to use in a message that your callback function sends to a server, so that the originating gateway can be identified if your system has several of them.
## Getting Version Information from the Gateway
Should you need to know the gateway's Contiki OS version, Conectric firmware version, or the version of the Node module that was npm installe'ed, you can do so in your callback function as follows:
```javascript
const gateway = require('conectric-usb-gateway-beta');
gateway.runGateway({
onSensorMessage: (sensorMessage) => {
console.log(gateway.contikiVersion); // '3.x'
console.log(gateway.conectricVersion); // '1.0.2'
console.log(gateway.nodeModuleVersion); // '0.0.15'
console.log(sensorMessage);
}
});
```
## Sending a Text Message
To send a text message to another USB router, you will need to know the last 4 characters of that router's MAC address (see above for how to obtain this).
Once you have that, simply call `sendTextMessage`:
```javascript
const gateway = require('conectric-usb-gateway-beta');
gateway.runGateway({
onSensorMessage: (sensorMessage) => {
console.log(sensorMessage);
},
onGatewayReady: () => {
console.log('Gateway is ready.');
const res = gateway.sendTextMessage({
message: 'Hello World this is a test.',
destination: 'da40'
});
console.log(`${res === true ? 'Message sent.' : 'Error sending message.'}`);
}
});
```
This requires the gateway to be up and running, so should be called only once the `onGatewayReady` callback has been invoked. If you want to broadcast the text message to any listening routers, use `gateway.BROADCAST_ALL_ADDRESS` as the destination value. Use `gateway.BROADCAST_LOCAL_ADDRESS` to broadcast to local neighboring devices only.
Both `message` and `destination` are required parameters.
## Sending Sensor Configuration Messages
Messages can be sent to sensors to tell them to alter their configuation. At the moment, the following messages are available:
### Event Config Message
This message is used to configure the reporting interval, sleep time and event configuration for the sensors.
The following parameters (with the exception of `moistureWetReportEvery` are all required when using `sendEventConfigMessage`:
* `sensorType`: Indicates which type of sensor the message is to be sent to. The message will be sent to all sensors of this type. Valid values are:
* `moisture`
* `motion`
* `pulse`
* `switch`
* `tempHumidity` (also sends to `tempHumidityAdc` sensors)
* `tempHumidityLight`
* `sleepTime`: the time in seconds that the sensor will sleep for if no events occur. Valid values are 2-60 inclusive. Using lower values here will cause the sensor to use more battery power.
* `reportEvery`: the number of sleep intervals after which the sensor will send it periodic status message. Valid values are 1-1440 inclusive. Setting `sleepTime` to 30 and `reportEvery` to 2 will make the sensor send the periodic status message every 60 seconds for example.
* `eventConfig`: tells the sensor which events to enable / disable the sending of messages for. The values for this are sensor specific, see the table below.
* `deploymentLifetime`: The time in minutes to broadcast the configuration message through the mesh network.
* `moistureWetReportEvery`: This setting is only for the `moisture` sensor and can be omitted for all other sensor types. When the moisture sensor detects water (when it goes from a dry state to a wet state), it will switch to using this value as the multiplier rather than `reportEvery` when calculating how often to send periodic status messages. For example, with a moisture sensor, setting `sleepTime` to 30, `reportEvery` to 2 and `moistureWetReportEvery` to 1 would cause the sensor to periodically report every 30 x 2 = 1 minute until it detected water when the periodic report would change to be every 30 x 1 = 30 seconds.
Appropriate values for the `eventConfig` parameter:
`moisture` sensor:
| Value | Description |
| ------------------------------------ | ----------- |
| `MOISTURE_ENABLE_ALL_EVENTS` | Enables sending of messages for all events. |
| `MOISTURE_DISABLE_ALL_EVENTS` | Disables sending of messages for all events. |
| `MOISTURE_DISABLE_BECOMES_WET_EVENT` | Disables sending of message when sensor goes from a dry to wet condition. |
| `MOISTURE_DISABLE_BECOMES_DRY_EVENT` | Disables sending of message when sensor goes from a wet to dry condition. |
`motion` sensor:
| Value | Description |
| ---------------------------|----------------------|
| `MOTION_ENABLE_ALL_EVENTS` | Enables sending of message for a motion event. |
| `MOTION_DISABLE_ALL_EVENTS`| Disables sending of message for a motion event. |
`pulse` sensor:
| Value | Description |
| --------------------------|----------------------|
| `PULSE_ENABLE_ALL_EVENTS` | Enables sending of message for a pulse event. |
| `PULSE_DISABLE_ALL_EVENTS`| Disables sending of message for a pulse event. |
`switch` sensor:
| Value | Description |
| -----------------------------| ----------- |
| `SWITCH_ENABLE_ALL_EVENTS` | Enables all events. |
| `SWITCH_DISABLE_ALL_EVENTS` | Disables all events. |
| `SWITCH_DISABLE_CLOSE_EVENT` | Disables sending of message when switch magnets go from being apart to being close together. |
| `SWITCH_DISABLE_OPEN_EVENT` | Disables sending of message when switch magnets go from being close together to being apart. |
`tempHumidity` and `tempHumidityLight` sensors:
| Value | Description |
| -----------------------------| ------------|
| `TEMP_HUMIDITY_EVENT_CONFIG` | Always use this value - `tempHumidity` and `tempHumidityLight` are not event driven, they broadcasts temperature and humidity (plus lux for `tempHumidityLight`) at a timed interval.|
This function requires the gateway to be up and running, so should be called only once the `onGatewayReady` callback has been invoked.
Example usage, set a moisture sensor to a sleep time of 30 seconds, normal periodic reporting interval of 60 seonds, water detected periodic reporting interval of 30 seconds, and disable the event generated when the sensor goes from a wet state to a dry state:
```javascript
const gateway = require('conectric-usb-gateway-beta');
gateway.runGateway({
onSensorMessage: (sensorMessage) => {
console.log(sensorMessage);
},
sendStatusMessages: true,
sendEventCount: true,
onGatewayReady: () => {
console.log('Gateway ready!');
const res = gateway.sendEventConfigMessage({
sensorType: 'moisture',
sleepTime: 30,
reportEvery: 2,
deploymentLifetime: 60,
eventConfig: gateway.MOISTURE_DISABLE_BECOMES_DRY_EVENT,
moistureWetReportEvery: 1
});
console.log(`${res === true ? 'Message sent.' : 'Error sending message.'}`);
}
});
```
Example usage, set a motion sensor to a sleep time of 1 minute, and periodic reporting interval of 1 minute, disable all events so that only periodic report messages are sent (no immediate notifications of motion detected will be sent):
```javascript
const gateway = require('conectric-usb-gateway-beta');
gateway.runGateway({
onSensorMessage: (sensorMessage) => {
console.log(sensorMessage);
},
sendStatusMessages: true,
sendEventCount: true,
onGatewayReady: () => {
console.log('Gateway ready!');
const res = gateway.sendEventConfigMessage({
sensorType: 'motion',
sleepTime: 60,
reportEvery: 1,
deploymentLifetime: 60,
eventConfig: gateway.MOTION_DISABLE_ALL_EVENTS,
});
console.log(`${res === true ? 'Message sent.' : 'Error sending message.'}`);
}
});
```
This function returns `true` if the message was broadcast to the mesh network, and `false` if the object passed to it contained invalid configuration parameters.
### LED Config Message
This message is used to configure the three LEDs on each sensor. The LEDs are:
* tx (transmit)
* rx (receive)
* activity (activity)
The following parameters are all required when using `sendLEDConfigMessage`:
* `destination`: The last 4 characters of the MAC address of the device that the message is destined for e.g. `da40`.
* `sensorType`: Needs to be set to match which type of sensor the message is going to, valid values are `moisture`, `motion`, `pulse`, `switch`, `tempHumidity` and `tempHumidityLight`.
* `deploymentLifetime`: The time in minutes to broadcast the configuration message through the mesh network.
* `leds.tx`: Set to `true` to turn the tx (red) LED on, or `false` to turn it off.
* `leds.rx`: Set to `true` to turn the rx (green) LED on, or `false` to turn it off.
* `leds.activity`: Set to `true` to turn the activity (yellow) LED on, or `false` to turn it off.
This requires the gateway to be up and running, so should be called only once the `onGatewayReady` callback has been invoked. If you want to broadcast the text message to any listening routers, use `gateway.BROADCAST_ALL_ADDRESS` as the destination value. Use `gateway.BROADCAST_LOCAL_ADDRESS` to broadcast to local neighboring devices only.
Example usage...
```javascript
const gateway = require('conectric-usb-gateway-beta');
gateway.runGateway({
onSensorMessage: (sensorMessage) => {
console.log(sensorMessage);
},
onGatewayReady: () => {
console.log('Gateway is ready.');
const res = gateway.sendLEDConfigMessage({
destination: '3b8e',
sensorType: 'moisture',
leds: {
tx: true,
rx: true,
activity: true
},
deploymentLifetime: 30
});
console.log(`${res === true ? 'Message sent.' : 'Error sending message.'}`);
}
});
```
## RS-485 Messaging
Using Conectric's wireless RS-485 module, messages can be exchanged with devices that use the RS-485 protocol.
### Sending an RS-485 Configuration Message
This message is used to configure serial communications with the RS-485 device attached to the wireless RS-485 module.
The following parameters are all required when using `sendRS485ConfigMessage`:
* `baudRate`: Valid values are `2400`, `4800`, `9600`, `19200`.
* `parity`: Valid values are `gateway.PARITY_NONE`, `gateway.PARITY_ODD` and `gateway.PARITY_EVEN`.
* `stopBits`: Valid values are `1` and `2`.
* `bitMask`: Valid values are `8` and `7`.
* `destination`: The last 4 characters of the MAC address of the device that the message is destined for e.g. `da40`.
```javascript
const gateway = require('conectric-usb-gateway-beta');
gateway.runGateway({
onSensorMessage: (sensorMessage) => {
console.log(sensorMessage);
},
onGatewayReady: () => {
console.log('Gateway is ready.');
const res = gateway.sendRS485ConfigMessage({
baudRate: 4800,
parity: gateway.PARITY_NONE,
stopBits: 1,
bitMask: 7,
destination: 'da40'
});
console.log(`${res === true ? 'Message sent.' : 'Error sending message.'}`);
}
});
```
This requires the gateway to be up and running, so should be called only once the `onGatewayReady` callback has been invoked. If you want to broadcast the text message to any listening routers, use `gateway.BROADCAST_ALL_ADDRESS` as the destination value. Use `gateway.BROADCAST_LOCAL_ADDRESS` to broadcast to local neighboring devices only.
### Sending an RS-485 Request Message
This message is used to send data to an RS-485 device connected to a Conectric RS-485 wireless module.
The following parameters are required:
* `message`: A string of data to be sent to the RS-485 device. The format / encoding of this data will depend on your RS-485 device.
And the following are optional parameters:
* `hexEncodePayload`: If set to `true`, the value of `message` will be hex encoded before being sent to the wireless RS-485 module. If set to `false`, the value of `message` will be sent unchanged. Defaults to `true`.
```javascript
const gateway = require('conectric-usb-gateway-beta');
gateway.runGateway({
onSensorMessage: (sensorMessage) => {
console.log(sensorMessage);
},
onGatewayReady: () => {
console.log('Gateway is ready.');
gateway.sendRS485Request({
message: '010600000001480a',
destination: 'dfbc',
hexEncodePayload: false
});
}
});
```
(Sends `010600000001480a` to RS-485 wireless module whose MAC address ends `dfbc`).
This requires the gateway to be up and running, so should be called only once the `onGatewayReady` callback has been invoked. If you want to broadcast the text message to any listening routers, use `gateway.BROADCAST_ALL_ADDRESS` as the destination value. Use `gateway.BROADCAST_LOCAL_ADDRESS` to broadcast to local neighboring devices only.
### Receiving an RS-485 Response Message
`rs485Response` messages arrive into the `onSensorMessage` callback function like any other messages from sensors:
```javascript
const gateway = require('conectric-usb-gateway-beta');
gateway.runGateway({
onSensorMessage: (sensorMessage) => {
if (sensorMessage.messageType === 'rs485Response') {
console.log(sensorMessage.payload.rs485);
}
},
onGatewayReady: () => {
console.log('Gateway is ready.');
// Send an rs485 message here...
}
});
```
The data from the RS-485 device will be contained in `sensorMessage.payload.rs485`. The data's encoding will depend on the RS-485 device.
### Receiving a Chunked RS-485 Response Message
When sending an `rs485Request`, the response may sometimes contain a data payload that is too large to be transmitted over the mesh network in a single message. In this case the RS-485 sensor will break it down into chunks. Instead of replying with an `rs485Response` message, it will reply with a `rs485ChunkEnvelopeResponse`. This message contains details of how many chunks are needed to transmit the message, and what the size of each chunk is:
```json
{
"type": "rs485ChunkEnvelopeResponse",
"payload": {
"battery": 3.1,
"numChunks": 4,
"chunkSize": 64
},
"timestamp": 1536903474,
"sensorId": "e17b",
"sequenceNumber": 39
}
```
Using the values in `payload.numChunks` and `payload.chunkSize`, you can then send an `rs485ChunkRequest` message back to the RS-485 sensor for the first chunk (chunks are 0 indexed, so to get 4 we would use 0-3):
```javascript
gateway.sendRS485ChunkRequest({
chunkNumber: 0,
chunkSize: msg.payload.chunkSize,
destination: msg.sensorId
});
```
The RS-485 sensor will respond with a `rs485ChunkResponse` message which looks like this and contains the first part of the data:
```json
{
"type": "rs485ChunkResponse",
"payload": {
"battery": 3.1,
"data": "021022173..."
},
"timestamp": 1536903735,
"sensorId": "e17b",
"sequenceNumber": 45
}
```
You would then repeat this process for chunks 1..3 and once all 4 chunks are retrieved, you can assemble the complete data packet.
While sending and receiving `rs485ChunkRequest` and `rs485ChunkResponse` messages, you should **not** send another `rs485Request` to the same sensor, as this will cause it to exit the chunking process on its side, and begin a new request/response cycle.
Full demo code for this process can be found in `examples/ekm`.
## Bundled Examples
To get you started quickly, we have provided some basic example implementations that use the gateway module. These are located in the `examples` folder.
### Example 1: Log Incoming Messages
**Location:** `examples/logmessages`.
**Sensors Required:** Any.
**Description:** This is the simplest example, which uses all the configuration defaults and simply logs each message received.
**Usage:** To run this example, use follow these simple steps:
```shell
mkdir iotgateway
cd iotgateway
npm init
```
Accept all the defaults, except "entry point", use `server.js` for that. Then:
```shell
npm install --save cone