commity-ai-commit-tool
Version:
AI-powered Git commit message generator with dynamic emoji selection
245 lines (179 loc) • 6.48 kB
Markdown
# 🤖 Commity - VS Code Extension
A VS Code extension that generates intelligent Git commit messages using OpenAI with dynamic emoji selection.
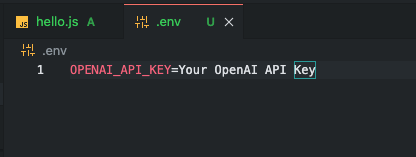
*Add your OpenAI API key to the .env file*
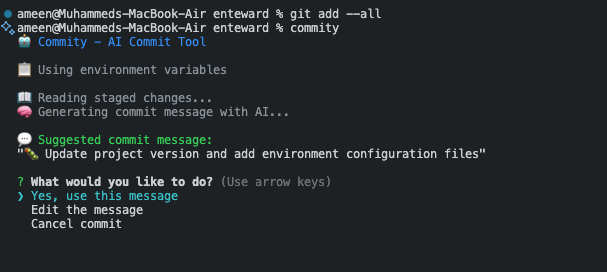
*Run the commity command in terminal*
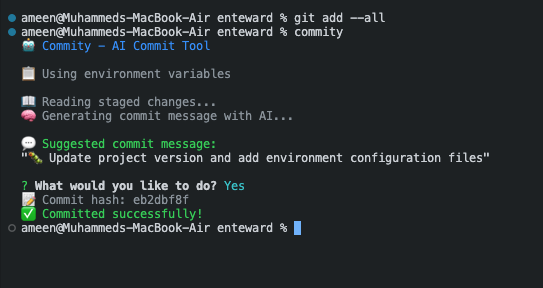
*View the AI-generated commit message and successful commit*
## ✨ Features
- 🎯 **Dynamic Emoji Selection**: Automatically detects change types and adds appropriate emojis
- 🧠 **AI-Powered**: Uses OpenAI GPT models to generate intelligent commit messages
- 💬 **Interactive**: Shows suggested message with options to use, edit, or cancel
- 🔒 **Secure**: API key stored securely in VS Code settings
- ⚡ **Fast**: Lightweight and efficient
- 🔗 **CLI Integration**: Use the same settings from command line with `commity` command
## 🚀 Installation
### Method 1: Install from VSIX (Recommended)
1. **Download the extension**:
```bash
# Clone this repository
git clone <repository-url>
cd commity/vscode-extension
# Install dependencies
npm install
# Build the extension
npm run compile
# Package the extension
npx vsce package
```
2. **Install in VS Code**:
- Open VS Code
- Go to Extensions (Ctrl+Shift+X)
- Click the "..." menu and select "Install from VSIX..."
- Select the generated `.vsix` file
### Method 2: Install from Source
1. **Clone and build**:
```bash
git clone <repository-url>
cd commity/vscode-extension
npm install
npm run compile
```
2. **Install in development mode**:
```bash
# In VS Code, press F5 to run the extension in a new window
# Or use the command palette: "Developer: Reload Window"
```
## ⚙️ Configuration
### 1. Get OpenAI API Key
1. Go to [OpenAI Platform](https://platform.openai.com/api-keys)
2. Create a new API key
3. Copy the key (starts with `sk-`)
### 2. Configure in VS Code
1. **Open VS Code Settings**:
- Press `Ctrl+,` (Windows/Linux) or `Cmd+,` (Mac)
- Or go to File → Preferences → Settings
2. **Search for "Commity"** and configure:
- **OpenAI API Key**: Paste your API key
- **OpenAI Model**: Choose your preferred model (default: gpt-4o-mini)
- **Enable Emojis**: Toggle emoji support (default: true)
### 3. Alternative: Settings JSON
Add to your `settings.json`:
```json
{
"commity.openaiApiKey": "sk-your-actual-api-key-here",
"commity.openaiModel": "gpt-4o-mini",
"commity.enableEmojis": true
}
```
## 🎯 Usage
### VS Code Extension Usage
1. **Stage your changes**:
```bash
git add <files>
```
2. **Generate commit message**:
- Press `Ctrl+Shift+P` (Windows/Linux) or `Cmd+Shift+P` (Mac)
- Type "Generate AI Commit Message"
- Select the command
3. **Review and commit**:
- The extension will show the suggested message
- Choose "Use This Message", "Edit Message", or "Cancel"
### CLI Integration
After installing the VS Code extension and configuring your API key, you can also use Commity from the command line:
1. **Install CLI tool**:
```bash
./install-cli.sh
```
2. **Use from command line**:
```bash
git add <files>
commity
```
The CLI tool will automatically use the same API key and settings configured in VS Code!
### Command Palette
- `Ctrl+Shift+P` → "Generate AI Commit Message"
### Keyboard Shortcut (Optional)
Add to `keybindings.json`:
```json
{
"key": "ctrl+shift+g",
"command": "commity.generateCommit",
"when": "gitOpenRepositoryCount != 0"
}
```
## 🎨 Emoji Categories
The extension automatically selects emojis based on your changes:
- **🐛 Bug Fixes**: `fix`, `bug`, `error`, `issue`, `problem`, `exception`
- **✨ Features**: `add`, `new`, `create`, `implement`, `introduce`
- **📚 Documentation**: `readme`, `docs`, `documentation`, `comment`
- **⚡ Performance**: `performance`, `optimize`, `speed`, `cache`
- **♻️ Refactoring**: `refactor`, `restructure`, `clean`, `improve`
- **🧪 Testing**: `test`, `spec`, `unit`, `integration`, `coverage`
- **⚙️ Configuration**: `config`, `setting`, `env`, `package.json`
- **🔒 Security**: `security`, `vulnerability`, `auth`, `password`
- **🎨 UI/UX**: `ui`, `ux`, `style`, `css`, `design`
- **🗄️ Database**: `database`, `db`, `sql`, `migration`
- **🔌 API**: `api`, `endpoint`, `route`, `controller`
- **🚀 Deployment**: `deploy`, `ci`, `cd`, `pipeline`, `docker`
- **📦 Dependencies**: `package.json`, `dependencies`, `npm`
- **📝 General**: Default for other changes
## 🔧 Troubleshooting
### Common Issues
**"OpenAI API key not configured"**
- Go to VS Code Settings
- Search for "Commity"
- Enter your OpenAI API key
**"No staged changes found"**
- Stage files first: `git add <files>`
- Check git status: `git status`
**"Invalid OpenAI API key"**
- Verify your API key starts with `sk-`
- Check that you have credits in your OpenAI account
- Ensure the key is correctly copied
**"Not in a Git repository"**
- Make sure you're in a Git repository
- Initialize Git: `git init`
### Error Messages
- **401 Unauthorized**: Invalid API key
- **429 Rate Limited**: Too many requests, wait and try again
- **500 Server Error**: OpenAI service issue, try again later
## 🛠️ Development
### Building the Extension
```bash
# Install dependencies
npm install
# Compile TypeScript
npm run compile
# Watch for changes
npm run watch
# Package for distribution
npx vsce package
```
### Project Structure
```
vscode-extension/
├── src/
│ ├── extension.ts # Main extension logic
│ ├── ai.ts # OpenAI integration
│ └── git.ts # Git operations
├── package.json # Extension manifest
├── tsconfig.json # TypeScript config
└── README.md # This file
```
## 📝 License
MIT License - feel free to use and modify as needed!
## 🤝 Contributing
1. Fork the repository
2. Create a feature branch
3. Make your changes
4. Test thoroughly
5. Submit a pull request
## 🚀 Future Enhancements
- Support for conventional commit formats
- Local AI model support (Ollama)
- Custom prompt templates
- GitLens integration
- Multi-language support
- Team collaboration features