cloudworker-proxy
Version:
An api gateway for cloudflare workers
607 lines (410 loc) • 25.6 kB
Markdown
[](http://serverless.com)
<br/>
Build, compose, & deploy serverless apps in seconds with **Serverless Components**, the **[Serverless Framework's](https://github.com/serverless/serverless)** new infrastructure provisioning technology.
- - [x] **Speed -** The fastest way to deploy serverless infra and apps.
- - [x] **Power -** Deploy low-level infra, or higher-order use-case abstractions.
- - [x] **Re-Use -** Everything you build is reusable by you, your team, and (if you want) the world.
- - [x] **Composition -** Easily compose Components together in YAML or Javascript.
Here's how easy it is to use Components with Serverless Framework:
```yaml
# serverless.yml
name: website
website:
component: '@serverless/website'
inputs:
code:
src: ./src
hook: npm run build
domain: www.serverlesscomponents.com
```
[^ Watch a video guide on using a Serverless Component here](https://www.youtube.com/watch?v=ts26BVuX3j0).
<br/>
- [Quick-Start](#quick-start)
- [Features](#features)
- [Overview](#overview)
- [Using Components](#using-components)
- [Serverless.yml Basics](#serverlessyml-basics)
- [Inputs](#inputs)
- [Outputs](#outputs)
- [Credentials](#credentials)
- [Environment Variables](#environment-variables)
- [Building Components](#building-components)
- [Serverless.js Basics](#serverlessjs-basics)
- [Development Tips](#development-tips)
- [Available Components](https://github.com/serverless-components)
- [Templates](./templates)
- [Artwork](https://github.com/serverless/artwork)
- [Join Us on Slack](https://serverless.com/slack)
- [Roadmap](https://github.com/serverless/components/projects/1)
<br/>
# Quick-Start
Install the [Serverless Framework](https://www.github.com/serverless/serverless) via NPM:
```console
$ npm i -g serverless
```
**Make sure you are using Serverless Framework version 1.49 or above.** Serverless Components Beta will not work with older versions.
Next, use the `create --template-url` command to install a [Serverless Components Template](./templates), which contains Components as well as boilerplate code, to get you started quickly.
Here are a few popular templates...
#### [Deploy A Website](https://github.com/serverless/components/tree/master/templates/website)
AWS S3 & AWS Cloudfront powered serverless website w/ custom domain. [A video guide on this can be found here](https://www.youtube.com/watch?v=ts26BVuX3j0)
```shell
serverless create --template-url https://github.com/serverless/components/tree/master/templates/website
```
#### [Deploy A REST API](https://github.com/serverless/components/tree/master/templates/backend-monolith)
AWS Lambda & AWS API Gateway powered serverless REST API w/ custom domain.
```shell
serverless create --template-url https://github.com/serverless/components/tree/master/templates/backend-monolith
```
#### [Deploy A Fullstack Web Application](https://github.com/serverless/components/tree/master/templates/fullstack-application)
A React-based frontend and AWS Lambda based API fullstack application.
```shell
serverless create --template-url https://github.com/serverless/components/tree/master/templates/fullstack-application
```
#### [Deploy Other Use-Cases](./templates)
[Check out all of the pre-made Templates](./templates) to deploy serverless _REST APsI_, _Websockets APIs_, _Websites_, _Scheduled Tasks_, and much more! Each Template has a `README.md` with clear instructions on what it does and how to get started.
Also, all Serverless Components can be found [here](https://github.com/serverless-components/).
<br/>
# Features
### Simplicity
Serverless Components are built around higher-order use-cases (e.g. a website, blog, payment system). Irrelevant low-level infrastructure details are abstracted away, and simpler configuration is offered instead.
For example, with minimal configuration, you can deploy...
- A **serverless website** hosted on AWS S3, delivered globally and quickly w/ AWS Cloudfront, via a custom domain on AWS Route 53, secured by a free AWS ACM SSL Certificate:
```yaml
# serverless.yml
website:
component: '@serverless/website'
inputs:
code:
src: ./src
domain: www.serverless-app.com
```
- A **serverless API** hosted on AWS Lambda, accessible via an AWS API Gateway endpoint under a custom domain on AWS Route 53, secured by a free AWS ACM SSL Certificate:
```yaml
# serverless.yml
api:
component: '@serverless/backend'
inputs:
code:
src: ./src
domain: api.serverless-app.com
```
- A **serverless real-time websockets API** hosted on AWS Lambda, accessible via an AWS API Gateway Websockets endpoint:
```yaml
# serverless.yml
api:
component: '@serverless/backend-socket'
inputs:
code:
src: ./src
```
- and [much more!](./templates)
### Reusability
While Serverless Components can be easily composed in YAML (`serverless.yml`), they are written as reusable javascript libraries (`serverless.js`), with simple syntax inspired by component-based frameworks, like React.
```javascript
// serverless.js
const { Component } = require('@serverless/core')
class MyBlog extends Component {
async default(inputs) {
this.context.status('Deploying a serverless blog')
const website = await this.load('@serverless/website') // Load a component
const outputs = await website({ code: { src: './blog-code' } }) // Deploy it
this.state.url = outputs.url
await this.save()
return outputs
}
}
module.exports = MyBlog
```
Anyone can build a Serverless Component and share it in our upcoming Registry.
### Fast Deployments
Most Serverless Components deploy 20x faster than traditional cloud provisioning tools. Our intention is to design Serverless Components' that deploy almost instantly, removing the need to emulate cloud services locally.
### Vendor-Agnostic
Serverless Components favor cloud infrastructure with serverless qualities (shocker!). We also believe in order to deliver the best product, you must be free to use the best services.
Serverless Components are being designed entirely vendor agnostic, enabling you to easily use services from different vendors, together! Like, AWS Lambda, AWS S3, Azure Functions, Google Big Query, Twilio, Stripe, Algolia, Cloudflare Workers and more.
### Vanilla Javascript
Serverless Components are written in vanilla javascript and seek to use the least amount of dependencies, making the entire project as approachable as possible to beginners (and fatigued veterans).
<br/>
# Overview
Serverless Components are merely Javascript libraries that provision something/anything.
They are focused primarily on back-end use-cases, and cloud infrastructure with serverless qualities, enabling you to deliver software with radically less overhead and cost. Serverless Components are to serverless back-end use-cases, what React Components are to front-end use-cases.
A Component can be designed to provision low-level infrastructure (e.g. an AWS S3 bucket). However, they can also provision higher-order outcomes — which is when they are at their best. Examples of a higher-order outcome are:
1. A group of infrastructure with a purpose, like a type of data processing pipeline.
2. A software feature, like user registration, comments, or a payment system.
3. An entire application, like a blog, video streaming service, or landing page.
The syntax for writing a Serverless Component makes it trivial to load child Components and deploy them, enabling you to lean on low-level Components to handle difficult infrastructure provisioning tasks, while you rapidly create a higher-order abstraction.
Serverless Components can be used **declaratively** (via the Serverless Framework's `serverless.yml` file) or **programmatically** (via a `serverless.js` file).
Using Components declaratively is great if you want to build a serverless application as easily as possible, but not re-use it.
Using Components programmatically is also great for building serverless applications easily. And if you'd like to build a reusable Serverless Component, this is currently the only way.
In the [Using Components](#using-components) section, we'll focus on the declarative experience (`serverless.yml`). In the [Building Components](#building-components) section, we'll focus on the programmatic experience (`serverless.js`).
<br/>
# Using Components
### Serverless.yml Basics
`serverless.yml` is the easiest way to compose Serverless Components into an application.
The syntax for using Serverless Components looks like this:
```yml
name: my-serverless-website
website: # An instance of a component is declared here.
component: '@serverless/website@2.0.5' # This is the component you want to create an instance of.
inputs: # These are inputs to pass into the component's "default()" function
code:
src: ./src
```
You can deploy this easily via the Serverless Framework with the `$ serverless` command.
```console
$ serverless # Installs and deploys the components...
```
You can also watch for changes with the `--watch` flag
```console
$ serverless --watch # Watches for changes and redeploy if any detected
```
There is nothing to install when using Serverless Components via `serverless.yml`. Instead, when you deploy a `serverless.yml`, its Components are downloaded automatically at the beginning of that deployment (if they aren't already downloaded), and stored in a central folder at the root of your machine. This effectively caches the Components in one location, so you don't clutter your project files with Component libraries and don't download duplicates.
Serverless Components are distributed via [NPM](https://www.npmjs.com/). When Components are downloaded, a basic NPM installation is happening behind the scenes.
Because of this, you use the NPM name in the `component:` property.
```yml
website: # An instance of a component.
component: '@serverless/website' # This is the NPM package name
```
You can also use the same semantic versioning strategy that NPM uses.
```yml
website: # An instance of a component.
component: '@serverless/website@3.0.5' # This is the NPM package name and version
```
When you add a version, only that Component version is used. When you don't add a version, upon every deployment, the Serverless Framework will check for a newer version, and use that, if it exists.
**Note:** While in Beta, you cannot currently use Serverless Components within an existing Serverless Framework project file (i.e. a project file that contains `functions`, `events`, `resources` and `plugins`).
### Inputs
Every Serverless Component has one main function to make it deploy _something_. This is known as the `default()` function (you can learn more about it in the "Building Components" section). This `default()` function takes an `inputs` object.
When you specify `inputs` for a Component in `serverless.yml`, they are simply arguments that are being passed into that Serverless Component's `default()` function.
```yml
name: my-serverless-website
website:
component: '@serverless/website@3.0.5'
inputs: # Inputs to pass into the component's default function
code:
src: ./src
```
### Outputs
When a Component function (e.g. the `default()` function) is finished running, it returns an `outputs` object.
You can reference values of this `outputs` object in `serverless.yml` to pass data into Components, like this:
```yml
backend:
component: '@serverless/backend@1.0.2'
inputs:
code:
src: ./src
env:
dbName: ${database.name}
dbRegion: ${database.region}
database:
component: '@serverless/aws-dynamodb@4.3.1'
inputs:
name: users-database
```
This tells the Serverless Framework to pass a few of the outputs from the `database` instance into the `backend` instance. Specifically, the `name` and `region` of the database are being added as environment variables to the `backend` instance, so that it can interact with that database.
This also tells the Serverless Framework what depends on what. The Framework builds a graph based on this, and deploys everything in that order. Circular references however do not work and the Framework will throw an error.
### Credentials
Upon deployment, whether it's a `serverless.yml` or `serverless.js`, Serverless Components' core looks for a `.env` file in the current working directory.
Upon deployment, if a `.env` file exists, Serverless Components will add the content of it as environment variables. If you use specific environment variable names that match that of a cloud infrastructure vendor's access keys/tokens, upon deployment, Serverless Components will automatically inject that into the Components that need that vendor to provision infrastructure.
These credentials will be used by any and all Components in your `serverless.yml` or `serverless.js` — as well as their child Components — if you specify the environment variables exactly as shown below.
Here are the keys that are currently supported:
#### AWS Credentials
```bash
AWS_ACCESS_KEY_ID=123456789
AWS_SECRET_ACCESS_KEY=123456789
AWS_REGION=us-east-1
```
Components could access these AWS credentials using `this.context.credentials.aws`. This object would look like this:
```js
{
accessKeyId: '123456789',
secretAccessKey: '123456789',
region: 'us-east-1'
}
```
#### Google Credentials
```bash
# You can specify the path to the JSON credentials file that you downloaded from Google
GOOGLE_APPLICATION_CREDENTIALS=path/to/credentials/json/file
# Or you could just provide your project id, client email & private key
GOOGLE_PROJECT_ID=project-id-xxx
GOOGLE_CLIENT_EMAIL=project-id-xxx@appspot.gserviceaccount.com
GOOGLE_PRIVATE_KEY="-----BEGIN PRIVATE KEY-----\nMIIEvAIBADANBgk..."
```
Components could access these google credentials using `this.context.credentials.google`. This object would look like this:
```js
{
applicationCredentials: 'path/to/credentials/json/file',
projectId: 'project-id-xxx',
clientEmail: 'project-id-xxx@appspot.gserviceaccount.com',
privateKey: '-----BEGIN PRIVATE KEY-----\nMIIEvAIBADANBgk...'
}
```
### Environment Variables
You can reference environment variables (e.g. those that you defined in the `.env` file) directly in `serverless.yml` by referencing the `${env}` object. For example, if you want to reference the `TABLE` environment variable, you could do that with `${env.TABLE}`.
```yml
backend:
component: '@serverless/backend'
inputs:
code:
src: ./src
env:
table: ${env.TABLE}
```
<br/>
# Building Components
If you want to build reusable Serverless Components, it starts and ends with a `serverless.js` file.
### Serverless.js Basics
In your current working directory, install the Serverless Components core (`@serverless/core`) as a local dependency.
```
npm i --save @serverless/core
```
Create a `serverless.js` file, extend the Component class and add a `default` method, to make a bare minimum Serverless Component, like this:
```javascript
// serverless.js
const { Component } = require('@serverless/core')
class MyComponent extends Component {
async default(inputs = {}) {
return {}
} // The default functionality to run/provision/update your Component
}
module.exports = MyComponent
```
`default()` is always required. It is where the logic resides in order for your Component to _make_ something. Whenever you run the `$ serverless` command, it's always calling the `default()` method.
You can also any other methods to this class. A `remove()` method is often the next logical choice, if you want your Serverless Component to remove the things it creates.
You can add as many methods as you want. This is interesting because it enables you to ship more automation with your Component, than logic that merely _deploys_ and _removes_ something.
You can use the `serverless --watch` flag when you run any method. This would keep watching for changes in the current working directory, and rerun your method if changes are detected. So you could also do `serverless remove --watch` for example.
It's still early days for Serverless Components, but we are starting to work on Components that ship with their own `test()` function, or their own `logs()` and `metrics()` functions, or `seed()` for establishing initial values in a database Component. Overall, there is a lot of opportunity here to deliver outcomes that are loaded with useful automation.
All methods other than the `default()` method are optional. All methods take a single `inputs` object, not individual arguments, and return a single `outputs` object.
Here is what it looks like to add a `remove` method, as well as a custom method.
```javascript
// serverless.js
const { Component } = require('@serverless/core')
class MyComponent extends Component {
/*
* Default (Required)
* - The default functionality to run/provision/update your Component
* - You can run this function by running the "$ serverless" command
*/
async default(inputs = {}) {
return {}
}
/*
* Remove (Optional)
* - If your Component removes infrastructure, this is recommended.
* - You can run this function by running "$ serverless remove"
*/
async remove(inputs = {}) {
return {}
}
/*
* Anything (Optional)
* - If you want to ship your Component w/ extra functionality, put it in a method.
* - You can run this function by running "$ serverless anything"
*/
async anything(inputs = {}) {
return {}
}
}
module.exports = MyComponent
```
When inside a Component method, `this` comes with utilities which you can use. Here is a guide to what's available to you within the context of a Component.
```javascript
// serverless.js
const { Component } = require('@serverless/core')
class MyComponent extends Component {
async default(inputs = {}) {
// this.context features useful information
console.log(this.context)
// Common provider credentials are identified in the environment or .env file and added to this.context.credentials
// when you run "components", then the credentials in .env will be used
// when you run "components --stage prod", then the credentials in .env.prod will be used...etc
// if you don't have any .env files, then global aws credentials will be used
const dynamodb = new AWS.DynamoDB({ credentials: this.context.credentials.aws })
// You can easily create a random ID to name cloud infrastructure resources with using this utility.
const s3BucketName = `my-bucket-${this.context.resourceId()}`
// This prevents name collisions.
// Components have built-in state storage.
// Here is how to save state to your Component:
this.state.name = 'myComponent'
await this.save()
// Here is how to load a child Component.
// This assumes you have the "@serverless/website" component in your "package.json" file and you've run "npm install"
let website = await this.load('@serverless/website')
// You can run the default method of a child Component two ways:
let websiteOutputs = website({ code: { src: './src' } })
let websiteOutputs = website.default({ code: { src: './src' } })
// If you are deploying multiple instances of the same Component, include an instance id.
let website1 = await this.load('@serverless/website', 'website1')
let website2 = await this.load('@serverless/website', 'website2')
// Child Components save their state automatically.
// You can also load a local component that is not yet published to npm
// just reference the root dir that contains the serverless.js file
// You can also use similar syntax in serverless.yml to run local Components
let localComponent = await this.load('../my-local-component')
// Here is how you can easily remove a Component.
let websiteRemoveOutputs = await website.remove()
// Here is how you can call any custom method on a Component.
let websiteRemoveOutputs = await website.test({})
// If you want to show a status update to the CLI in an elegant way, use this.
this.context.status('Uploading')
// If you want to show a log statement in the CLI in an elegant way, use this.
this.context.log('this is a log statement')
// Return your results
return { url: websiteOutputs.url }
}
}
module.exports = MyComponent
```
Just run `serverless` in the directory that contains the `serverless.js` file to run your new component. You'll will see all the logs and outputs of your new component. Logs and outputs of any child component you use will not be shown, unless you run in debug mode: `serverless --debug`. You can also run any custom method/command you've defined with `serverless <methodName>`.
For complete real-world examples on writing components, [check out our official components](https://github.com/serverless-components)
### Development Tips
Here are some development tips when it comes to writing Serverless Components:
#### Activate Watch Mode with the `--watch` Flag
During development, it's super helpful to keep the terminal running with `serverless --watch` (or with any method other than the default) while you develop your component. This way you get instant feedback and reduce friction.
#### Use Debug Statements and the `--debug` Flag
The Serverless Components CLI experience is intentionally minimal. But if you ever want to see what Components are doing behnd the scenes, use the `--debug` flag when you run a Component. You'll see output like this:
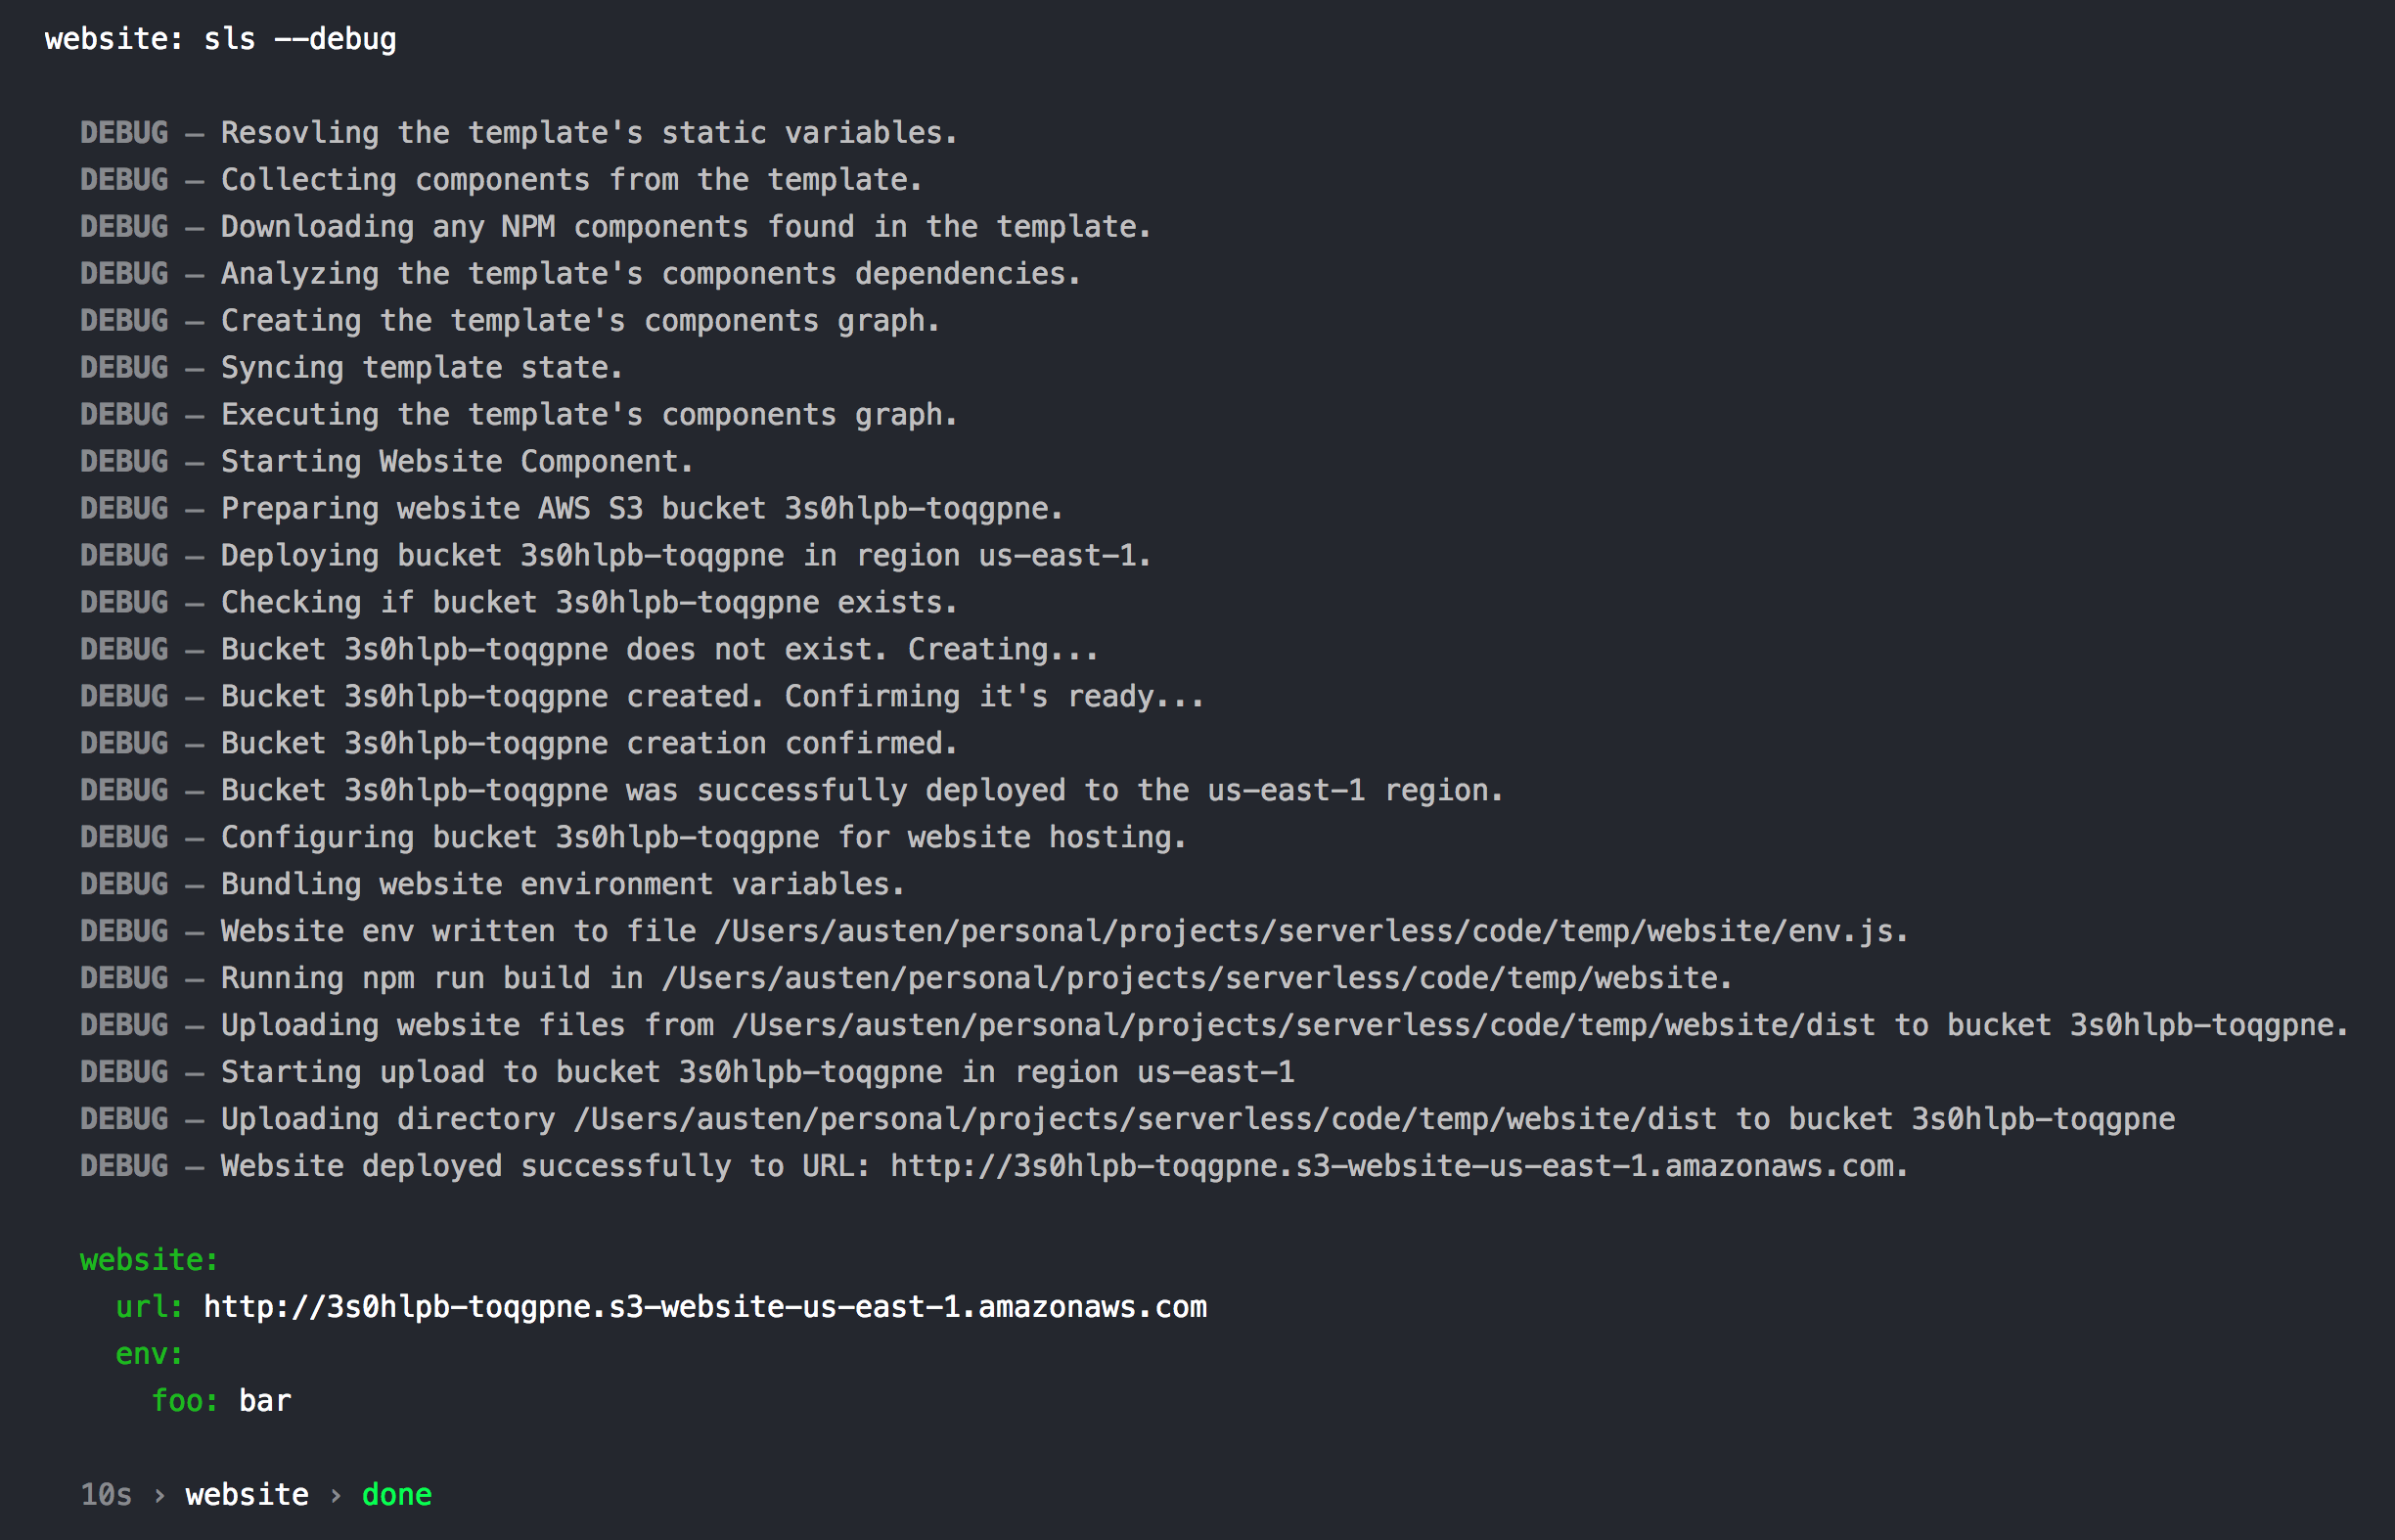
Many Serverless Components include debug statements to report what work they are doing. We recommend you add debug statements into your Component as well. Just use this:
```javascript
class MyComponent extends Component {
async default() {
this.context.debug(`Starting MyComponent.`)
this.context.debug(`Creating resources.`)
this.context.debug(`Waiting for resources to be provisioned.`)
this.context.debug(`Finished MyComponent.`)
}
}
```
#### Use Local References
When writing a Serverless Component, you can reference it locally via a `serverless.yml`, or another `serverless.js`. Keep in mind, a directory can only contain 1 `serverless.yml` or `serverless.js`. A directory cannot contain a both a `serverless.yml` and a `serverless.js`.
Here's how to reference a local Component via `serverless.yml`:
```yaml
name: my-project
myComponent:
component: ../src
inputs:
foo: bar
```
Here's how to reference a local Component via `serverless.js`:
```javascript
class myFirstComponent extends Component {
default() {
const mySecondComponent = this.load('../components/my-second-component')
}
}
```
#### Start With The Outcome
When making a Serverless Component, it can be tempting to break it down into several levels of child Components, to maintain separation of concerns and increase the ways your work could be re-used.
However, provisioning back-end logic can be more complicated than designing a front-end React Component. We've learned over-optimizing for granular separation of concerns is a fast way to burn yourself out!
We recommend starting with a focus on your desired outcome. Create one Serverless Component that solves that problem first. After you've achieved your initial goal, then start breaking it down into child Components.
#### The Outcome Is Your Advantage
Provisioning infrastructure can be quite complicated. However, Serverless Components have one powerful advantage over general infrastructure provision tools that seek to enable every possible option and combination (e.g. AWS Cloudformation) — Serverless Components know the specific use-case they are trying to deliver.
One of the most important lessons we've learned about software development tools is that once you know the use-case, you can create a much better tool.
Components know their use-case. You can use that knowledge to: 1) provision infrastructure more reliably, because you have a clear provisioning path and you can program around the pitfalls. 2) provision infrastructure more quickly 3) add use-case specific automation to your Component in the form of custom methods.
#### Keep Most State On The Cloud Provider
Serverless Components save remarkably little state. In fact, many powerful Components have less than 10 properties in their state objects.
Components rely on the state saved within the cloud services they use as the source of truth. This prevents drift issues that break infrastructure provisioning tools. It also opens up the possibility of working with existing resources, that were not originally managed by Serverless Components.
#### Store State Immediately After A Successful Operation
If you do need to store state, try to store it immediately after a successful operation. This way, if anything after that operation fails, your Serverless Component can pick up where it left off, when the end user tries to deploy it again.
#### Optimize For Accessibility
We believe serverless infrastructure and architectures will empower more people to develop software than ever before.
Because of this, we're designing all of our projects to be as approachable as possible. Please try to use simple, vanilla Javascript. Additionally, to reduce security risks and general bloat, please try to use the least amount of NPM dependencies as possible.