@urso/revolt-fx
Version:
Particle and Effect System for Pixi.js
368 lines (264 loc) • 8.58 kB
Markdown

# RevoltFX
> **Compatible with PixiJS 7.3.x and 8.x**
Particle and effect system for PixiJS
Create particle emitters and time based effect sequences. Emitters and sequences can be nested and spawned on different particle events.
<a href="https://www.buymeacoffee.com/bma73" target="_blank"><img src="https://cdn.buymeacoffee.com/buttons/default-orange.png" alt="Buy Me A Coffee" height="41" width="174"></a>
## Check out the examples
**<https://samples.revoltfx.electronauts.net>**
Github
https://github.com/bma73/revolt-fx-examples
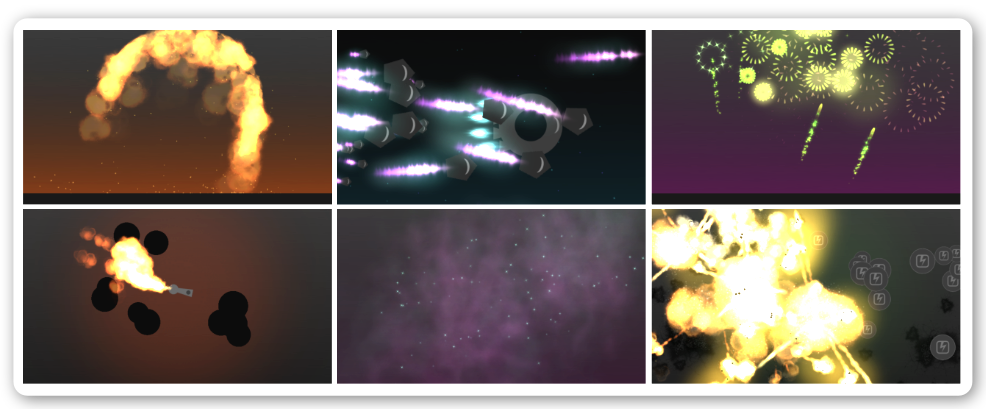
The system has already been stress tested in games like [Battleboats.io](https://battleboats.io) and [Jumbled.io](https://jumbled.io)
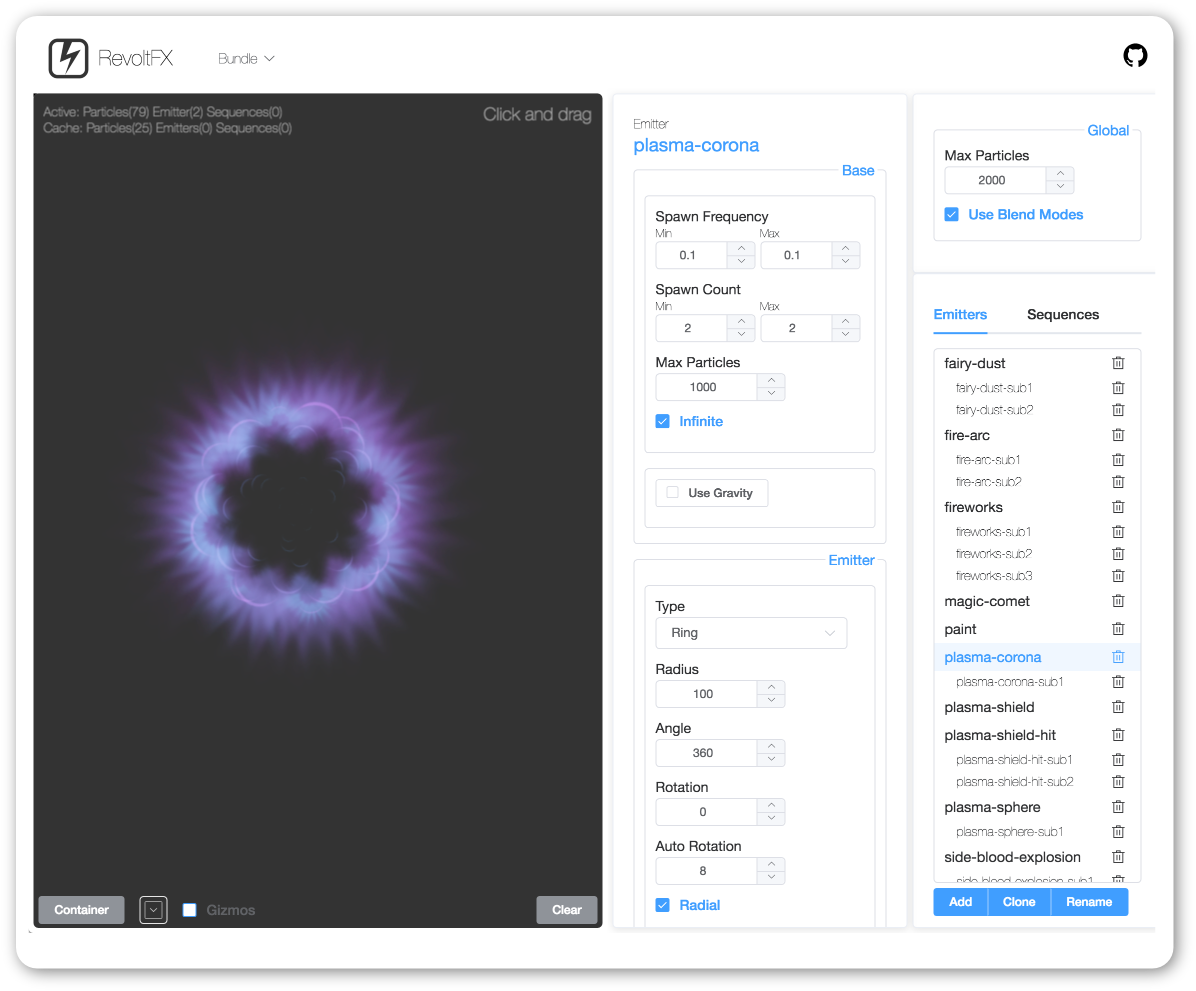
## Editor
To easily create your own effects use the extensive RevoltFX online editor
**<https://editor.revoltfx.electronauts.net>**
Fork the editor on Github
<https://github.com/bma73/revolt-fx-editor>
---
## Install
Via NPM
```sh
npm install revolt-fx --legacy-peer-deps
```
```js
import {FX} from 'revolt-fx'
const fx = new FX()
```
or via script tag
```js
// Pixi 7.3.x
<script src="https://unpkg.com/pixi.js@7.x/dist/pixi.min.js"></script>
<script src="https://unpkg.com/revolt-fx/dist/revoltfx.min.js"></script>
```
```js
// Pixi 8.x
<script src="https://unpkg.com/pixi.js/dist/pixi.min.js"></script>
<script src="https://unpkg.com/revolt-fx/dist/revoltfx.min.js"></script>
```
```js
const fx = new revolt.FX()
```
----
## Usage
### Loading and initializing
There are different ways to load the needed assets:
**Using PIXI Loader** [(Example)](https://github.com/bma73/revolt-fx/blob/master/examples/loadbundle1.html)
```js
//Create a RevoltFX instance
const fx = new revolt.FX(); //loaded via the script tag
//Load the assets using PIXI Assets loader
PIXI.Assets.add({ alias: 'fx_settings', src: 'assets/default-bundle.json' });
PIXI.Assets.add({ alias: 'fx_spritesheet', src: 'assets/revoltfx-spritesheet.json' });
PIXI.Assets.add({ alias: 'example_spritesheet', src: 'assets/rfx-examples.json' });
PIXI.Assets.load(['fx_settings', 'fx_spritesheet', 'example_spritesheet']).then(function (data) {
//Init the bundle
fx.initBundle(data.fx_settings);
app.ticker.add(function () {
//Update the RevoltFX instance
fx.update();
});
});
```
**Using FX.loadBundleFiles** [(Example)](https://github.com/bma73/revolt-fx/blob/master/examples/loadbundle2.html)
```js
//Create a RevoltFX instance
const fx = new revolt.FX(); //loaded via the script tag
const rfxBundleSettings = 'assets/default-bundle.json';
const rfxSpritesheet = 'assets/revoltfx-spritesheet.json';
const additionalAssets = ['assets/rfx-examples.json'];
//Load bundle files and the additional example spritesheet
fx.loadBundleFiles(rfxBundleSettings, rfxSpritesheet, null, additionalAssets).then(function (data) {
app.ticker.add(function () {
//Update the RevoltFX instance
fx.update();
});
}).catch(function (err) {
console.log('Error', err);
});
```
### Particle Emitters
After the system is initialized you can create particle emitters defined in your bundle by using their names:
```js
//Get the emitter
const emitter = fx.getParticleEmitter('plasma-corona');
//Inititialize it with the target PIXI container
emitter.init(displayContainer);
```
You can also change the global scale of an emitter instance
```js
//Get the emitter
const emitter = fx.getParticleEmitter('plasma-corona');
//Inititialize it with the target PIXI container and a scale of 2
emitter.init(displayContainer, true, 2);
```
Pause an emitter
```js
emitter.paused = true;
```
Stop an emitter to be recycled. Pass **true** (default) to the method, if the system shall wait until all particles have died, before recycling.
```js
emitter.stop();
```
Set the x/y position and rotation
```js
emitter.x = 100;
emitter.y = 100;
emitter.rotation = Math.PI;
```
Set a target, so that the emitter will automatically adopt the target's position and rotation
```js
emitter.target = displayObject;
```
Set a target offset, so that the emitter will automatically offset its position
```js
emitter.targetOffet = 50;
```
### Effect Sequences
After the system is initialized you can create effect sequences defined in your bundle by using their names:
```js
//Get the effect sequence
const sequence = fx.getEffectSequence('top-big-explosion');
//Inititialize it with the target PIXI container
sequence.init(displayContainer);
```
Set delay, autostart and scale
```js
//Get the effect sequence
const sequence = fx.getEffectSequence('top-big-explosion');
const delay = 0.5;
const autostart = true;
const scale = 1.5;
sequence.init(displayContainer, delay, autostart, scale);
```
Set the x/y position and rotation
```js
sequence.init = 100;
sequence.init = 100;
sequence.init = Math.PI;
```
### Events
ParticleEmitters, Particles and EffectSequences dispatch signals on different events
#### ParticleEmitter
```js
emitter.on.started.add(emitter => { });
emitter.on.exhausted.add(emitter => { });
emitter.on.completed.add(emitter => { });
emitter.on.particleUpdated.add(particle => { });
emitter.on.particleSpawned.add(particle => { });
emitter.on.particleBounced.add(particle => { });
emitter.on.particleDied.add(particle => { });
```
*Usage* [(Example)](https://github.com/bma73/revolt-fx/blob/master/examples/events-particleemitter.html)
```js
emitter.on.particleSpawned.add(particle => {
console.log('Particle spawned:', particle);
});
emitter.on.completed.addOnce(function(emitter) {
console.log('Done');
});
```
#### Particle
```js
particle.on.bounced(particle => { });
particle.on.updated(particle => { });
particle.on.died(particle => { });
```
*Usage*
```js
emitter.on.particleSpawned.add(particle => {
//Register for an update signal for that particle
particle.on.updated.add(particle => {
//Do something with the particle
if (particle.x > 200 && particle.time >= 0.5) {
particle.stop();
}
});
//Register for a died signal for that particle
particle.on.died.add(particle => {
console.log('Particle', particle, 'died');
});
});
```
#### EffectSequence
```js
sequence.on.started(sequence => { });
sequence.on.exhausted(sequence => { });
sequence.on.completed(sequence => { });
sequence.on.effectSpawned((effectType, effect) => { });
sequence.on.triggerActivated(triggerValue => { });
```
*Usage* [(Example)](https://github.com/bma73/revolt-fx/blob/master/examples/events-particleemitter.html)
```js
sequence.on.effectSpawned.add((type, effect) => {
console.log('Effect spawned:', type, effect);
});
sequence.on.triggerActivated.add(triggerValue => {
console.log('Trigger:', triggerValue);
});
```
#### Update
Call the update method every frame with the ticker's delta value (optional)
```js
app.ticker.add(function (delta) {
//Update the RevoltFX instance
fx.update(delta);
});
```
----
## Bundler
It's important that there is only one Pixi instance in your app. Here are some setup instructions for Webpack, Rollup and Parcel:
#### Webpack
Webpack provides a feature called "aliasing" that you can use to ensure that only one Pixi instance is bundled and used.
Update **webpack.config.js**:
Add an alias for PixiJS in your Webpack configuration file.
```js
const path = require('path');
module.exports = {
// ... other configurations ...
resolve: {
alias: {
'pixi.js': path.resolve(__dirname, 'node_modules/pixi.js')
}
}
};
```
#### Rollup
Install Rollup Alias Plugin:
```sh
npm install @rollup/plugin-alias --save-dev
```
Update your **rollup.config.js** to include the alias configuration.
```js
import alias from '@rollup/plugin-alias';
import path from 'path';
export default {
// ... other configurations ...
plugins: [
// ... other plugins ...
alias({
entries: [
{ find: 'pixi.js', replacement: path.resolve(__dirname, 'node_modules/pixi.js') }
]
})
]
};
```
#### Parcel
Add an alias for PixiJS in your **package.json**.
```js
{
// ... other package.json settings ...
"alias": {
"pixi.js": "./node_modules/pixi.js"
}
}
```
----
## Build
Clone the repository and to compile the Typescript sources and create the distribution version run
```sh
npm install
npm run build
```