@rm3l/plugin-scaffolder-odo-actions
Version:
odo custom actions for Backstage (Backend Plugin)
168 lines (128 loc) • 5.71 kB
Markdown
This is a [Backend Plugin](https://backstage.io/docs/plugins/backend-plugin/) containing a set of [Custom Actions](https://backstage.io/docs/features/software-templates/writing-custom-actions) using the [`odo`](https://odo.dev/) CLI.
It contains the following actions:
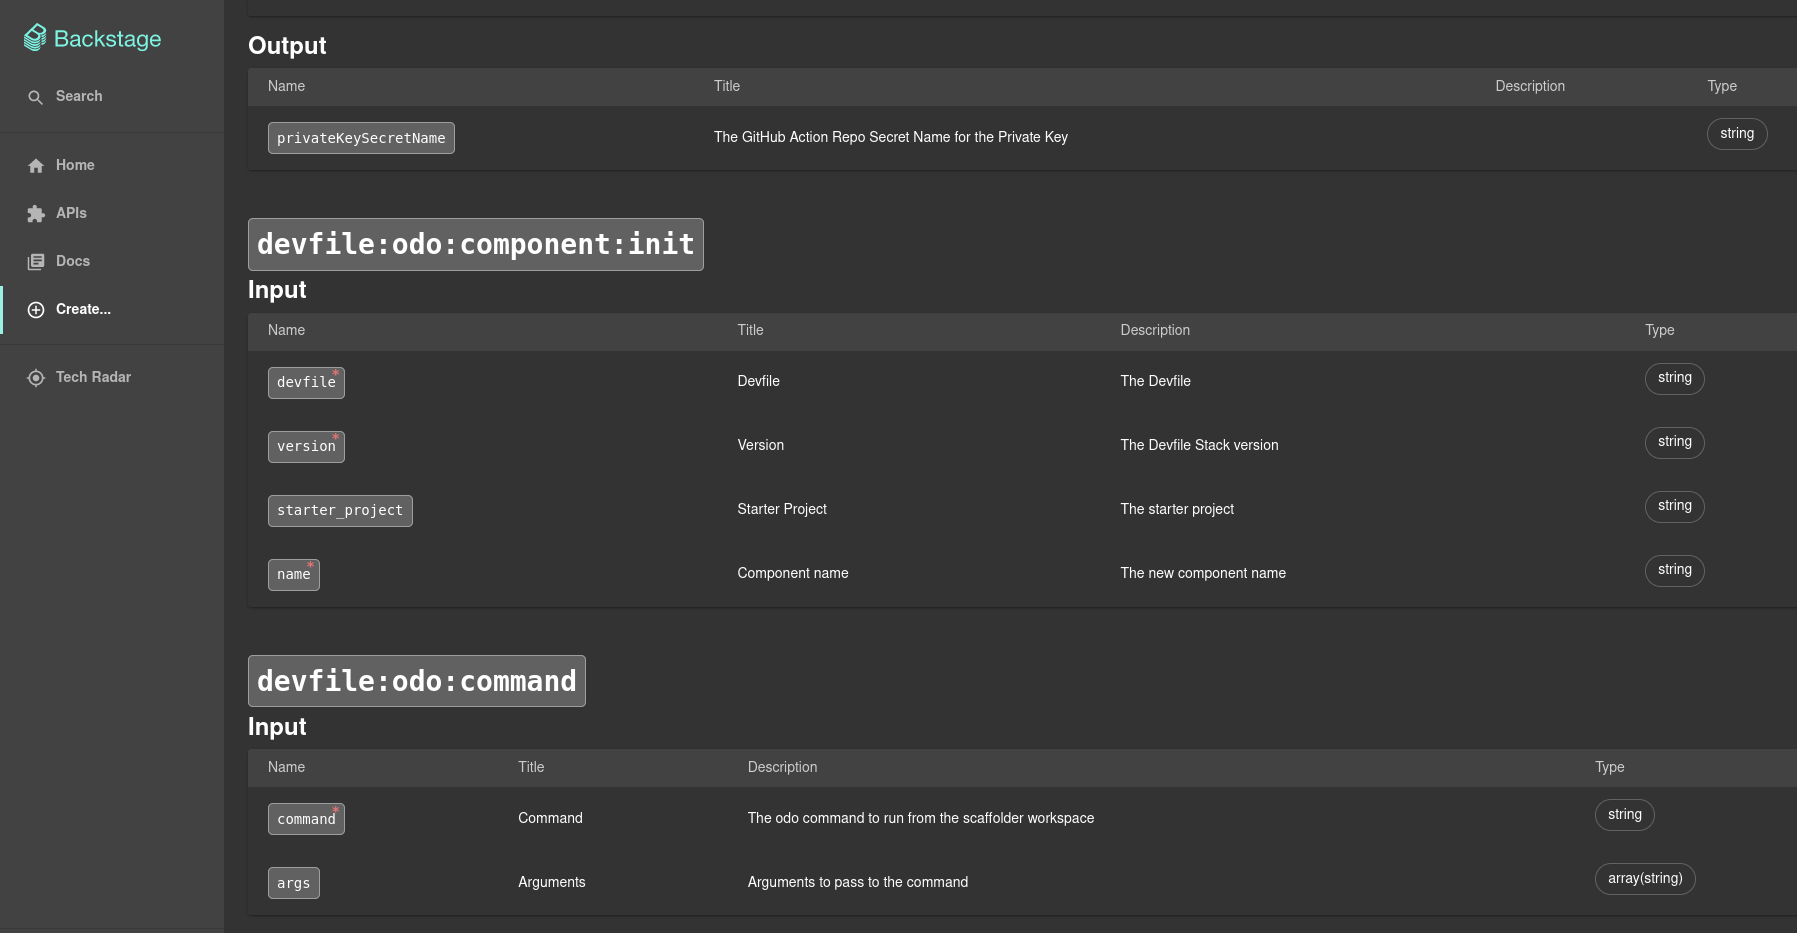
- `devfile:odo:command`: a generic action that can execute any `odo` command from the scaffolder workspace.
- `devfile:odo:component:init`: allows to execute the [`odo init`](https://odo.dev/docs/command-reference/init) command from the scaffolder workspace. The goal of this action is to generate a starter project for a given Devfile that can be customized later on.

From your Backstage instance root folder:
```shell
yarn add --cwd packages/backend @rm3l/plugin-scaffolder-odo-actions
```
This will download the right `odo` binary for the current operating system and architecture from the Red Hat servers at https://developers.redhat.com/content-gateway/rest/mirror/pub/openshift-v4/clients/odo/.
This behavior can be customized by adding a new `"odo"` field in your `packages/backend/package.json` file, like so:
```json
// packages/backend/package.json
{
"odo": {
// specifying the version is optional. You can also specify "latest" to use the latest version of odo
"version": "3.15.0",
"skipDownload": false
}
}
```
Note that the custom actions here do require an `odo` binary to work properly.
So if you choose to skip the download (using the `odo.skipDownload` property above), you need to make sure to meet any of the requirements below:
- either you can explicitly set the path to the `odo` binary in your `app-config.yaml` (see [below](#app-configyaml));
- or `odo` is already [installed](https://odo.dev/docs/overview/installation) and available globally in the system paths of the environment the Backstage instance is running in.
1. Import the actions into your `packages/backend/src/plugins/scaffolder.ts` on the Scaffolder Backend Plugin of your Backstage instance:
```js
// packages/backend/src/plugins/scaffolder.ts
import { createBuiltinActions } from '@backstage/plugin-scaffolder-backend';
import { ScmIntegrations } from '@backstage/integration';
import { odoInitAction, odoAction } from '@rm3l/plugin-scaffolder-odo-actions';
```
2. Then pass the imported actions along with the built-in ones to the `createRouter` function. You should end up with something like this in the end:
```js
// packages/backend/src/plugins/scaffolder.ts
const integrations = ScmIntegrations.fromConfig(env.config);
const builtInActions = createBuiltinActions({
integrations,
catalogClient,
config: env.config,
reader: env.reader,
});
const actions = [
...builtInActions,
odoInitAction(env.config.getOptionalConfig("odo")),
odoAction(env.config.getOptionalConfig("odo")),
];
return await createRouter({
logger: env.logger,
config: env.config,
database: env.database,
reader: env.reader,
catalogClient,
actions,
});
```
Optionally, the behavior of these custom actions can be customized by adding the following section to your `app-config.yaml` file:
```yaml
odo:
telemetry:
disabled: false
devfileRegistry:
url: 'https://registry.devfile.io'
```
You should now see the custom `devfile:odo:*` actions if you navigate to the Actions page at http://localhost:3000/create/actions.
You can use the action in any of the steps of your Software Template.
This action can be used in conjunction with the [devfile-field-extension](../devfile-field-extension) Custom Field Extension to get the Devfile input data from the end-user, e.g.:
```yaml
spec:
parameters:
- title: Provide details about the Devfile
required:
- devfile_data
properties:
devfile_data:
type: object
required:
- devfile
- version
properties:
devfile:
type: string
version:
type: string
starter_project:
type: string
ui:field: DevfileSelectorExtension
steps:
- id: odo-init
name: Generate
action: devfile:odo:component:init
input:
name: ${{ parameters.name }}
devfile: ${{ parameters.devfile_data.devfile }}
version: ${{ parameters.devfile_data.version }}
starter_project: ${{ parameters.devfile_data.starter_project }}
```
```yaml
spec:
steps:
- id: generic-odo-command
name: Execute odo command
action: devfile:odo:command
input:
command: ${{ parameters.command }}
args: ${{ parameters.args }}
```