@microsoft/m365agentstoolkit-cli
Version:
Microsoft 365 Agents Toolkit CLI
435 lines (347 loc) • 19 kB
Markdown
# Enable single sign-on for bot applications
> Note: This document includes single sign-on instructions applicable for both bot and message extension. Make sure to add the corresponding Teams capability first and then follow the documentation.
Microsoft Teams lets your app obtain the signed-in Teams user token to access Microsoft Graph and other APIs. Microsoft 365 Agents Toolkit simplifies this by wrapping Microsoft Entra ID flows in easy-to-use APIs, making it simple to add SSO features to your Microsoft Teams App.
For a bot application, user can invoke the Microsoft Entra consent flow to obtain sso token to call Graph and other APIs.
<h2>Contents </h2>
- [Changes to your project](#1)
- [Update code to Use SSO for Bot](#2)
- [Set up the Microsoft Entra redirects](#2.1)
- [Update your business logic](#2.2)
- [(Optional) Add a new sso command to the bot](#2.3)
- [Update code to Use SSO for Message Extension](#3)
- [Debug your application](#4)
- [Customize Microsoft Entra applications](#5)
- [Trouble Shooting](#6)
<h2 id='1'>Changes to your project</h2>
After adding the SSO feature to your app, Microsoft 365 Agents Toolkit updates your project to support SSO.
After adding SSO into your project, Microsoft 365 Agents Toolkit will create and modify some files that help you implement SSO feature.
| Action | File | Description |
| ------ | ---------------------------------------------------------------------------------------------------------------- | -------------------------------------------------------------------------------------------------------------------------------------- |
| Modify | `azureWebAppBotConfig.bicep` under `templates/azure/teamsFx` and `azure.parameters.dev.json` under `.fx/configs` | Insert environment variables used for bot web app to enable SSO feature |
| Modify | `manifest.template.json` under `templates/appPackage` | An `webApplicationInfo` object will be added into your app manifest template. This field is required by Teams when enabling SSO. |
| Modify | `projectSettings.json` under `.fx/configs` | Add bot sso capability, which will be used internally by Microsoft 365 Agents Toolkit. |
| Create | `aad.template.json` under `templates/appPackage` | The Microsoft Entra application manifest that is used to register the application with Microsoft Entra. |
| Create | `auth/bot` | Reference code, redirect pages and a `README.md` file. These files are provided for reference. See below for more information. |
<h2 id='2'>Update your code to Use SSO for Bot</h2>
The Microsoft 365 Agents Toolkit has configured your app for SSO, but you'll need to update your business logic to fully utilize this feature.
> Note: The following part is for `command and response bot`. For `basic bot`, please refer to the [bot-sso sample](https://aka.ms/bot-sso-sample).
<h3 id='2.1'>Set up the Microsoft Entra redirects</h3>
1. Move the `auth/bot/public` folder to `bot/src`. This folder contains HTML pages that the bot application hosts. When single sign-on flows are initiated with Microsoft Entra, Microsoft Entra will redirect the user to these pages.
1. Modify your `bot/src/index` to add the appropriate `express` routes to these pages.
```ts
const path = require("path");
const send = require("send");
expressApp.get(["/auth-start.html", "/auth-end.html"], async (req, res) => {
send(
req,
path.join(
__dirname,
"public",
req.url.includes("auth-start.html") ? "auth-start.html" : "auth-end.html"
)
).pipe(res);
});
```
<h3 id='2.2'>Update your business logic</h3>
The sample business logic provides a sso command handler `ProfileSsoCommandHandler` that use a Microsoft Entra token to call Microsoft Graph. This token is obtained by using the logged-in Teams user token. The flow is brought together in a dialog that will display a consent dialog if required.
To make this work in your application:
1. Move `profileSsoCommandHandler` file under `auth/bot/sso` folder to `bot/src`. ProfileSsoCommandHandler class is a sso command handler to get user info with SSO token. You can follow this method and create your own sso command handler.
1. Open `package.json` file, make sure that teamsfx SDK version >= 2.2.0
1. Execute the following commands under `bot` folder: `npm install isomorphic-fetch --save`
1. (For ts only) Execute the following commands under `bot` folder: `npm install copyfiles --save-dev` and replace following line in package.json:
```json
"build": "tsc --build && shx cp -r ./src/adaptiveCards ./lib/src",
```
with:
```json
"build": "tsc --build && shx cp -r ./src/adaptiveCards ./lib/src && copyfiles src/public/*.html lib/",
```
By doing this, the HTML pages used for auth redirect will be copied when building this bot project.
1. After adding the following files, you need to update `bot/src/index` file.
Please replace the following code to make sso consent flow works:
```ts
server.post("/api/messages", async (req, res) => {
await commandBot.requestHandler(req, res);
});
```
with:
```ts
server.post("/api/messages", async (req, res) => {
await commandBot.requestHandler(req, res).catch((err) => {
// Error message including "412" means it is waiting for user's consent, which is a normal process of SSO, sholdn't throw this error.
if (!err.message.includes("412")) {
throw err;
}
});
});
```
1. Replace the options for `ConversationBot` instance in `bot/src/internal/initialize` to add the sso config and sso command handler:
```ts
export const commandBot = new ConversationBot({
...
command: {
enabled: true,
commands: [new HelloWorldCommandHandler()],
},
});
```
with:
```ts
import { ProfileSsoCommandHandler } from "../profileSsoCommandHandler";
export const commandBot = new ConversationBot({
...
// To learn more about ssoConfig, please refer teamsfx sdk document: https://docs.microsoft.com/microsoftteams/platform/toolkit/teamsfx-sdk
ssoConfig: {
aad :{
scopes:["User.Read"],
},
},
command: {
enabled: true,
commands: [new HelloWorldCommandHandler() ],
ssoCommands: [new ProfileSsoCommandHandler()],
},
});
```
1. Register your command in the app manifest. Open `templates/appPackage/manifest.template.json`, and add following lines under `commands` in `commandLists` of your bot:
```json
{
"title": "profile",
"description": "Show user profile using Single Sign On feature"
}
```
<h3 id='2.3'>(Optional) Add a new sso command to the bot</h3>
After successfully add SSO in your project, you can also add a new sso command.
1. Create a new file (e.g. `photoSsoCommandHandler.ts` or `photoSsoCommandHandler.js`) under `bot/src/` and add your own business logic to call Graph API:
```TypeScript
// for TypeScript:
import { Activity, TurnContext, ActivityTypes } from "botbuilder";
import "isomorphic-fetch";
import {
CommandMessage,
TriggerPatterns,
TeamsFxBotSsoCommandHandler,
TeamsBotSsoPromptTokenResponse,
OnBehalfOfUserCredential,
OnBehalfOfCredentialAuthConfig,
} from "@microsoft/teamsfx";
import { Client } from "@microsoft/microsoft-graph-client";
import { TokenCredentialAuthenticationProvider } from "@microsoft/microsoft-graph-client/authProviders/azureTokenCredentials";
const oboAuthConfig: OnBehalfOfCredentialAuthConfig = {
authorityHost: process.env.M365_AUTHORITY_HOST,
clientId: process.env.M365_CLIENT_ID,
tenantId: process.env.M365_TENANT_ID,
clientSecret: process.env.M365_CLIENT_SECRET,
};
export class PhotoSsoCommandHandler implements TeamsFxBotSsoCommandHandler {
triggerPatterns: TriggerPatterns = "photo";
async handleCommandReceived(
context: TurnContext,
message: CommandMessage,
tokenResponse: TeamsBotSsoPromptTokenResponse,
): Promise<string | Partial<Activity> | void> {
await context.sendActivity("Retrieving user information from Microsoft Graph ...");
// Init OnBehalfOfUserCredential instance with SSO token
const oboCredential = new OnBehalfOfUserCredential(tokenResponse.ssoToken, oboAuthConfig);
// Create an instance of the TokenCredentialAuthenticationProvider by passing the tokenCredential instance and options to the constructor
const authProvider = new TokenCredentialAuthenticationProvider(oboCredential, {
scopes: ["User.Read"],
});
// Initialize Graph client instance with authProvider
const graphClient = Client.initWithMiddleware({
authProvider: authProvider,
});
let photoUrl = "";
try {
const photo = await graphClient.api("/me/photo/$value").get();
const arrayBuffer = await photo.arrayBuffer();
const buffer=Buffer.from(arrayBuffer, 'binary');
photoUrl = "data:image/png;base64," + buffer.toString("base64");
} catch {
// Could not fetch photo from user's profile, return empty string as placeholder.
}
if (photoUrl) {
const photoMessage: Partial<Activity> = {
type: ActivityTypes.Message,
text: 'This is your photo:',
attachments: [
{
name: 'photo.png',
contentType: 'image/png',
contentUrl: photoUrl
}
]
};
return photoMessage;
} else {
return "Could not retrieve your photo from Microsoft Graph. Please make sure you have uploaded your photo.";
}
}
}
```
```javascript
// for JavaScript:
const { ActivityTypes } = require("botbuilder");
require("isomorphic-fetch");
const { OnBehalfOfUserCredential } = require("@microsoft/teamsfx");
const { Client } = require("@microsoft/microsoft-graph-client");
const {
TokenCredentialAuthenticationProvider,
} = require("@microsoft/microsoft-graph-client/authProviders/azureTokenCredentials");
const oboAuthConfig = {
authorityHost: process.env.M365_AUTHORITY_HOST,
clientId: process.env.M365_CLIENT_ID,
tenantId: process.env.M365_TENANT_ID,
clientSecret: process.env.M365_CLIENT_SECRET,
};
class PhotoSsoCommandHandler {
triggerPatterns = "photo";
async handleCommandReceived(context, message, tokenResponse) {
await context.sendActivity("Retrieving user information from Microsoft Graph ...");
// Init OnBehalfOfUserCredential instance with SSO token
const oboCredential = new OnBehalfOfUserCredential(tokenResponse.ssoToken, oboAuthConfig);
// Create an instance of the TokenCredentialAuthenticationProvider by passing the tokenCredential instance and options to the constructor
const authProvider = new TokenCredentialAuthenticationProvider(credential, {
scopes: ["User.Read"],
});
// Initialize Graph client instance with authProvider
const graphClient = Client.initWithMiddleware({
authProvider: authProvider,
});
let photoUrl = "";
try {
const photo = await graphClient.api("/me/photo/$value").get();
const arrayBuffer = await photo.arrayBuffer();
const buffer = Buffer.from(arrayBuffer, "binary");
photoUrl = "data:image/png;base64," + buffer.toString("base64");
} catch {
// Could not fetch photo from user's profile, return empty string as placeholder.
}
if (photoUrl) {
const photoMessage = {
type: ActivityTypes.Message,
text: "This is your photo:",
attachments: [
{
name: "photo.png",
contentType: "image/png",
contentUrl: photoUrl,
},
],
};
return photoMessage;
} else {
return "Could not retrieve your photo from Microsoft Graph. Please make sure you have uploaded your photo.";
}
}
}
module.exports = {
PhotoSsoCommandHandler,
};
```
1. Put `PhotoSsoCommandHandler` instance to `ssoCommands` array in `bot/src/internal/initialize.ts` as below:
```ts
// for TypeScript:
import { PhotoSsoCommandHandler } from "../photoSsoCommandHandler";
export const commandBot = new ConversationBot({
...
command: {
...
ssoCommands: [new ProfileSsoCommandHandler(), new PhotoSsoCommandHandler()],
},
});
```
```javascript
// for JavaScript:
...
const { PhotoSsoCommandHandler } = require("../photoSsoCommandHandler");
const commandBot = new ConversationBot({
...
command: {
...
ssoCommands: [new ProfileSsoCommandHandler(), new PhotoSsoCommandHandler()]
},
});
...
```
1. Register your command in the app manifest. Open 'templates/appPackage/manifest.template.json', and add following lines under `commands` in `commandLists` of your bot:
```json
{
"title": "photo",
"description": "Show user photo using Single Sign On feature"
}
```
<h2 id='3'>Update your business logic for Message Extension</h2>
The sample business logic provides a handler `TeamsBot` extends TeamsActivityHandler and override `handleTeamsMessagingExtensionQuery`.
You can update the query logic in the `handleMessageExtensionQueryWithSSO` with token which is obtained by using the logged-in Teams user token.
To make this work in your application:
1. Move the `auth/bot/public` folder to `bot`. This folder contains HTML pages that the bot application hosts. When single sign-on flows are initiated with Microsoft Entra, Microsoft Entra will redirect the user to these pages.
1. Modify your `bot/index` to add the appropriate `express` routes to these pages.
```ts
const path = require("path");
const send = require("send");
// Listen for incoming requests.
expressApp.post("/api/messages", async (req, res) => {
await adapter
.process(req, res, async (context) => {
await bot.run(context);
})
.catch((err) => {
// Error message including "412" means it is waiting for user's consent, which is a normal process of SSO, sholdn't throw this error.
if (!err.message.includes("412")) {
throw err;
}
});
});
expressApp.get(["/auth-start.html", "/auth-end.html"], async (req, res) => {
send(
req,
path.join(
__dirname,
"public",
req.url.includes("auth-start.html") ? "auth-start.html" : "auth-end.html"
)
).pipe(res);
});
```
1. Override `handleTeamsMessagingExtensionQuery` interface under `bot/teamsBot`. You can follow the sample code in the `handleMessageExtensionQueryWithSSO` to do your own query logic.
1. Open `bot/package.json`, ensure that `@microsoft/teamsfx` version >= 2.2.0
1. Install `isomorphic-fetch` npm packages in your bot project.
1. (For ts only) Install `copyfiles` npm packages in your bot project, add or update the `build` script in `bot/package.json` as following
```json
"build": "tsc --build && copyfiles ./public/*.html lib/",
```
By doing this, the HTML pages used for auth redirect will be copied when building this bot project.
1. Update `templates/appPackage/aad.template.json` your scopes which used in `handleMessageExtensionQueryWithSSO`.
```json
"requiredResourceAccess": [
{
"resourceAppId": "Microsoft Graph",
"resourceAccess": [
{
"id": "User.Read",
"type": "Scope"
}
]
}
]
```
<h2 id='4'>Debug your application </h2>
You can debug your application by pressing F5.
Microsoft 365 Agents Toolkit will use the Microsoft Entra manifest file to register a Microsoft Entra application registered for SSO.
To learn more about Microsoft 365 Agents Toolkit local debug functionalities, refer to this [document](https://docs.microsoft.com/microsoftteams/platform/toolkit/debug-local).
<h2 id='5'>Customize Microsoft Entra applications</h2>
The Microsoft Entra [manifest](https://docs.microsoft.com/azure/active-directory/develop/reference-app-manifest) allows you to customize various aspects of your application registration. You can update the manifest as needed.
Follow this [document](https://aka.ms/teamsfx-aad-manifest#customize-aad-manifest-template) if you need to include additional API permissions to access your desired APIs.
Follow this [document](https://aka.ms/teamsfx-aad-manifest#How-to-view-the-AAD-app-on-the-Azure-portal) to view your Microsoft Entra application in Azure Portal.
<h2 id='6'>Trouble Shooting </h2>
<h3>Login page does not pop up after clicking `continue`</h3>
First check whether your auth-start page is available by directly go to "{your-bot-endpoint}/auth-start.html" in your browser. You can find your-bot-endpoint in `.fx/states/state.{env}.json`.
- If the auth-start page can be opened in your browser, please try sign out current account in the app page and sign in again and run the command again.
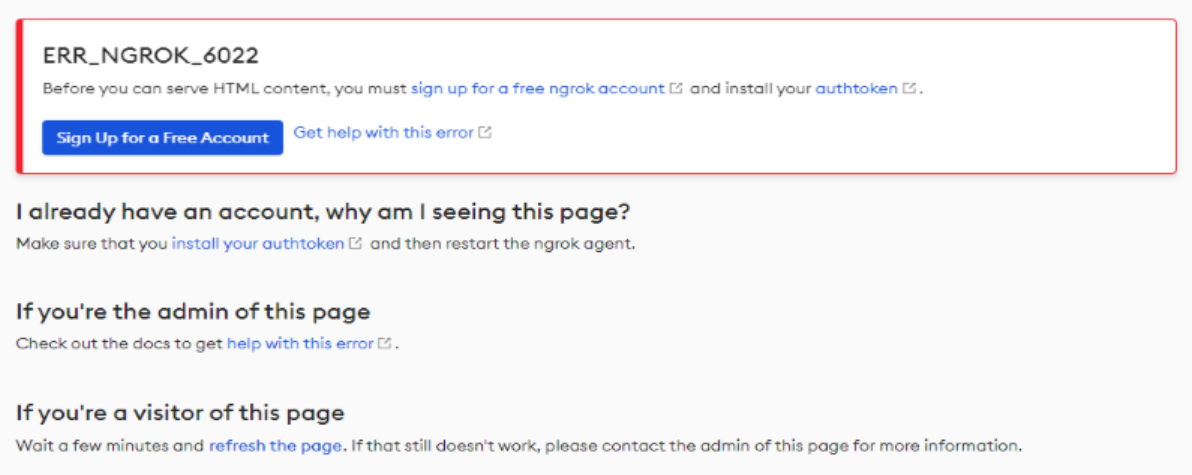
- If encounter with ngrok page below when local debug, please follow the steps to solve this issue.
1. Stop debugging in Visual Studio Code.
1. Sign up an ngrok account in https://dashboard.ngrok.com/signup.
1. Copy your personal ngrok authtoken from https://dashboard.ngrok.com/get-started/your-authtoken.
1. Run `npx ngrok authtoken <your-personal-ngrok-authtoken>` in Visual Studio Code terminal.
1. Start debugging the project again by hitting the F5 key in Visual Studio Code.