@karpojs/vue-neditor-wrap
Version:
Vue + NEditor + v-model双向绑定
59 lines (46 loc) • 1.74 kB
Markdown
# vue-neditor-wrap
## Installation
```bash
$ npm i vue-neditor-wrap
```
## Quick Start
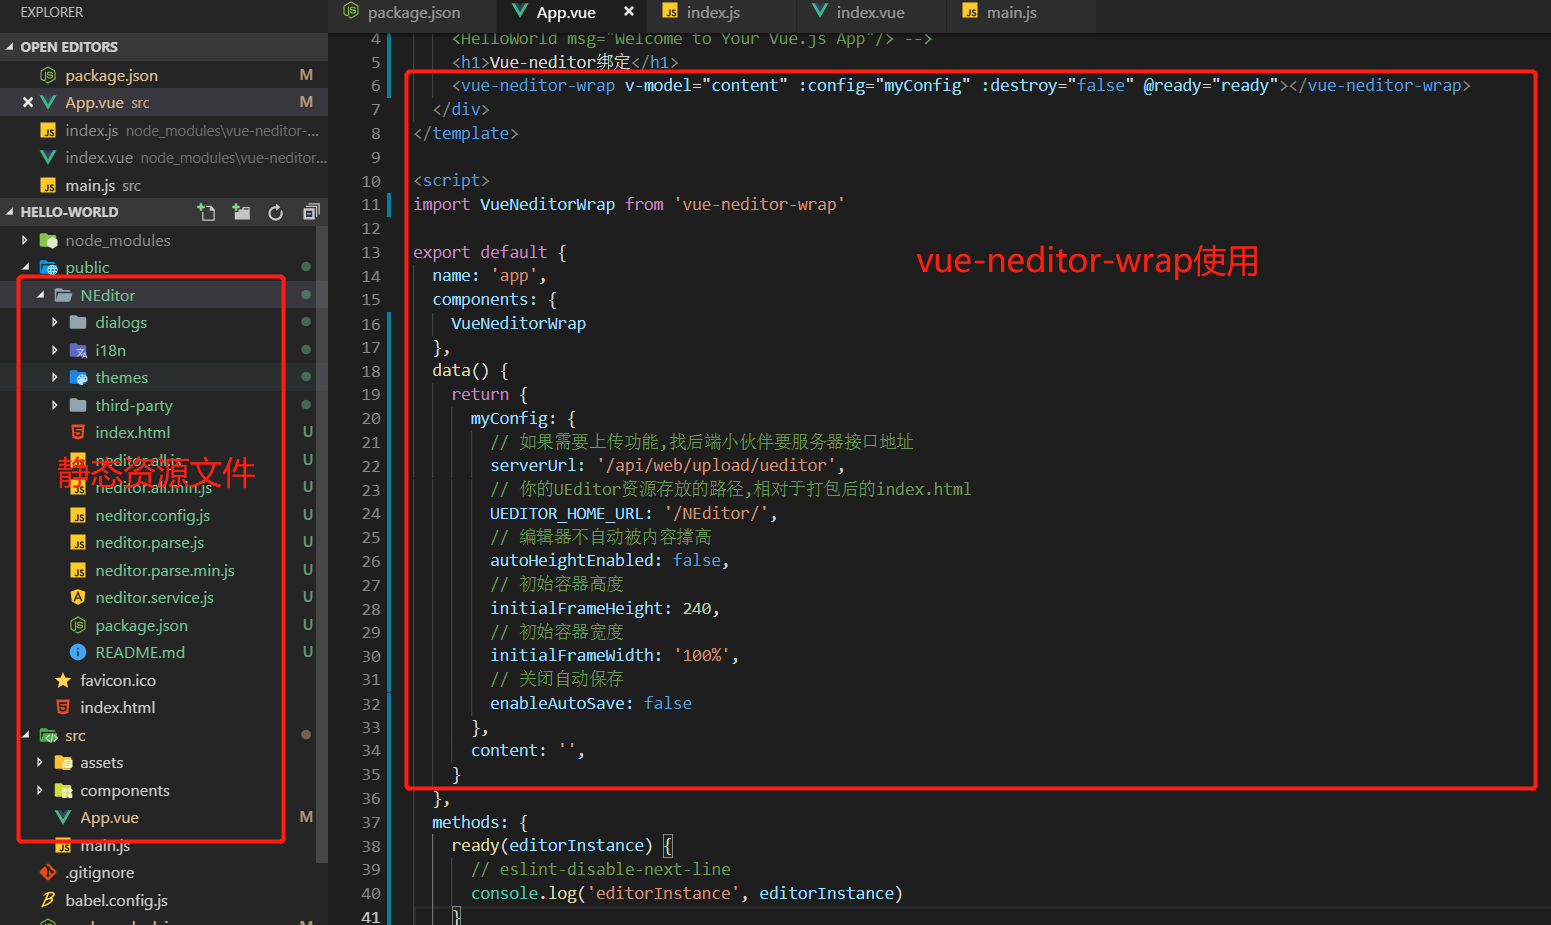
1. 下载[官方资源文件](https://www.notadd.com/download/neditor/Neditor-next-master.tar.xz)
> 下载完成后放在本地public下,命名为NEditor的文件夹下
2. 引入`VueNeditorWrap`组件
`import VueNeditorWrap from 'vue-neditor-wrap'`
3. 注册组件
```js
components: {
VueNeditorWrap
},
```
4. `v-model`绑定数据
```html
<vue-neditor-wrap v-model="content" :config="myConfig" :destroy="false" @ready="ready"></vue-neditor-wrap>
```
```js
data () {
return {
myConfig: {
// 如果需要上传功能,找后端小伙伴要服务器接口地址
serverUrl: '/api/web/upload/ueditor',
// 你的UEditor资源存放的路径,相对于打包后的index.html
UEDITOR_HOME_URL: '/NEditor/',
// 编辑器不自动被内容撑高
autoHeightEnabled: false,
// 初始容器高度
initialFrameHeight: 240,
// 初始容器宽度
initialFrameWidth: '100%',
// 关闭自动保存
enableAutoSave: false
},
content: '',
}
}
```
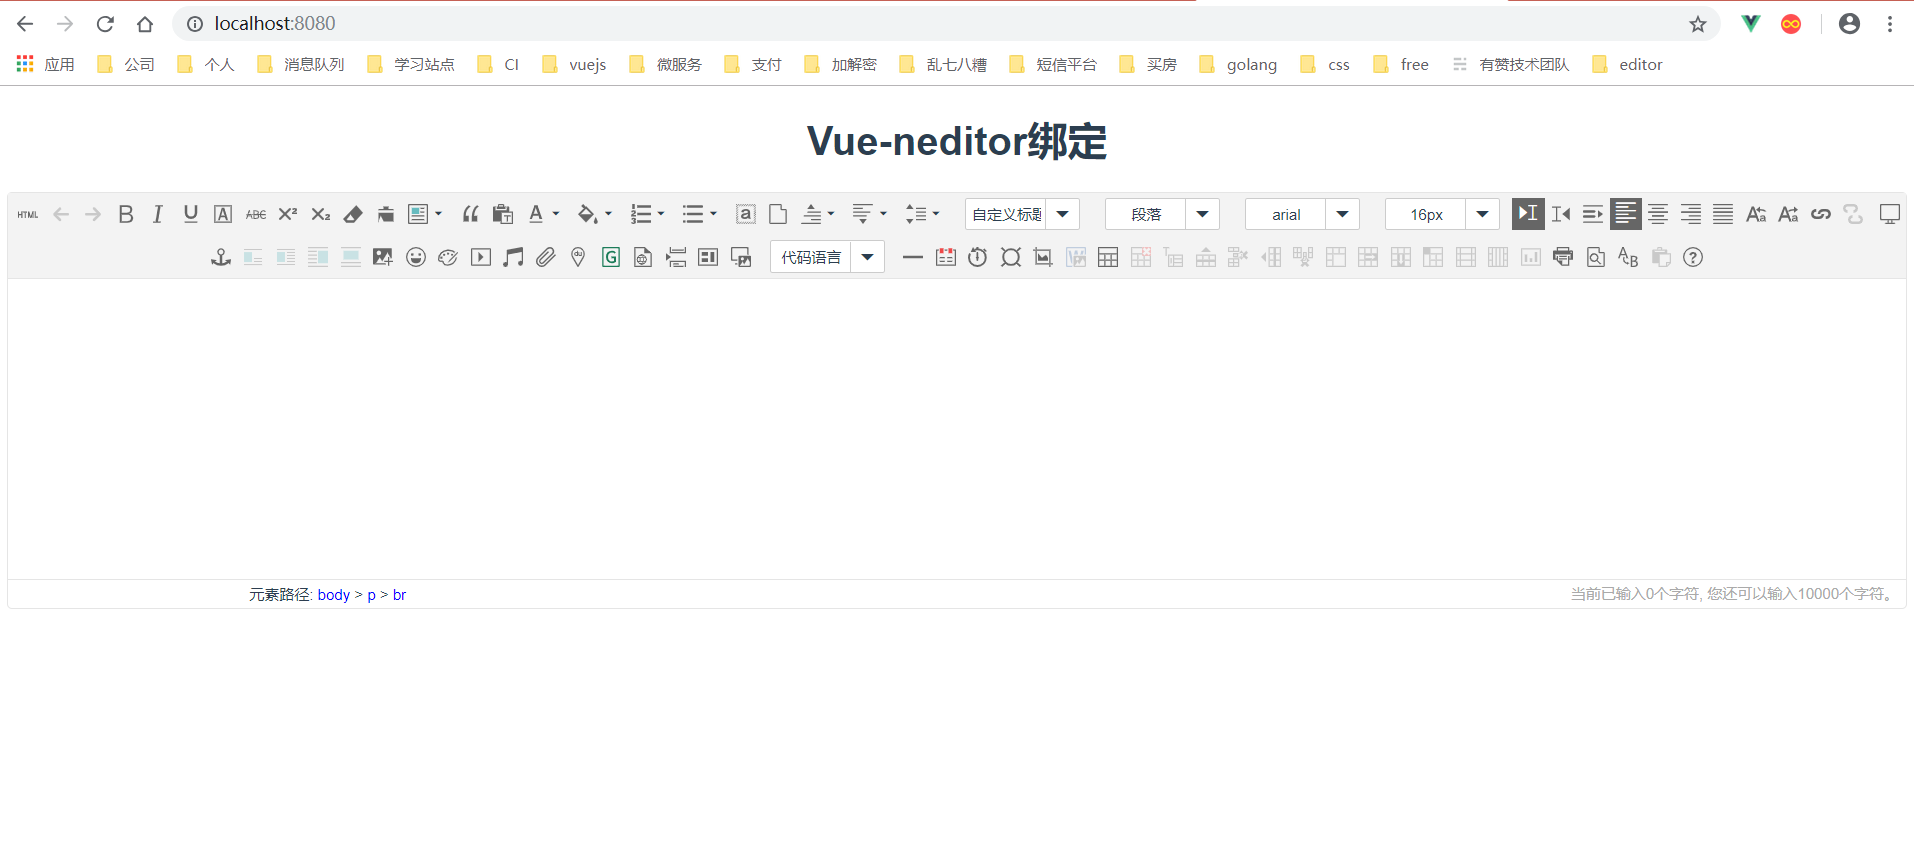
> 至此你已经可以在页面中看到一个初始化之后的`NEditor`了,并且它已经成功和数据绑定了!
## License
[MIT](http://opensource.org/licenses/MIT)